Knockdown free standing shelf
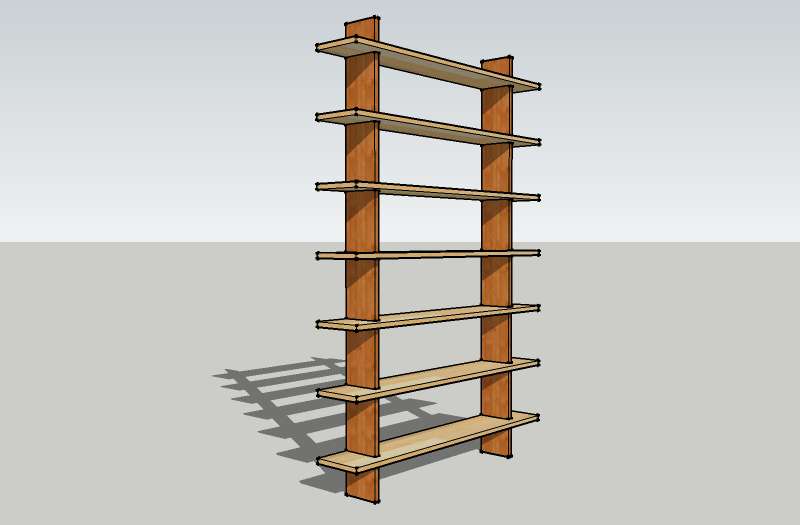
This simple furniture project is an adaptable way to built free standing shelves, that can be easily transported as flat planks, and assembled and disassembled at will.
Materials
There are only two components used here: uprights and shelves. You can use as many shelves as you require, and you will need at least two uprights, although larger spans can me accommodated with additional uprights. The timber for the uprights ought to be at least 3/4" or 19mm thick. Shelves can be the same or thinner if the load anticipated is not too high. The shelves should ideally be a little deeper than the uprights, however the amount is not important, and this can be selected for aesthetic appeal.
Construction
Construction basically requires cutting rebates. These can be done with a router or a stacked dado set in a radial arm saw or on a table saw.
Uprights
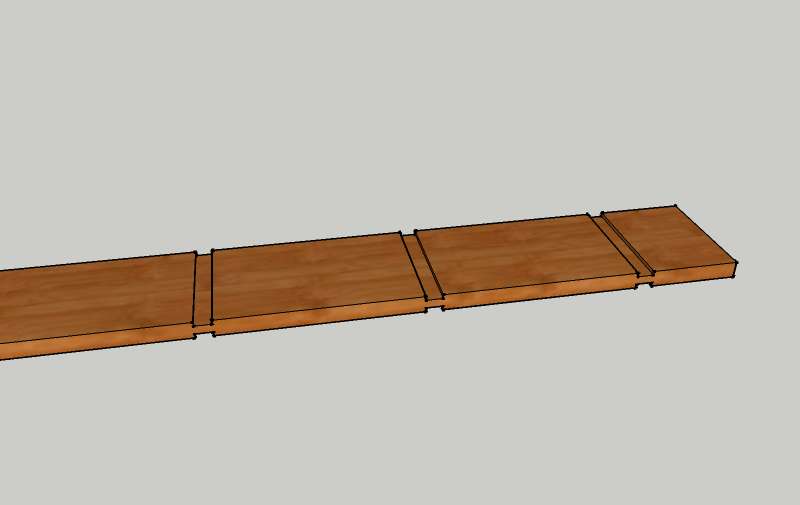
There are two stages to making the uprights, the first is to cut the shelf rebates:
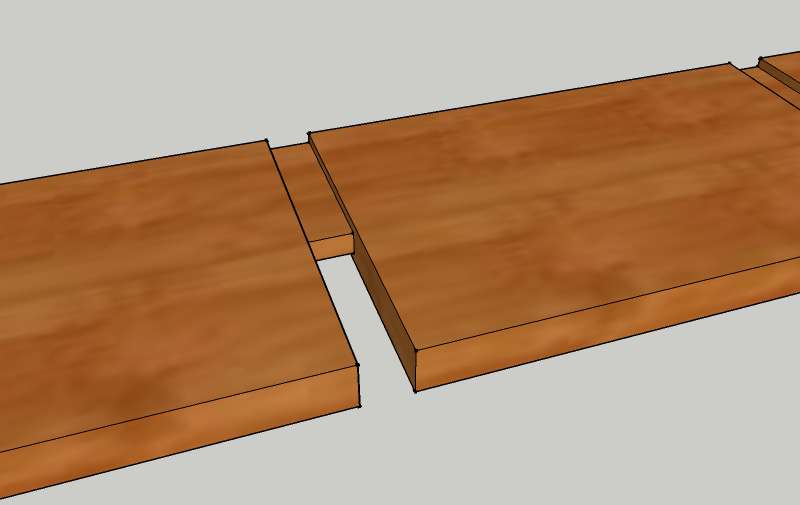
These need to be approx 5mm deep, and an exact match for the shelf thickness to give a nice snug fit. Once one side is completed, flip the upright over and cut matching rebates on the other side.
The second stage is to cut away the front half of the remaining web of each rebate, this can be done using the router at the same time that the main rebates are cut if you like, or can be done later with a jigsaw etc.
Shelves
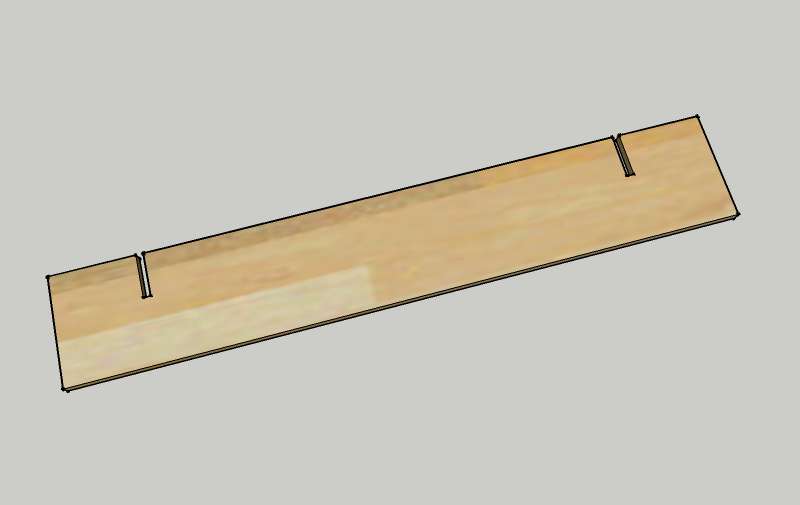
The shelves are simpler to do. These simply require a through notch cut into the back of the shelf. The notch needs to be to a depth just over half the thickness of the upright (i.e. not half the shelf), and the width needs to be enough to clear the web of the upright between the two rebates (the notches are narrower than the full upright thickness - so that the shelf is supported along most of its depth by the rebate in the upright.
So in the example here, 12mm or 1/2" would be fine (it can be a little wider - the edges of the notch are covered by the rebates in the upright anyway)
Assembly
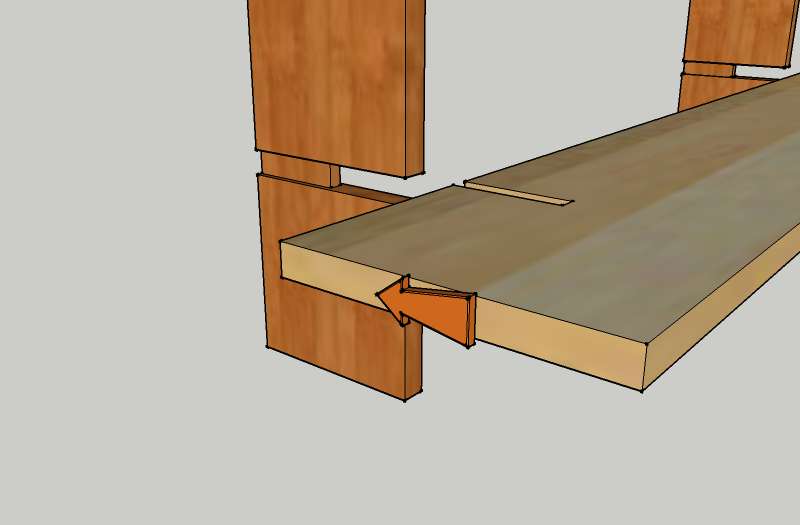
Its easier to assemble the shelves laying on their back, although they can be built in place. Layout the uprights, and then slide each shelf into place:
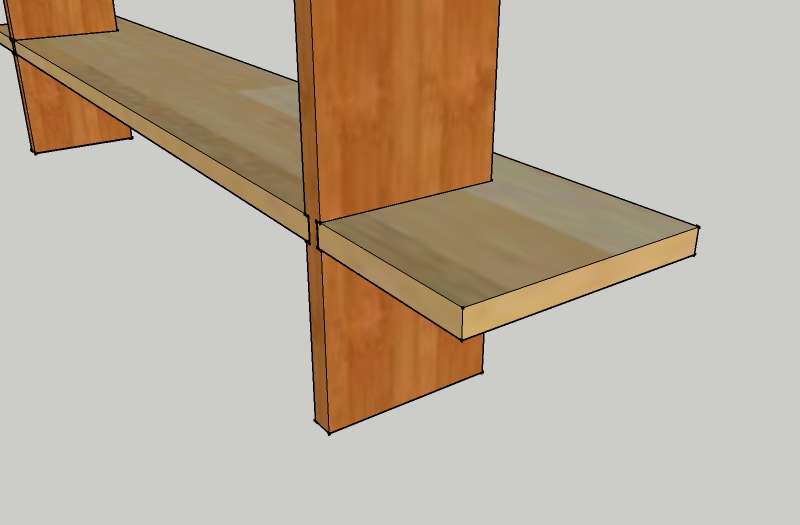
Each shelf is simply slid back to be flush with the back of each upright:
Fine Tuning
There are a number of tweaks that you can make to the basic design to change the appearance. The leading edges of the shelves and uprights can be chamfered, rounded over or otherwise "broken" or detailed.
Spacing / size
Shelf spacing can vary - larger gaps at the bottom for taller bookes etc. Shelf depth can also vary - wither with consistent width uprights, or tapering uprights.
Some protruding shelf is required on the outside of each upright, however this can be reduced down to a stub if preferred.
Additional uprights can be used to make natural dividers / bookends between shelf compartments.
Stability
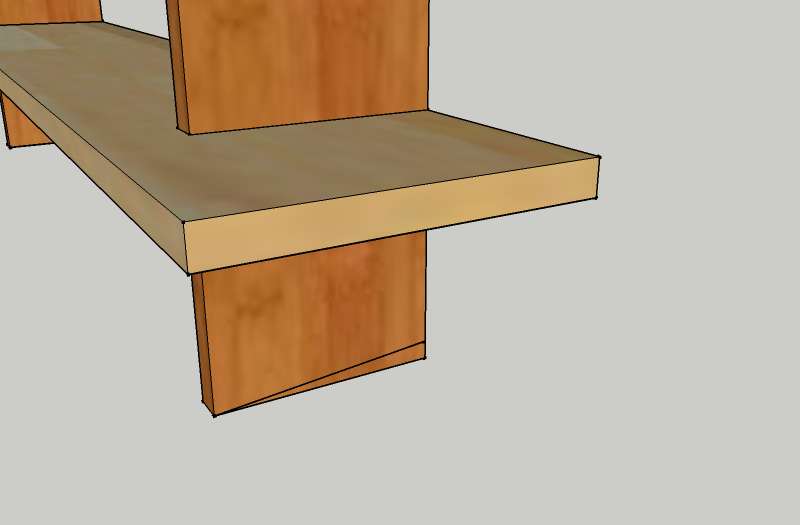
The shelves will free stand, although work best against a wall. To improve stability on soft surfaces like carpet, you can cut a slight angle on the base of the uprights, that will tend to make them tip "backwards", as per the line shown below:
This will make a set of shelves that naturally "lean" against the wall behind them. It also ensures that the more heavily they are loaded, the more the push against the wall. However you can still use a fixing to the wall at the top if required.
