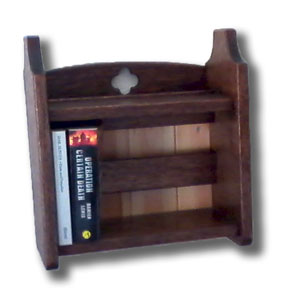
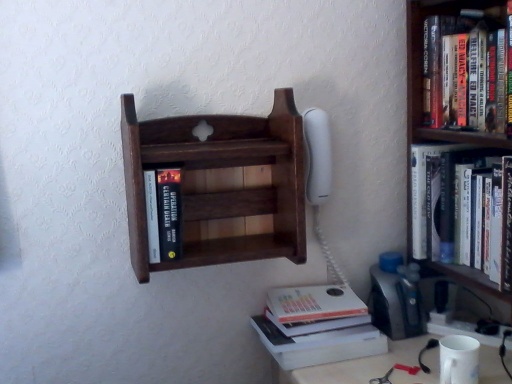
Mini bookcase
Here is a furniture project that sprang from my lack of elbows... I have two, like most folks, and there is the problem. When laying in bed reading a book or similar, it would be nice to be able to reach out to grab my coffee cup. Alas, the bed side table is about level with my head, and a similar height to the bed - this makes picking things up from it in this position difficult without the aforementioned extra elbow.
So a bit of lateral thinking suggested a shelf on the adjacent wall, a little further down at arms reach. Then the thought that extra bookshelf space might be nice, and a quick glance at the pile of magazines on the floor suggested doing something to hold those would also be handy. Hence this project for a mini shelf, bookcase, magazine rack, and coffee cup holder!
Introduction
This was to be a quick and easy project, and since it was going to be fixed right beside one of these bookcases, that also led to most of the design and styling guidelines being already settled. Joinery is very basic, and construction should only take a few hours.
Design
The basic styling was going to be based on the Small bookcase project but somewhat scaled down. However we also needed a change to accommodate some magazine storage space.
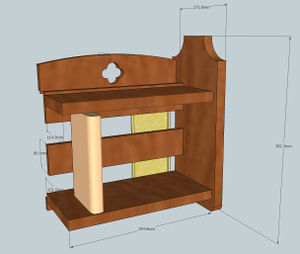
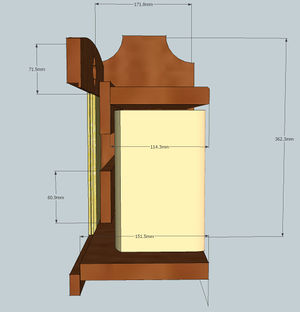
First the plan was scalled down to a shelf width adequate for small paperbacks. The depth was then increased to allow approximately an extra inch thickness of magazines to be stored when slid into a slot behind the shelves. Thin slats of wood were added toward the back of the unit to separate the book and magazine space.
The Final tweak required was to use one of the slats to add a slight lip to the back of the top shelf. This would stop things placed ont he top shelf from being able to roll and fall down the back of the shelf.
The back of the unit is simply filled in with some T&G panels, set into a rebate.
Materials
A generic sapele style hardwood was used for most of the construction (about 6' of a 9" x 3/4" board), and about 3' of 4" pine T&G planking.
Construction
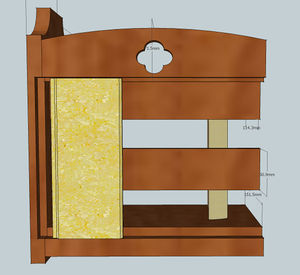
The first job was cutting the main components to size (click the thumbnails of the illustrations above for approximate dimensions)
Top Rail
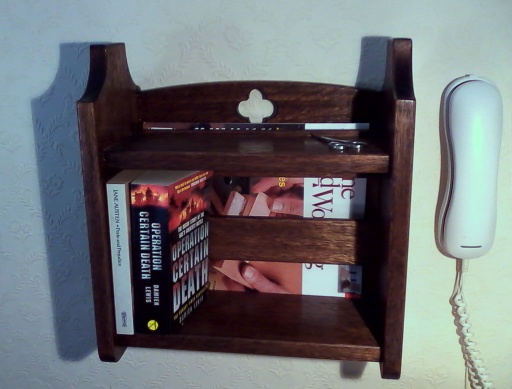
The top rail was marked with a flexicurve and then cut using a bandsaw, before a final sanding to the finished curve. The quarterfoil patten was made using a 20mm auger bit. To save explosive breakout on the back of the hole, I drilled the holes in a drill press with a lump of MDF acting as a backing block. I also pre-drilled the centre point of each hole with a 5mm bit first, so as to prevent the worm screw on the auger bit pulling it through the wood.
Sides
The scallop in the top was made using the same jig and a holesaw as described in the Small bookcase project. The bottom radius was simply traced round a template, the corner cut off, and then the rest sanded to the line.
Profiling
A quarter inch roundover bit was used to profile the edges, and then each of the components were sanded (80, 120, and then 180 grit).
Joinery
The top magazine separator was glued and brad nailed to the back of the top shelf. The bottom rail fixed to the back of the bottom shelf. Biscuit slots were cut into the sides,shelf ends, and top rail to locate those (same technique as the Small bookcase - but no screws were needed on the smaller cabinet - glue and claps did all the work).
Back
Once the main frame was assembled, the rebate for the back could be routed into the sides and the bottom of the top rail. (the bottom rebate is formed by the offset joint between bottom shelf and bottom rail).
The back was assembled from some 1/2" T&G panelling.
Finishing
The colour was achieved with a Jacobean Dark Oak stain, followed by a wipe over with a mahogany varnish (it was supposed to be quick drying, but a later inspection of the tin when it was still tacky after several hours revealed I had picked up the wrong one from the shelf and used a polyurethane varnish instead!) The pine T&G was just given a coat of boiled linseed oil to give it a slightly more golden hue.
Use
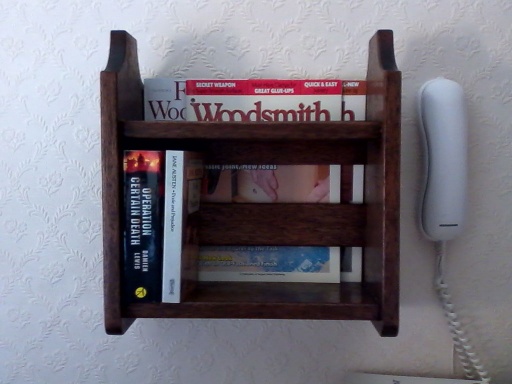
The shelf spacing was set to accommodate the smallest paperbacks only (partly to stop it filling up too fast!) You may want to add an extra half inch to the height for the next common size of book up.
The magazine section can either take a mag horizontally
or vertically
In this design there is room for five or six mags depending on thickness.
