Router inlay jig
Introduction
A passing discussion in uk.d-i-y touched on using a jig with a router for making inlays, to allow new wood to be set into the surface of a door which suffered damage following the removal of a lock. While a painted door could be filled and sanded prior to repainting, this is not possible for a hardwood door with a translucent finish. Here it would be nice to inset a piece of new wood with a close grain and colour match.
There are commercial router jigs available designed for just this purpose, but this was an experiment so see if one could be made from existing bits laying about the workshop.
How they work
The theory is quite simple; make a outline template, then use a straight fluted cutter in a router fitted with a guide bush, to follow the template and hog out some of the surface of the wood into which you want to place your inlay. Then use the same template to make the matching plug of new wood to insert.
The complication is that router bits do not have an infinitely small diameter (well most don't, but I can't find the one I had!). So if you use the template for both cuts as it is, your plug will come out way too small! This is because the rebate will have the diameter of the cutter added to its outside, and the infill the diameter taken away from its outside.
The way to fix this is with an offset bearing, that fits snugly round the guide bush. By adding a router cutters diameter to the overall diameter of the guide bush, the template can be used to make a smaller rebate, that will hopefully match the infill when that is cut out using the normal guide bush without the extra offset spacer.
Construction
So we need four bits:
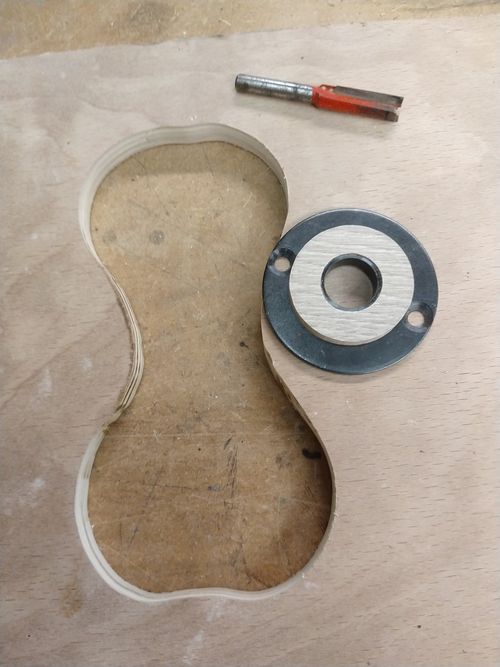
A suitable router cutter and guide bush. The offset spacer, and a template to guide the router.
Making the template
This was easy enough in principle. I drew a shape (for some reason a dog bone sprang to mind). So having drawn a suitable shape, you need to measure the diameter of your router cutter. Now add to that the difference between the diameter of the router cutter and that of the guide bush. Now set a pair of compasses to half that distance, and use them to trace round the outline of your shape, making an enlarged shape.
The shape can be anything you like, but there are two constraints that apply to the enlarged shape:
- It must not have any internal radius that is smaller that that of the router bush with its spacer ring fitted; and
- The minimum gap between any two sides must be no smaller than the outer diameter of the spacing ring.
So for example, if you have a 20mm guide bush, and a 10mm cutter, there will be a 5mm gap between the outside edge of the bush and that of the router cutter. So add that to the diameter of the cutter, to get 15mm. Now mark an offset line on the template 7.5mm wider all round (trying to keep tangential to the curve as you trace it at all times)
I then cut out the bulk of the waste close to the line with a jigsaw, and then sanded to the line to get a smooth accurate finish.
Making the spacer
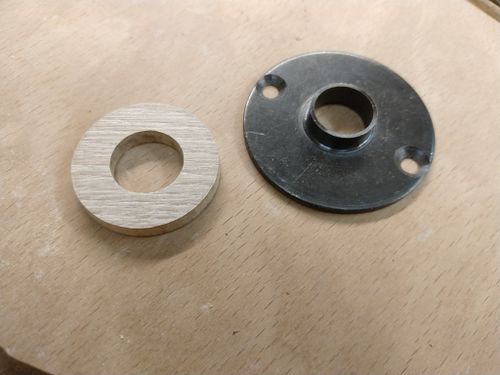
So to make the offset spacer, I started with a bit of scrap laminate flooring since its a 5mm thick MDF core which is easy to sand smooth, and it has laminate faces which make it nice and durable (and slippery) for templates. I marked up the centre, and drew the inner and outer radii using a pair of compasses. Since I needed a 20mm hole in it to match the diameter of my 20mm router bush, I drilled it a little under size with a forstner bit, and then filed and sanded it wider until I got the desired snug fit.
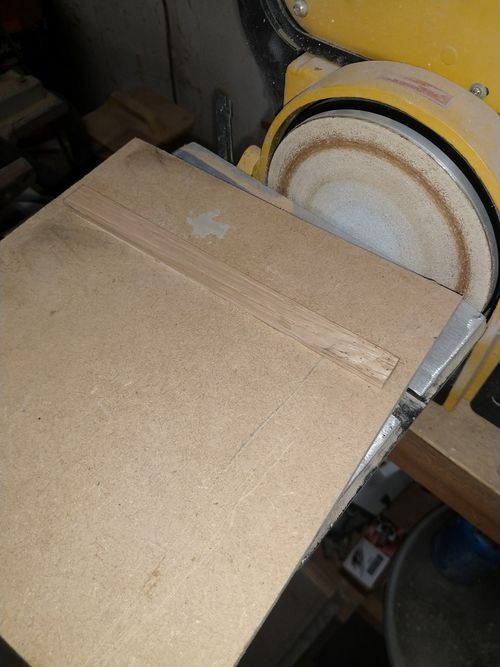
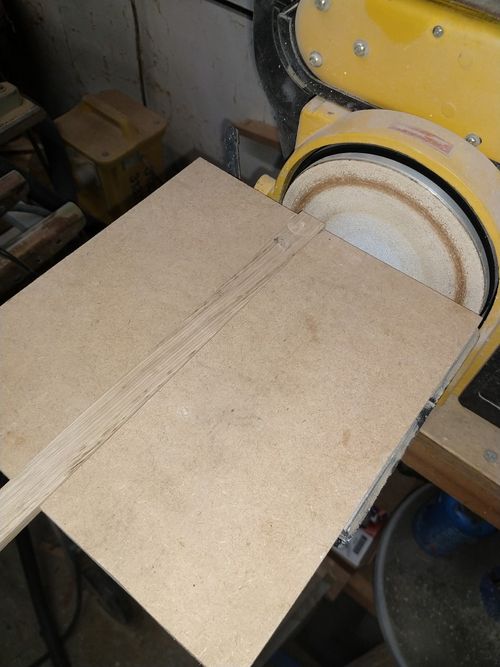
To get the outer diameter, I used a circle truing jig that I already had. This is nothing more than a small section of 19mm MDF with a guide rail mounted on the underside that matches the slot in the table on my disc sander:
On the top it has a rebate cut into it, with a snugly fitted slider.
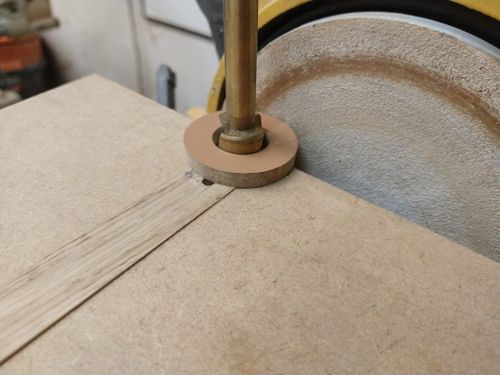
To use, one drills a hole in the slider roughly near the radial point of the circle required. If you do this with the drill bit that makes the centre hole of your circle, you can use the same drill bit as an arbour in the jig. (it kind of works using a forstner bit, but not as well with a proper twist drill, since they have a point rather than a nice round shank).
So in use you tap the adjustment bar closer to the sanding disc, causing your circle to push into the disc, sanding away some of the radius. When close to the desired radius, you rotate the disc against the sander. This will make a close to perfect round. Finally take a light final pass to get right on the required diameter. (its better to err on the large size since one can always make it smaller later)
After sanding to size:
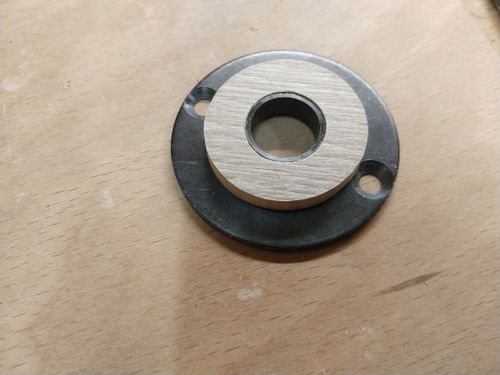
And fitted to the guide bush:
Testing / Using
Cutting the rebate
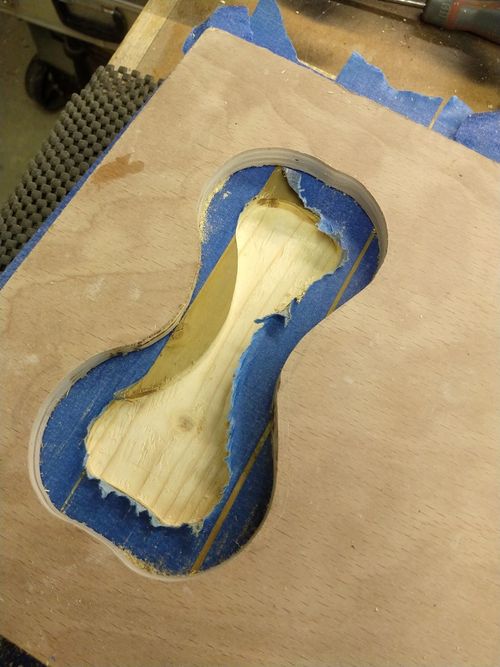
The first thing to cut is the rebate. For this the template needs to be fixed to the surface which it is to take the cut-out. Double side tape or clamps can be used. Here I covered both the underside of the template and the surface to be routed in low tack masking tape. Then spread some CA glue on one half, and sprayed the other with CA glue accelerator / activator. Push them together and hold for 10 secs, and they are fixed!
Now with the spacer fitted to the bush route round the perimeter of the template, and then clean out all the interior spaces.
Once the rebate is cut, the template can be prised off the surface (the masking tape is good at holding it in position with a strong "shear" strength, but pulls away easily under tension)
Cutting the plug
Now we need to cut the infill plug. The template can be fitted to the material in the same way. For demo purposes I just used a 6mm thick offcut of ply. Now set the depth of cut on the router so that it will go most of the way through the plug material - but not quite all the way. This is important because we don't want to cut the plug completely free during the routing process, otherwise there is a danger that it will move and get snagged or damaged by the router bit.
Carefully route round the perimeter of the template, taking care to keep the bush in contact with the template at all times. .
Once its routed, flip the sheet of plug material over and then free the plug from its surround by sanding the back of the material with an aggressive grit sandpaper.
Fitting the plug
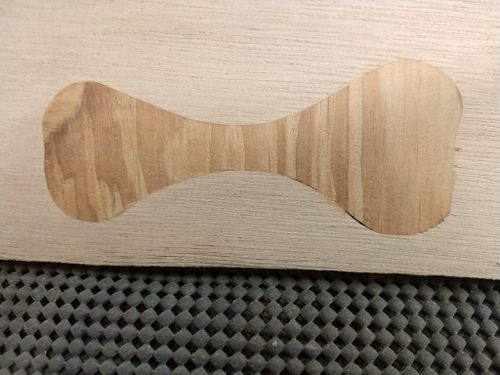
Now if everything is perfect, you should be able to clean up the edges of the plug and the rebate and drop the plug into position. In my case I had sized the offset ring so that the rebate was gnatt's todger under sized. So I sanded a bevel onto the under edge of the plug all round. Sat it in position, and clomped it with a soft faced hammer. The plug ideally needs to be a little thicker than the depth of the rebate.
To finish off, I wiped some wood glue around the periphery of the plug, and then sanded it flush with a 80 grit disc on an random orbit sander. (the glue locking in place some sawdust into any unintended gaps.
The result
It came out reasonably well - with one small visible gap - I am not sure if that is due to an error in the concentricity of my router bush offset ring, or more likely, that I did not take enough care when cutting out the plug to keep the bush in contact with the template at all times.
Some more experimentation will tell. (and possibly making the spacer ring from steel using a lathe)
