Difference between revisions of "Cable crimping"
(improve(?) opening para) |
(New crimp table, improved explanation on crimp choice) |
||
| Line 1: | Line 1: | ||
This article gives a practical description of crimping for joining electrical cables in fixed wiring installations. The techniques shown are generally applicable to other fields such as automotive electrics. This is not, however, a recommended technique for extending flexible mains cables connected to appliances. | This article gives a practical description of crimping for joining electrical cables in fixed wiring installations. The techniques shown are generally applicable to other fields such as automotive electrics. This is not, however, a recommended technique for extending flexible mains cables connected to appliances. | ||
| + | |||
| + | It is recommended that you practice this procedure a few times before deploying it on a real installation, to make sure the joints you create are mechanically strong. It is also a good idea to get your practice in when you are not stuck upside down in some uncomfortable corner of a wiring cupboard or other "real life" situation. | ||
== Acceptable jointing methods == | == Acceptable jointing methods == | ||
| Line 20: | Line 22: | ||
== Required Tools and Materials == | == Required Tools and Materials == | ||
| − | For making reliable crimped joints the correct crimping tool must be used. Adequate crimping tools are of a substantial contruction and include a ratchet tightening mechanism that ensure adequate pressure is applied to the crimp before it is released. A suitable tool is available from most good tool shops and electrical retailers such as this[[http://www.tlc-direct.co.uk/Products/DVDHCR15.html]]. | + | For making reliable crimped joints the correct crimping tool must be used. Adequate crimping tools are of a substantial contruction and include a ratchet tightening mechanism that ensure adequate pressure is applied to the crimp before it is released. Like this: |
| + | |||
| + | [[Image:CrimpRatchetTool.jpg|Ratchet action crimp tool]] | ||
| + | |||
| + | A suitable tool is available from most good tool shops and electrical retailers such as this[[http://www.tlc-direct.co.uk/Products/DVDHCR15.html]]. | ||
Crimp terminals are available in a number of sizes and two basic types: [[http://www.tlc-direct.co.uk/Main_Index/Cable_Accessories_Index/Crimp_Lugs_and_Tools/index.html Insulated]] and [[http://www.tlc-direct.co.uk/Main_Index/Cable_Accessories_Index/Crimp_Lug_1/index.html Uninsulated]]. Both types can be used, but the procedure is different, and uninsulated crimps require the use of a different crimp tool to insulated ones. For the purposes of this article we will use insulated crimps since these are the more commonly available, and require a little less work to use. | Crimp terminals are available in a number of sizes and two basic types: [[http://www.tlc-direct.co.uk/Main_Index/Cable_Accessories_Index/Crimp_Lugs_and_Tools/index.html Insulated]] and [[http://www.tlc-direct.co.uk/Main_Index/Cable_Accessories_Index/Crimp_Lug_1/index.html Uninsulated]]. Both types can be used, but the procedure is different, and uninsulated crimps require the use of a different crimp tool to insulated ones. For the purposes of this article we will use insulated crimps since these are the more commonly available, and require a little less work to use. | ||
| Line 38: | Line 44: | ||
== The crimping procedure == | == The crimping procedure == | ||
| − | Let's assume we need to | + | Let's assume we need to join a section of cable. |
| − | |||
| − | |||
=== Prepare the wire === | === Prepare the wire === | ||
| − | The first job to | + | The first job is to cut out any damaged sections or wire to leave sound wire to work with: |
[[Image:CrimpCutNStripCable.jpg|Any damaged wire removed]] | [[Image:CrimpCutNStripCable.jpg|Any damaged wire removed]] | ||
| Line 53: | Line 57: | ||
[[Image:CrimpStaggerJoint.jpg|Staggered wire cuts]] | [[Image:CrimpStaggerJoint.jpg|Staggered wire cuts]] | ||
| + | |||
| + | (It is better to stagger the joints even more than as shown in the photograph - such that there is no overlap in the crimp terminal positions at all being ideal) | ||
=== Fit insulation === | === Fit insulation === | ||
| Line 61: | Line 67: | ||
[[Image:CrimpCutJHeatshrink.jpg|Cut heatshrink long enough]] | [[Image:CrimpCutJHeatshrink.jpg|Cut heatshrink long enough]] | ||
| + | |||
| + | For a 2.5mm² T&E cable use 12.7mm (0.5 inch) diameter heatshrink, for smaller cables 10mm diameter will probably be a better fit. | ||
Also remember to fit sleeving to the earth wires. Slide the heatshrink it up one of the wires until it is out of the way: | Also remember to fit sleeving to the earth wires. Slide the heatshrink it up one of the wires until it is out of the way: | ||
| Line 68: | Line 76: | ||
=== Select suitable crimps === | === Select suitable crimps === | ||
| − | The crimp selected needs to not only match the wire size in question, but also have enough current carrying capacity for the circuit. The | + | For joining cables like this, the type of crimp required is known as a "butt" crimp or splice. |
| + | |||
| + | The crimp selected needs to not only match the wire size in question, but also have enough current carrying capacity for the circuit. The colour of a crimp only indicates its size, they are not designed to match any particular colour of wire insulation. | ||
| + | |||
| + | The three most popular sizes / colours being: | ||
| + | |||
| − | * | + | {| style="width:60%" border ="1" cellpadding="3" |
| + | |+ <u>'''Different crimp connections and their applications'''</u> | ||
| + | ! Crimp colour !! Details || Application | ||
| + | |-valign="top" | ||
| + | ! Red | ||
| + | [[Image:RedCrimp.jpg]] | ||
| + | | | ||
| + | * Area, wire size min:0.25mm² | ||
| + | * Area, wire size max:1.65mm² | ||
| + | * Current rating:19A | ||
| + | * Material, contact:Copper | ||
| + | * Material, insulator:Coloured Vinyl | ||
| + | * Plating, contact:Electro-tinned | ||
| + | * Temp, op. max:85°C | ||
| + | * Temp, op. min:-20°C | ||
| + | * Voltage rating, AC:415V | ||
| + | | | ||
| + | 1mm² and 1.5mm² T&E | ||
| + | |-valign="top" | ||
| + | ! Blue | ||
| + | [[Image:BlueCrimp.jpg]] | ||
| + | | | ||
* Area, wire size min:1.04mm² | * Area, wire size min:1.04mm² | ||
* Area, wire size max:2.63mm² | * Area, wire size max:2.63mm² | ||
| Line 80: | Line 114: | ||
* Temp, op. min:-20°C | * Temp, op. min:-20°C | ||
* Voltage rating, AC:415V | * Voltage rating, AC:415V | ||
| + | | | ||
| + | 2.5mm² T&E | ||
| + | |-valign="top" | ||
| + | ! Yellow | ||
| + | [[Image:YellowCrimp.jpg]] | ||
| + | | | ||
| + | * Area, wire size min:2.63mm² | ||
| + | * Area, wire size max:6.64mm² | ||
| + | * Current rating:48A | ||
| + | * Material, contact:Copper | ||
| + | * Material, insulator:Coloured Vinyl | ||
| + | * Plating, contact:Electro-tinned | ||
| + | * Temp, op. max:85°C | ||
| + | * Temp, op. min:-20°C | ||
| + | * Voltage rating, AC:415V | ||
| + | | | ||
| + | 4.00mm² and 6.00mm² T&E | ||
| + | |||
| + | |} | ||
| + | |||
=== Crimp === | === Crimp === | ||
Revision as of 13:20, 17 May 2007
This article gives a practical description of crimping for joining electrical cables in fixed wiring installations. The techniques shown are generally applicable to other fields such as automotive electrics. This is not, however, a recommended technique for extending flexible mains cables connected to appliances.
It is recommended that you practice this procedure a few times before deploying it on a real installation, to make sure the joints you create are mechanically strong. It is also a good idea to get your practice in when you are not stuck upside down in some uncomfortable corner of a wiring cupboard or other "real life" situation.
Acceptable jointing methods
There are various situations where it may become necessary to join an electrical cable, such as when effecting repairs and upgrades to installations. The wiring regulations basically allow for four methods for making cable joints:
- Screw terminal connections
- Joints produced by a compression tool (i.e. crimped)
- Soldered Joints
- Welded Joints
1) is most commonly used in electrical accessories such as switches and sockets. However this method is only acceptable where the joint will remain accessible for future inspection and maintenance, since screwed terminal connections can become loose over time.
4) Is not an option readily available in many domestic situations. Hence if one needs to make a joint that is robust, and can be safely entombed into a building we are left with 2) & 3).
Why Crimping?
Crimping is a quick and reliable method of jointing that is easy to deploy in the field since unlike soldering it does not require time to be spent waiting for a soldering iron to heat up, and poses no burn risk to the operator when working on confined spaces.
Required Tools and Materials
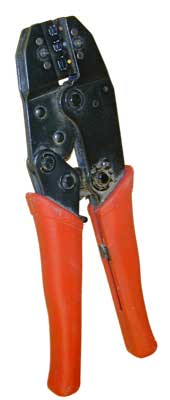
For making reliable crimped joints the correct crimping tool must be used. Adequate crimping tools are of a substantial contruction and include a ratchet tightening mechanism that ensure adequate pressure is applied to the crimp before it is released. Like this:
A suitable tool is available from most good tool shops and electrical retailers such as this[[1]].
Crimp terminals are available in a number of sizes and two basic types: [Insulated] and [Uninsulated]. Both types can be used, but the procedure is different, and uninsulated crimps require the use of a different crimp tool to insulated ones. For the purposes of this article we will use insulated crimps since these are the more commonly available, and require a little less work to use.
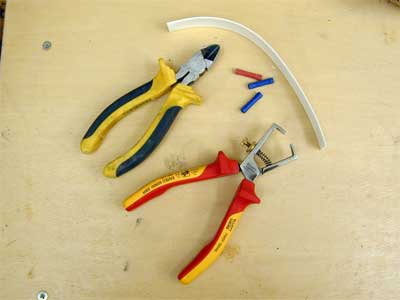
In addition to a crimp tool you will need a few basic tools like wire cutters, and strippers. You will also need some heatshrink tubing of a size appropriate for the cable to be joined
The wrong tool for the job
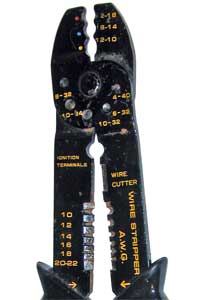
Note that the cheap non ratchet crimp tools like this are not suitable:
If you have one of these, save it for stripping wire and cropping small bolts.
The crimping procedure
Let's assume we need to join a section of cable.
Prepare the wire
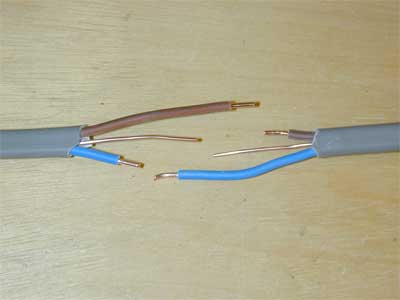
The first job is to cut out any damaged sections or wire to leave sound wire to work with:
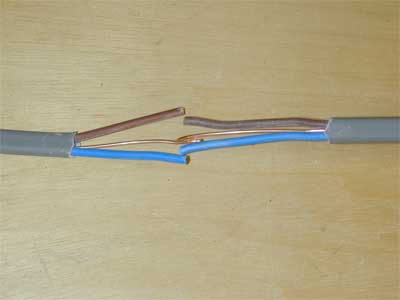
Strip the cable back a couple of inches (about 50mm) on each side so that there is room to work.
To Reduce the size of the overall crimp, and to make for a neater joint, the lengths of wires can be staggered so that the crimp terminals will not form a bunch:
(It is better to stagger the joints even more than as shown in the photograph - such that there is no overlap in the crimp terminal positions at all being ideal)
Fit insulation
Before going any further fit the insulation!
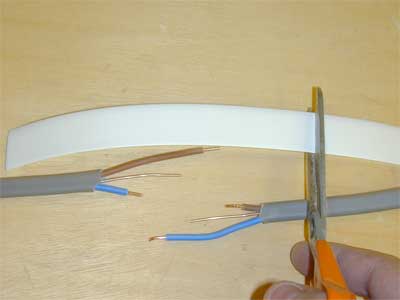
Cut some heatshrink to a length enough to not only cover the joint but also extend an inch of two down the cable. This will make the final joint more moisture resistant. (If waterproofing is important then an adhesive lined heatshrink can be used):
For a 2.5mm² T&E cable use 12.7mm (0.5 inch) diameter heatshrink, for smaller cables 10mm diameter will probably be a better fit.
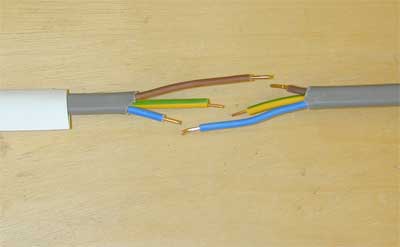
Also remember to fit sleeving to the earth wires. Slide the heatshrink it up one of the wires until it is out of the way:
Select suitable crimps
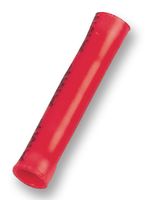
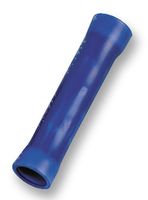
For joining cables like this, the type of crimp required is known as a "butt" crimp or splice.
The crimp selected needs to not only match the wire size in question, but also have enough current carrying capacity for the circuit. The colour of a crimp only indicates its size, they are not designed to match any particular colour of wire insulation.
The three most popular sizes / colours being:
| Crimp colour | Details | Application |
|---|---|---|
| Red |
|
1mm² and 1.5mm² T&E |
| Blue |
|
2.5mm² T&E |
| Yellow |
|
4.00mm² and 6.00mm² T&E |
Crimp
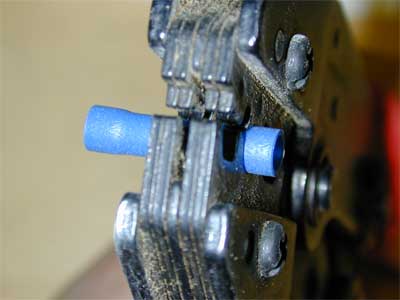
Position the crimp in the jaws of the crimp tool (in the recess marked with the same colour as the crimp), and squeeze gently so as to grip the crimp without squashing it:
You should position the crimp so that the active part of the jaws are directly over the metal part of the crimp, leaving the empty part of the plastic insulation sticking out
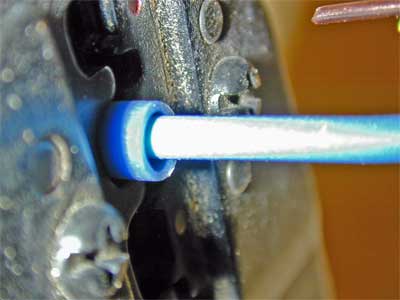
Insert the wire such that the insulation is tucked inside the shrouded part of the crimp:
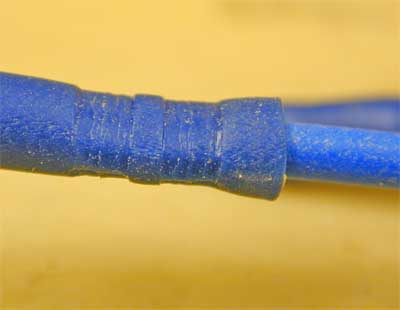
Once the crimp is made, inspect the crimp to ensure it looks correctly compressed and the wire is still in the correct place with no uninsulated section showing. Attempt to pull the wire out of the crimped connection to verify that it is held properly:
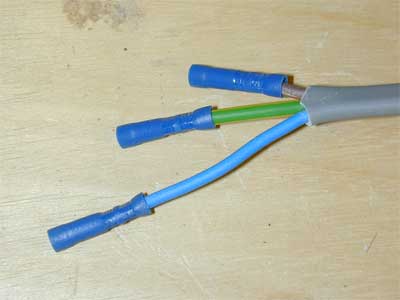
Repeat for the other wires in the cable:
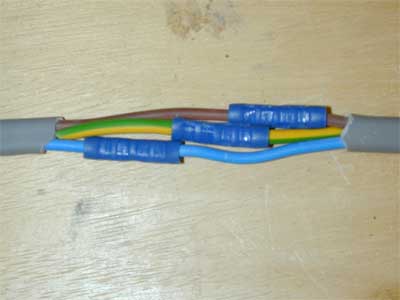
Finally complete the crimp to the other cable:
Test
Once the cable is joined, you can test your work. As described above the first test is mechanical: that the wire should not pull free of the crimp when applying reasonable force.
To test electrically, find where the cable you have repaired connects to the exiting circuit at both ends. Disconnect both and twist the wires at one end together. Now use a multimeter on a low ohms range to measure the resistance between each wire. See the section on Test procedures in the Elctrical Circuit Faults article.
Heatshrink
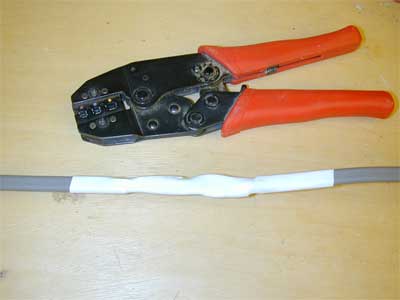
Last job is to slide the heatshrink over the joint and shrink it:
Heatshrink is best shrunk with a small purpose made hot air gun. If this is not available a gas flame can be used, but it must be played over the joint very quickly and sparingly so as not to scorch it.
