Desk bookshelf
Introduction
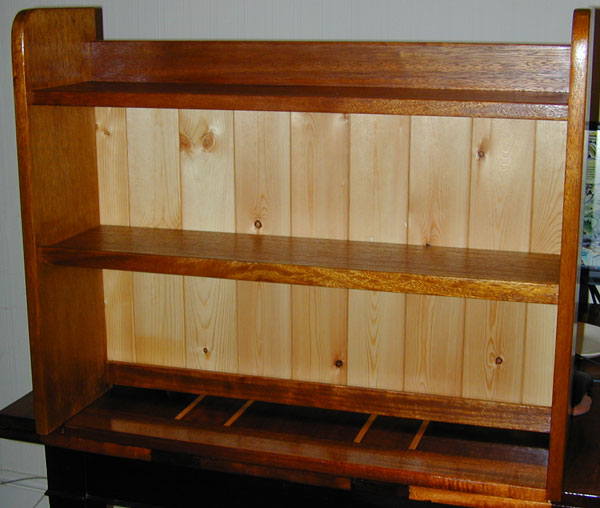
This article shows the design and construction of a quick and easy bookshelf unit designed to sit on a desk. The brief was to create something that would not consume too much desk space - hence no bottom shelf allowing the desk to still be accessed, a middle shelf with a retaining lip to capture miscellaneous "stuff" such that it will stack and not slide or roll off, and finally a top shelf with sides and back to help retain books and similar items.
(Also see the newer replacement for this shelf)
Materials
This was built from a generic species of hardwood as sold by many timber merchants. In total the project will use about 9 linear feet of 9x1 (nominal, 8.75" x 0.75" finished size) PAR. 4.2m of 4" T&G for the back. In addition, PVA glue, and some No. 20 biscuits. The finish used here is garnet shellac for the hardwood, and some Liberon finishing oil for the pine T&G to darken it slightly and add some protection.
Tools
Basic hand tools and a table saw for dimensioning the parts, biscuit jointer for sticking it together, sanders, 10mm plug cutter for wood plugs to hide the screw heads, and a router for the edge details.
Design
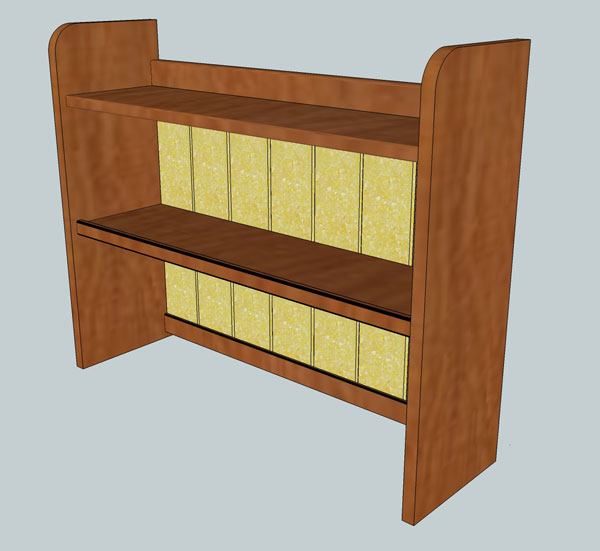
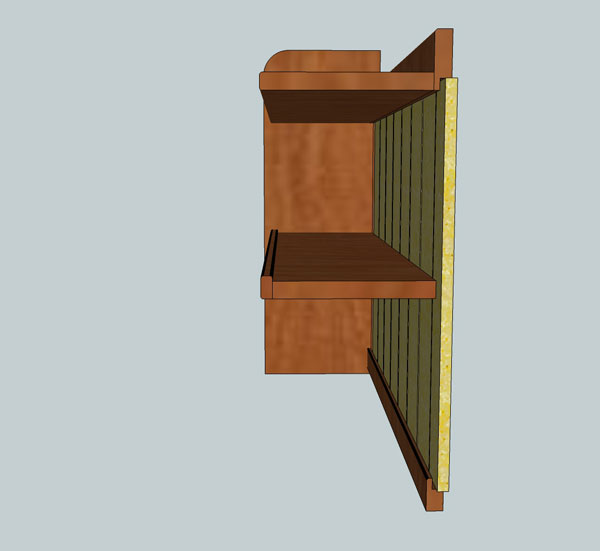
The design was created in sketchup, to experiment with the overall look first. The joints are basic butt joints located with biscuits. Three screws are used in each side - one for each shelf, and one for the stringer at the bottom. These are located in counter bored holes that are then filled with a matching wood plug. The top stretcher is simply located on biscuits at each end and screwed to the back of the top shelf. The front lip of the middle shelf is simply fixed with glue and biscuits.
Preparation / cutting
The sides are 8.5" x 24". The shelved etc are all 28" wide. Both shelves are designed to finish 0.5" short of the front of the sides and are 7.25" deep. The middle shelf is located 0.5" short of the back to allow space for the back, and also has a 1/4" deep lip to be affixed to the front. The top shelf sits 0.75" from the back in front of the top stretcher and has no lip on the front. The top stretcher is approx 3.5" high in total. and the bottom one appox 1.5" high. The T&G panels are approx 17.75" long.
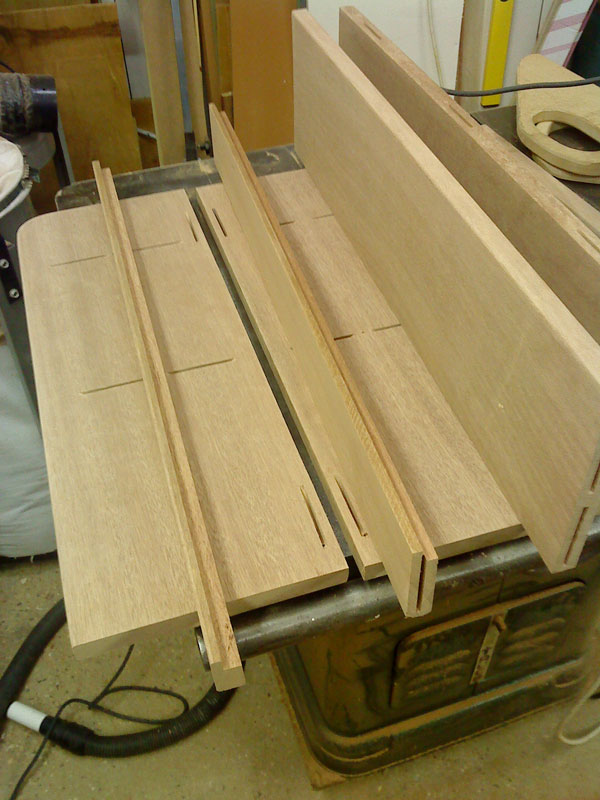
Picture showing the two sides, one of the shelves, and the stretchers with their rebates cut ready to accept the 0.5" thick T&G backing.
Construction
Note: for more details on the construction techniques used, see the Small bookcase article.
Making parts
After the materials are cut to size, the first job is to prepare the sides. These have a radius on the top front corner. This was marked out, the wood trimmed to roughly the correct shape with a couple of straight cuts on a mitre saw. The final shape being achieved by sanding down to the line on a bench disc sander.
Next mark out the shelf positions. The middle shelf was positioned with its under side 10" from the desk top. The top shelf a further 8" above the middle shelf. Sing a pair of biscuits for each shelf. Remember to allow for the fact that the top shelf will sit 0.25" nearer the front of the case. Mark and sink biscuit slots for the top stretcher as well. (ignore the biscuit slots shown in the photo for the bottom stretcher - this was in fact an error - fortunately one hidden by the backing later!)
Mark the biscuit locations on the ends of the shelves and top stretcher and sink those.
(note if you don't have access to a biscuit jointer, then you can use a straight fluted cutter on a router and either use free tenons in place of the biscuits, or rebate the sides to accept the full width of the shelves).
Now drill the screw holes in the sides - one screw between each pair of biscuits, and another for the bottom stretcher. These were drilled from the outside with a 10mm lip & spur bit to a depth of 10mm, and then drilled through with a 3mm bit.
Cut some matching wood plugs from a bit of scrap timber.
On the table saw cut 0.5" square rebates into the bottom rear section of the top stretcher, and the top rear of the bottom one.
Using a small round over cutter in a router, add a radius to the front and top edges of the sides, the front edges of the top shelf, and the top, (inside, and out), and bottom edges of the lipping for the middle shelf. Also round off the top and bottom edges of the bottom stretcher, and the top edge of the top one.
Using a straight fluted cutter, cut 0.5" square rebates into the inside edges of the sides, to accommodate the edges of the backing.
Sand all the timber with 120 grit paper, and then give a final hand sand with 1200 wet'n'dry for a smooth finish.
Assembly
Glue and fix the lipping to the middle shelf. Use three biscuits to located this securely on the shelf. With one side laying on the bench, glue and biscuit both shelves and the top stretcher. Use three five small screws to screw through the back of the top stretcher into the edge of the shelf, fixing them together. Now glue up and place the other side in position. Drive the screws for this side home. Carefully turn the piece over end to end, and screw that side. Finally glue, position and screw the bottom stretcher.
Apply sash clamps to the edges while the glue dries to make sure there are no gaps.
Glue and insert plugs in the screw holes, one dry pare these flush with the surface and sand off.
The back can be cut read for fitting, however should not be fitted until after applying the finish to each section.
Finishing
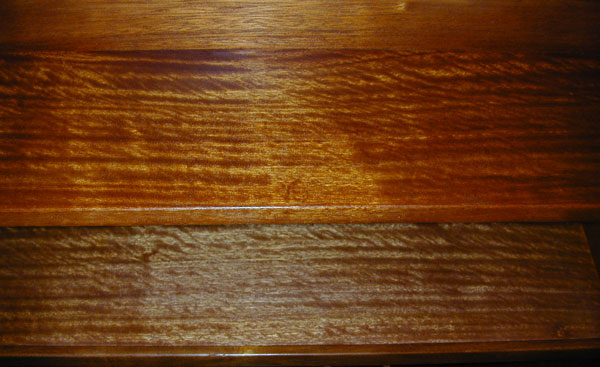
The finish used on this piece was made from garnet shellac flakes dissolved in methylated spirit. This was rubbed over in several thin coats using a "fad" made from a cotton cloth stuffed with cotton waste. The shellac solution being poured into the waste and the cloth then wrapped around it. The thin coats dry very quickly and can be overcoated almost immediately (in fact by the time you are finished with one coat - just start again at the beginning!) Five or six coats in total were used to bring up the desired colour, and help "pop" the grain of the wood used:
After the first couple of coats the shellac was left to dry for an hour, and then sanded with the 1200 grit wet'n'dry again to de-nib the surface.
The pine T&G backing was lightly sanded and left basically untreated. Some Liberon finishing oil was rubbed into the visible face of the timber to darken it a little and offer some protection.
Once treated, the back is then inserted into the rebates on the back of the cabinet, and fixed in place at the top and middle of each panel using 30mm brad nails. Fixing in the centre of each board allows for seasonal movement of the back. The bottom of the boards are not actually fixed to the bottom stretcher since there is insufficient depth of timer in it to facilitate nailing - however the edge is hidden in the rebate.
The final piece was then given a polish all over with a light wax polish.
