Difference between revisions of "Digger"
(new page, back-hoe review) |
|||
| Line 1: | Line 1: | ||
==== Black Tools Back-Hoe Mini-digger Review ==== | ==== Black Tools Back-Hoe Mini-digger Review ==== | ||
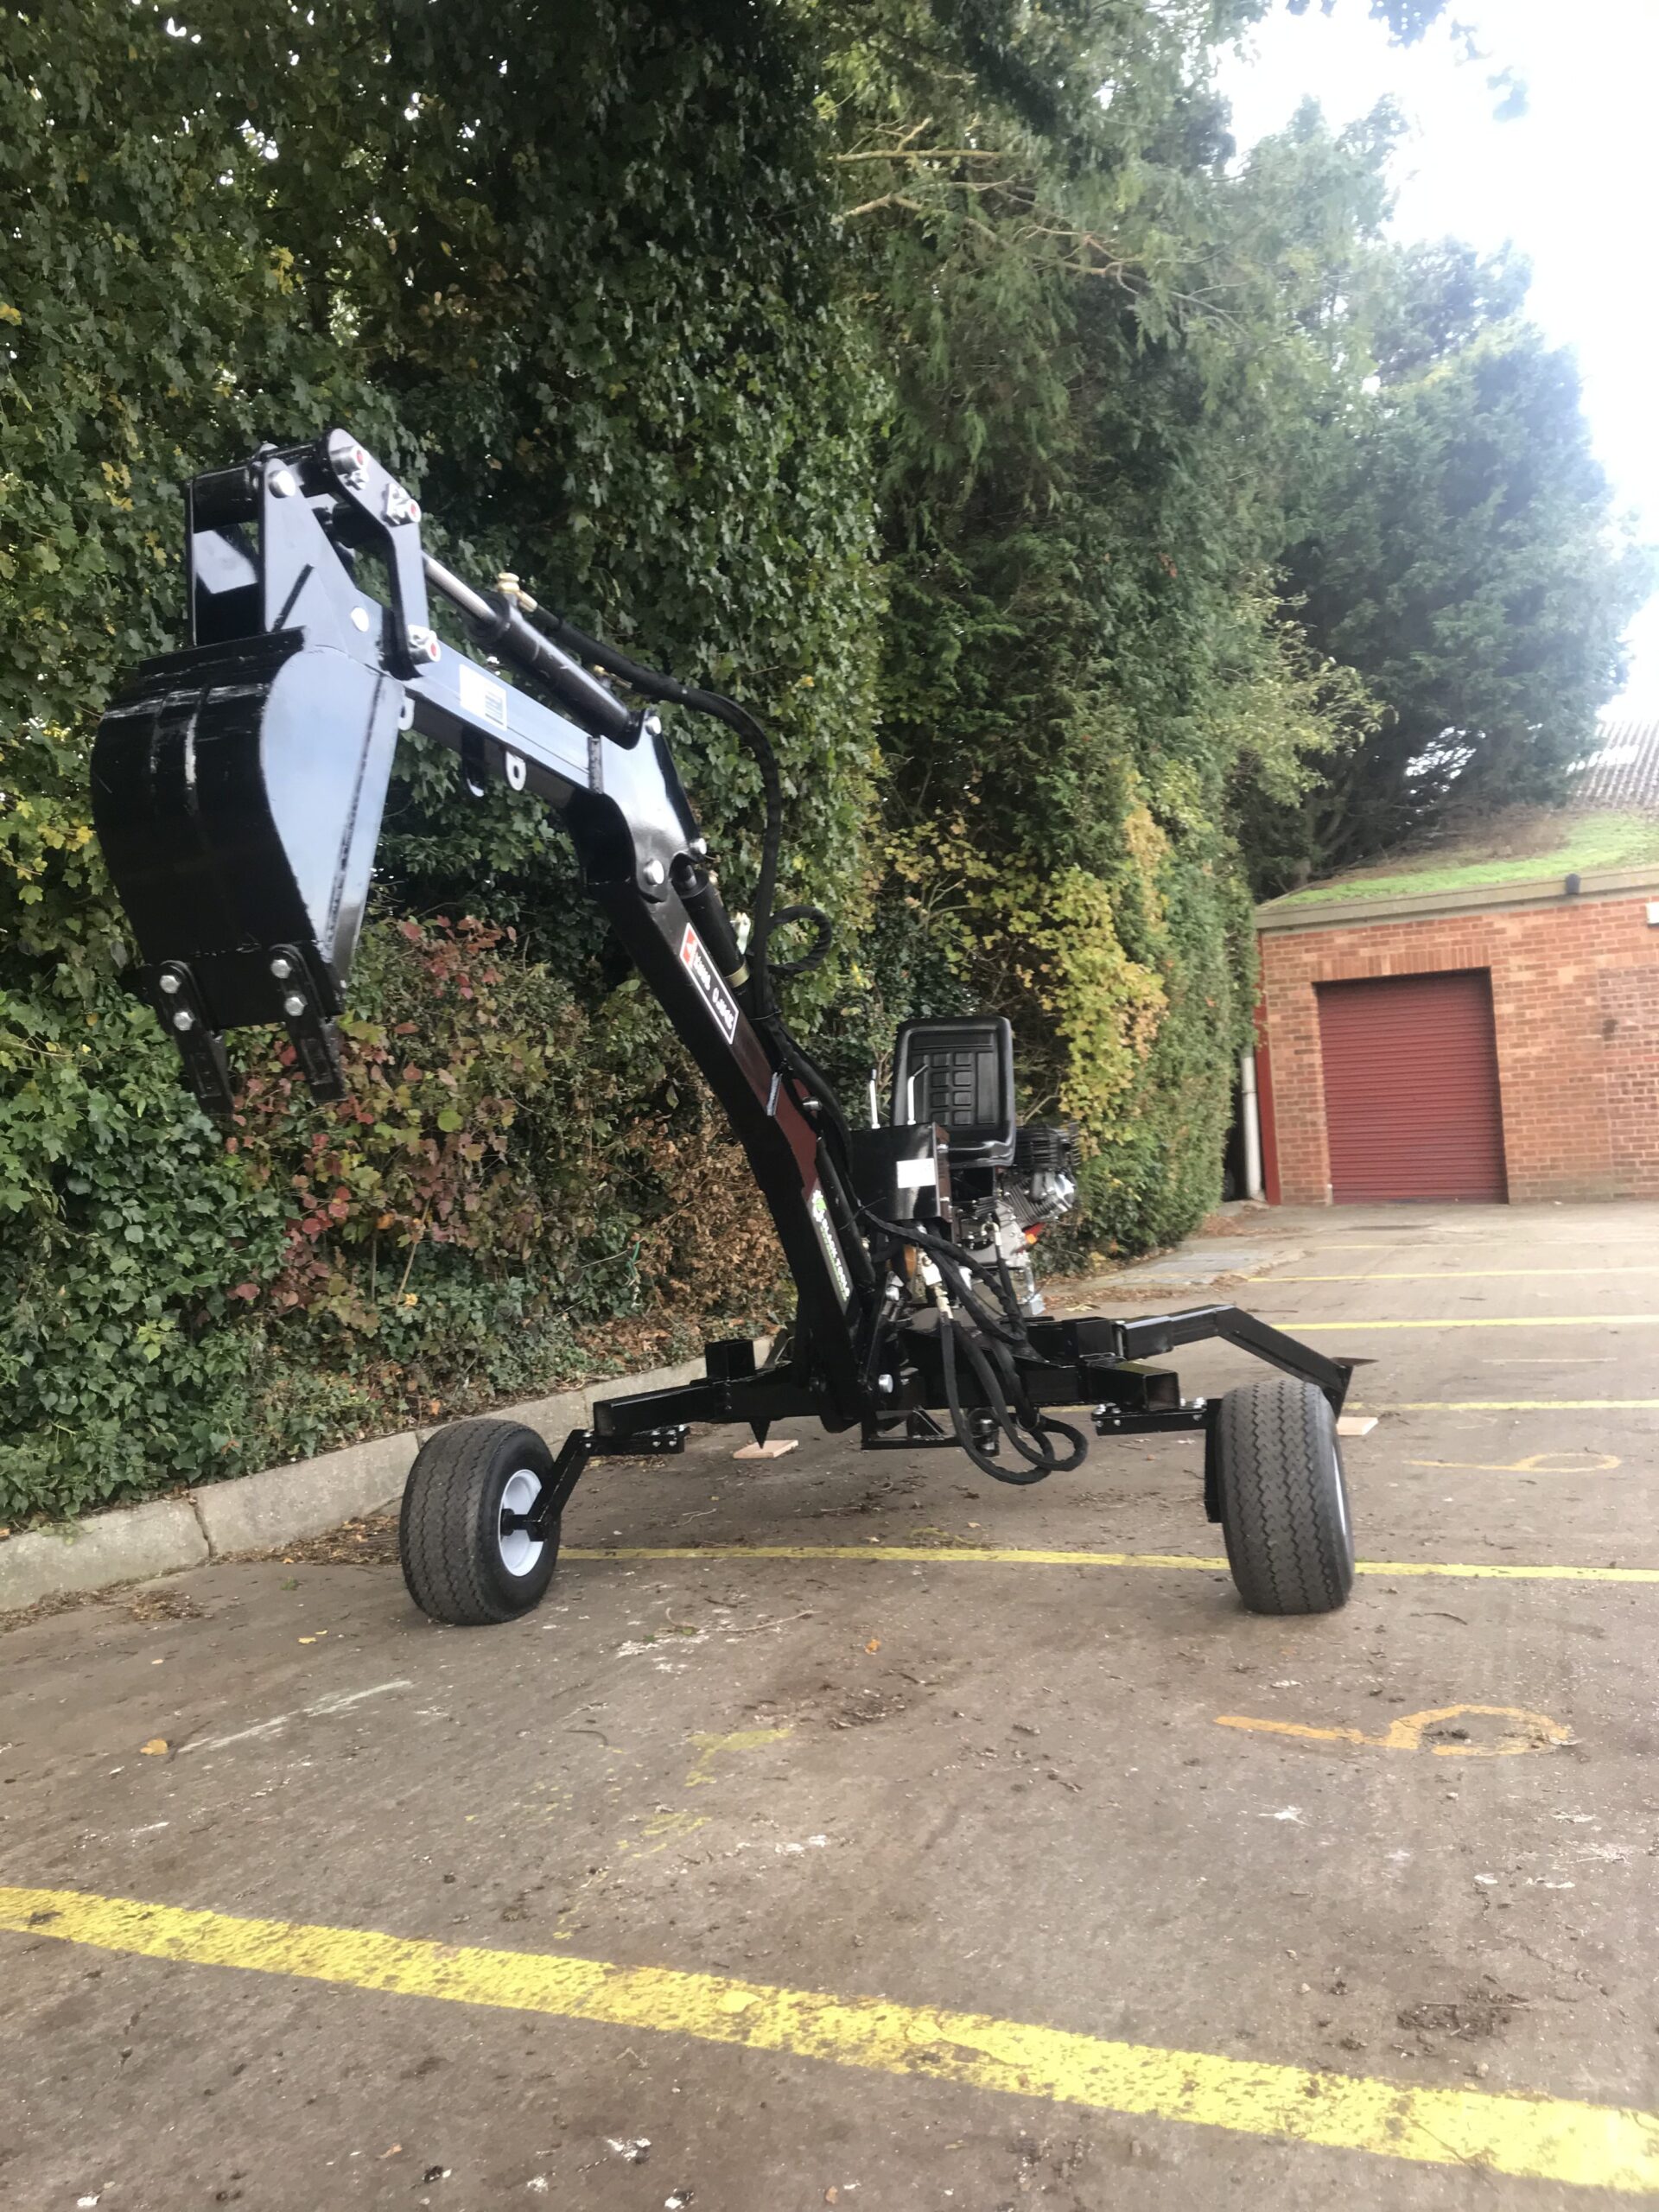
| + | Link to sales picture:- https://www.blacktools.co.uk/wp-content/uploads/2020/10/Photo-30-10-2019-14-48-37-1-e1572904607600-scaled.jpg | ||
| + | |||
I bought this from Ebay for my garden. I found it very useful. This review is directed to amateur users such as myself, serious gardeners with a lot of landscaping projects around a country house. I use it in conjunction with an electric barrow, the AB1 from Autobarrow of Tewkesbury. | I bought this from Ebay for my garden. I found it very useful. This review is directed to amateur users such as myself, serious gardeners with a lot of landscaping projects around a country house. I use it in conjunction with an electric barrow, the AB1 from Autobarrow of Tewkesbury. | ||
Revision as of 20:56, 2 November 2021
Black Tools Back-Hoe Mini-digger Review
Link to sales picture:- https://www.blacktools.co.uk/wp-content/uploads/2020/10/Photo-30-10-2019-14-48-37-1-e1572904607600-scaled.jpg
I bought this from Ebay for my garden. I found it very useful. This review is directed to amateur users such as myself, serious gardeners with a lot of landscaping projects around a country house. I use it in conjunction with an electric barrow, the AB1 from Autobarrow of Tewkesbury.
The hoe is built to scoop and dump soil beside a trench, so you don't get much rise on the bucket, only enough to clear a low barrow. The AB1 is a 3-wheeler, twin leading and a trailing one. Using the 300mm bucket I had no problem filling it with 3 scoops, then driving the barrow away to dump elsewhere. It will take a full load up a steep pathway so I landscaped several terraces successfully. With the hoe I moved quite large rocks too, heavier than I can lift by hand. I dug up a buddleja root, dug some post holes with the 200mm bucket too. I shifted sodden clay and mud, nettle roots, broken brickwork. I pushed and nudged tree roots, stumps, logs, sleepers and big rocks into positions. I found it very useful overall and am very satisfied with my purchase.
Once you get it under control I'm sure you can find many interesting projects to do even if you don't need the drainage trenches that it's designed for. Bushes and small trees to re-plant, dig ponds, form terraces, mount fence posts, compost pits, raised beds, gravel paths, stacking logs, running electric cable conduit and water pipes. Recommended for really serious gardeners.
The learning curve for a novice owner.
This was a long-distance delivery. Such a heavy item doesn't come by a parcel carrier, it's sent via the pallet network, which primarily deals with industry-to-industry deliveries. They don't have the same customer service structure as domestic deliveries. You'll have to track it yourself and organise delivery. Warn yout local depot about the size of lorry you can accommodate, maybe a huge articulated isn't appropriate. You'll have to be home all day too. The first question the driver will make on arrival is "where's your fork-lift?" You'll have to persuade him to help you lever the box off his tail-lift or have some help available. Myself we unpacked as much as possible inside the truck before we move it.
The backhoe comes in a steel open-frame cage stuffed with bubble-wrap and secured with wire twists. The top is held by 4 bolts. Without a fork-lift you can't get it out, I had to saw off one steel leg and use two car-jacks and a lot of old block/bricks/wood offcuts to gradually work the cage from under the hoe. I'd recommend buying two axle-stands when you get the grease-gun.
Assembly is easy, you can forget the manual as the hoe is semi-assembled at the shop and many of the fixings are different to those described. Only the front-page picture helped. I managed everything single-handed. Hoses are already fitted to pistons, so what goes where is obvious. The main concern is getting the hose runs on the correct side of the pistons, and later adjusting the hose clamps above the boom and under the floor so movement doesn't stretch the hoses. You need a 22mm socket with an extension to fit the wheels, one item I had to borrow. Other spanners are those in the usual DIY kits.
You need to buy fluids: axle grease, engine oil, petrol and hydraulic fluid. The latter comes from local oil dealers, you'll have to buy and collect a 25 litre drum I expect. I used a brand with -46 in the specification, that's the viscosity I think. The suppliers will tell you what's their equivalent to the US-specified one in the manual. You'll have to buy a cook's funnel to fill the narrow hydraulic pipe. I used a measuring jug too as the oil drum is heavy. Took me a while to realise that the level mentioned was the front window of the thermometer and the oil is only just visible behind it. Also you fill for ages before anything appears there, after which it rises rapidly, be aware! For petrol I cut off a milk carton and inverted it. The engine on my model was a Loncin brand and I had teething troubles from it's oil-level tilt switch until I over-filled the sump. I'd recommend doing that on different engines too because I sometimes get the hoe well over the 10 degree limit advised in the operating instructions. The JD engine doesn't have that tilt switch I think. All the piston axles need plenty of grease, pump through the nipples from a strong grease-gun. The local car-part shop will sell these, and the grease. I suggest you ask them to load it, I found it hard to do myself, and very messy. I put nearly a whole tub of grease into the many brass nipples and I broke one by removing the gun awkwardly.
The petrol engine is air-cooled, so warms up and cools down quickly, unlike a car. Rest for 2-3 minutes and it needs choke again. Take choke off as soon as it starts to avoid black soot from the exhaust. There's an adjustment for maximum speed but no minimum for tick-over. Also the Loncin had no throttle pre-set so I had to use a wedge for starting as you can't reach the foot-pedal obviously. It's thirsty, so I have two 5-litre petrol cans available and fill them alternately on my shopping runs. The engine doesn't weigh much and comes off easily, so repairs are best done by removing it and sending it to the local dealer. Look for lawn-mower services.
The assembled hoe is 2m wide and quite long. It should manage to go up a normal car drive, but better check that before you buy one. Unless you have a spare barn, stable or garage, it will live out in the garden where the bolts will quickly rust in place, so you won't be disassembling it again. The bucket bolts will need protecting or removing if you lay the hoe up for Winter so take them out and drop the bucket at the end of the season. You need to drain the petrol too as it goes stale. Even under a tarpaulin the hoe will get damp. Cover the seat and engine, but you might need to tissue-dry the spark-lead and maybe the spark-cap for easier starting the next Spring I expect.
Controlling the hoe.
I rode over rough ground on a tractor once, quite scary if you're not used to it. The hoe is lower and feels safer. The safety and operating instructions in the manual are all relevent and bear study before you start. To change the wheel positions as described in the manual you will also need the axle-stands to support the back end. I assume the manual thinks you have it on a tow-bar or something, couldn't understand those instructions myself. My hoe isn't leaving my garden so I keep it in digging mode.
You drag the hoe on its back wheels by using the bucket. Sometimes you end up balancing on three points but it still feels safe. Obviously you don't start digging until you have all four points supported, so you need blocks unless you find a suitably flat area to sit. One caution: you can get the bucket under the front legs, especially if they're buried in mud. It's not a design fault, just something you need to avoid doing.
Learning the controls took me a while. There are no signs so I stuck on my own labels while learning. There are four moves: curl bucket, drag inward, lift boom and swing sideways. Some are cross-connected and interact with each other to help dig. The furthest away, curl, is the strongest force, the nearest, lift, the weakest. I quickly learnt that the lowering lever (and swing to a lesser extent) is extra-sensitive because the movement of the boom bounces the rig and your hand, which amplifies your command, so I only move the right-hand lowering lever forward with my second hand firmly based on the control box so it can't jerk my first hand. Otherwise the boom can crash down with a thud that jolts your spine.