Difference between revisions of "Floor socket installation"
(Draft - WIP) |
|||
| Line 1: | Line 1: | ||
==Introduction== | ==Introduction== | ||
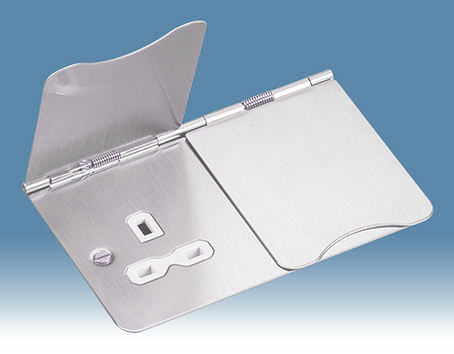
| − | + | Sometimes you need a socket in a place where there is no nearby wall to mount it, and you can't trail cables over the floor to the required location. The ideal solution to this can be a floor socket. These are specially designed sockets designed for floor installation, that typically are very flat and low profile, and have sprung covers to keep them protected when not in use. They are also built strongly enough to resist damage when being walked on, or having furniture placed on them when closed. | |
| + | [[File:TypicalFloorSocket.jpg|frame|Typical floor socket. Note floor sockets are usually unswitched since these would be vulnerable to damage, and also stick up spoiling the flat profile. ]] | ||
| + | Electrically, installing one is the same as installing any other [[Easy socket extensions|electrical socket, on an existing circuit]], however the mechanical mounting will be different. This article gives and example of the installation of a floor socket into a suspended timber floor. | ||
| + | |||
| + | === Choose your location === | ||
| + | The first job is to choose a suitable location. This particular one was going close to a couch, and was going to power an electric recliner, and a sub-woofer. Since the floor boarded, I needed to cut a hole through the centre of a board so as not to weaken it too much. An [[Oscillating tools|Oscillating tool]] was ideal for this since it can simply plunge cut into the wood, using a line drawn around a metal socket back box as a guide. | ||
| + | |||
| + | As fluke would have it, a cable for the required ring circuit passed directly under the socket location, and even had enough slack to allow easy insertion of the new socket. | ||
| + | |||
[[image:FloorSocketCutout.jpg|640px]] | [[image:FloorSocketCutout.jpg|640px]] | ||
| + | |||
| + | There are some specialist mounting boxes for floor sockets, however it is usually easiest to use a normal metal 35mm deep box (don't use a 25mm box since flat flush mounting sockets often have a deeper back projection than normal wall mounting sockets) | ||
| + | |||
| + | In this case we also needed some timber to mount the socket on. A based made from some 3/4" ply, and some softwood sides cut to the right depth so that when screwed to the underside of the floorboards, just the right amount of socket will protect through the cut out. The side strips were deliberately cut a bit long so that they would re-enforce the floor board made weaker by the cut out. | ||
[[image:FloorSocketMounting.jpg|640px]] | [[image:FloorSocketMounting.jpg|640px]] | ||
| + | |||
| + | This assembly can them be lowered under the floor. This is a good point to cut into the electrical cable (having turned off the circuit!), passing the cable through protective grommets and into the box. The wires were folder to make sure they would not get pulled out of the box before we are ready to wire it up. | ||
[[image:FloorSocketMountInFloor.jpg|640px]] | [[image:FloorSocketMountInFloor.jpg|640px]] | ||
| + | |||
| + | The socket box can then be fixed in place by drilling some holes through the floor board, and screwing down into the battens. Using 4 screw per side will make sure there is a good fixing, since these screws could be carrying the weight of someone standing on the socket entirely in tension. | ||
| + | |||
| + | The last job is to wire up the floor socket, test the wiring, and reconnect the power. Once the carpet is reinstated, the socket sits closed just below the top level of the carpet. | ||
| + | |||
| + | [[File:FloorSocketClosed.jpg|frameless|606x606px]] | ||
| + | |||
| + | Opening the sprung flap lids reveals the sockets below: | ||
| + | |||
| + | [[File:FloorSocketOpen.jpg|frameless|762x762px]] | ||
| + | |||
| + | When in use, the covers spring back over the plugs partly covering them: | ||
| + | |||
| + | [[File:FloorSocketWithPlugs.jpg|frameless|600x600px]] | ||
| + | |||
| + | |||
| + | [[Category:Electrical]] | ||
Latest revision as of 03:27, 9 January 2022
Introduction
Sometimes you need a socket in a place where there is no nearby wall to mount it, and you can't trail cables over the floor to the required location. The ideal solution to this can be a floor socket. These are specially designed sockets designed for floor installation, that typically are very flat and low profile, and have sprung covers to keep them protected when not in use. They are also built strongly enough to resist damage when being walked on, or having furniture placed on them when closed.
Electrically, installing one is the same as installing any other electrical socket, on an existing circuit, however the mechanical mounting will be different. This article gives and example of the installation of a floor socket into a suspended timber floor.
Choose your location
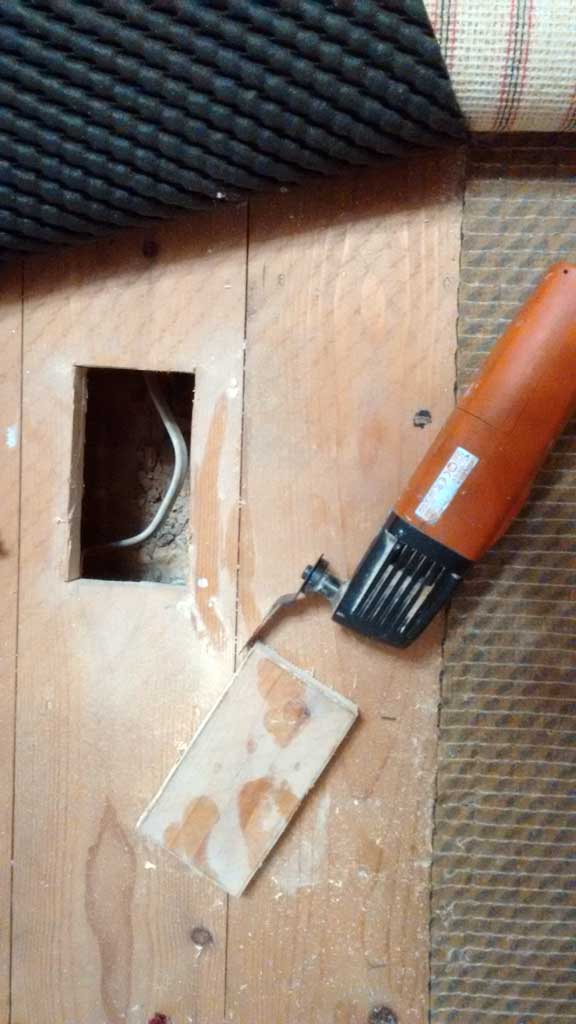
The first job is to choose a suitable location. This particular one was going close to a couch, and was going to power an electric recliner, and a sub-woofer. Since the floor boarded, I needed to cut a hole through the centre of a board so as not to weaken it too much. An Oscillating tool was ideal for this since it can simply plunge cut into the wood, using a line drawn around a metal socket back box as a guide.
As fluke would have it, a cable for the required ring circuit passed directly under the socket location, and even had enough slack to allow easy insertion of the new socket.
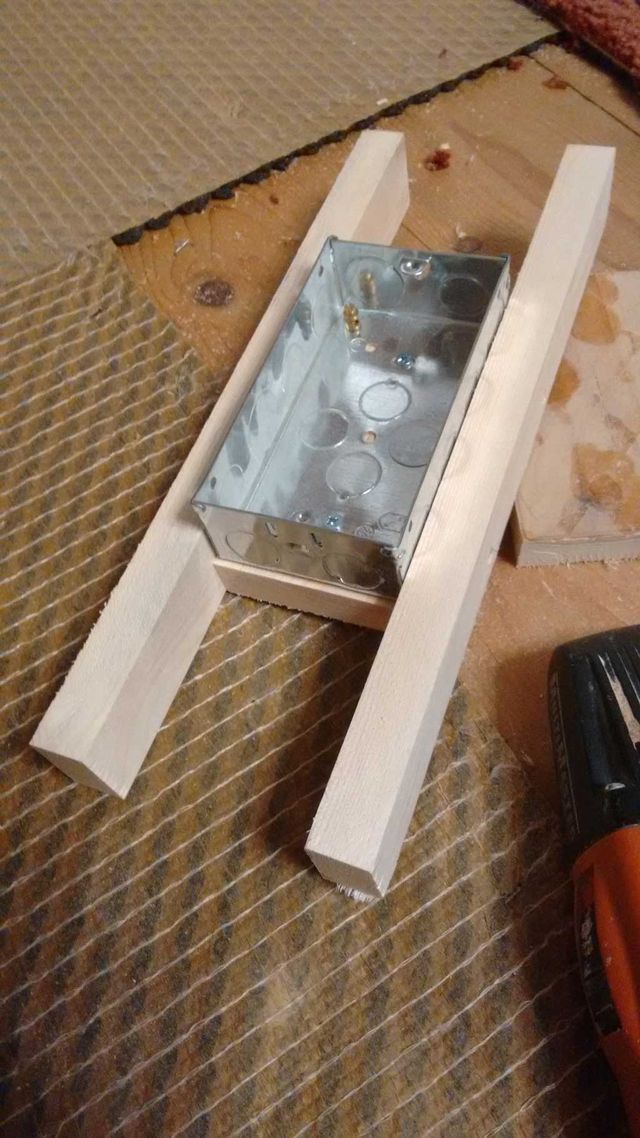
There are some specialist mounting boxes for floor sockets, however it is usually easiest to use a normal metal 35mm deep box (don't use a 25mm box since flat flush mounting sockets often have a deeper back projection than normal wall mounting sockets)
In this case we also needed some timber to mount the socket on. A based made from some 3/4" ply, and some softwood sides cut to the right depth so that when screwed to the underside of the floorboards, just the right amount of socket will protect through the cut out. The side strips were deliberately cut a bit long so that they would re-enforce the floor board made weaker by the cut out.
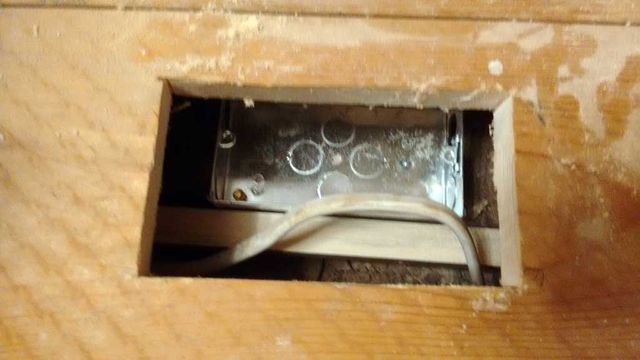
This assembly can them be lowered under the floor. This is a good point to cut into the electrical cable (having turned off the circuit!), passing the cable through protective grommets and into the box. The wires were folder to make sure they would not get pulled out of the box before we are ready to wire it up.
The socket box can then be fixed in place by drilling some holes through the floor board, and screwing down into the battens. Using 4 screw per side will make sure there is a good fixing, since these screws could be carrying the weight of someone standing on the socket entirely in tension.
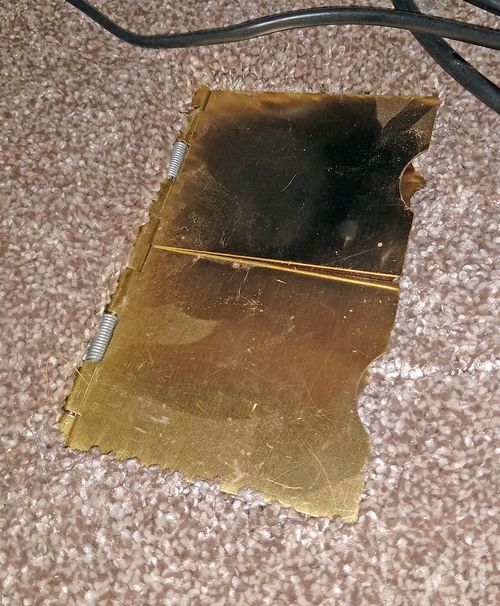
The last job is to wire up the floor socket, test the wiring, and reconnect the power. Once the carpet is reinstated, the socket sits closed just below the top level of the carpet.
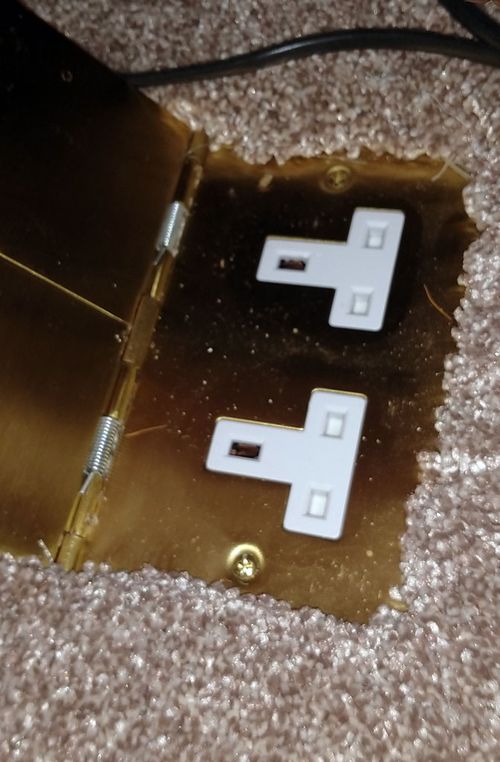
Opening the sprung flap lids reveals the sockets below:
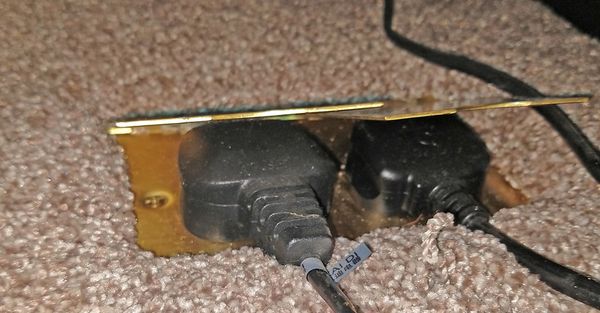
When in use, the covers spring back over the plugs partly covering them:
