Difference between revisions of "Garden bench"
(→Introduction: Added second bench pics) |
|||
| Line 11: | Line 11: | ||
I also altered the way the centre seat rest fixes such that is is lap jointed to the rear centre upright. This places the support in the middle of the span of slats rather than slightly offset. | I also altered the way the centre seat rest fixes such that is is lap jointed to the rear centre upright. This places the support in the middle of the span of slats rather than slightly offset. | ||
| − | + | [[image:HorseBenchNoFinish1.jpg|512px]] | |
| + | |||
| + | ===Second Bench=== | ||
| + | |||
| + | Since I had enough timber for another. I decided to build a second bench with a different "scene" in place of thee Horse theme of the first. So a group effort here, SWMBO came up with the idea and provided the sketch of the idea, and DDD was press-ganged into transferring the design onto a sheet of MDF that I could then cut out for use as a template. | ||
| + | |||
| + | [[image:ButterflyBenchNoFinish1.jpg|512px]] | ||
| − | [[image: | + | This one is actually less fiddly to cut out on the band saw than the horses. The piercings were done using hole saws (apart from the big spot which was easier to cut out on the scroll saw). The back centre splat was sculpted to become part of the scene. The edges were moved in slightly to make a narrower back. which also saved having to cut them to fit round the bench arms. The other change was to add slightly more depth to the profile of the seat guides. Lastly the top rail was changed to fit the new scene and also had the antennae cut into it since this avoided having very slim (and hence weak) bits of design to cut out and fix. |
| + | |||
| + | [[image:ButterflyBenchNoFinish2.jpg|512px]] | ||
==Finishing== | ==Finishing== | ||
Revision as of 18:41, 2 August 2016
Click images for larger version
Introduction
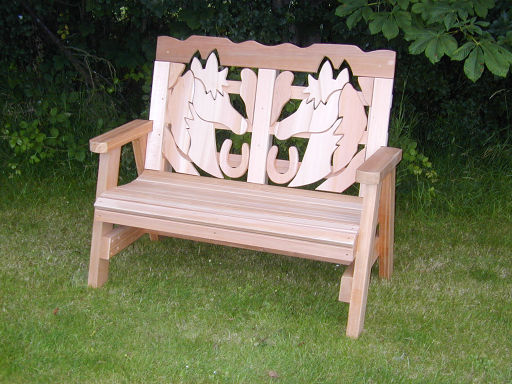
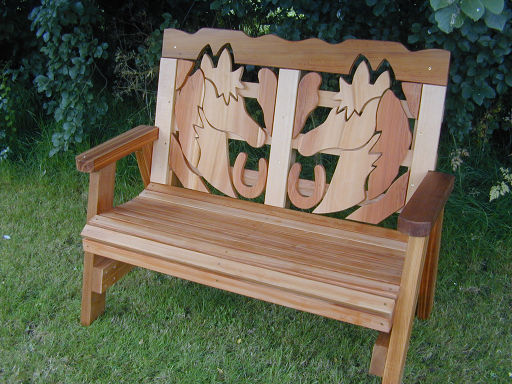
Not so much a "how to" article, and more of a here is how it turned out one! This garden bench was based on Jay Bates' design as featured on his web site, and also as shown in his video.
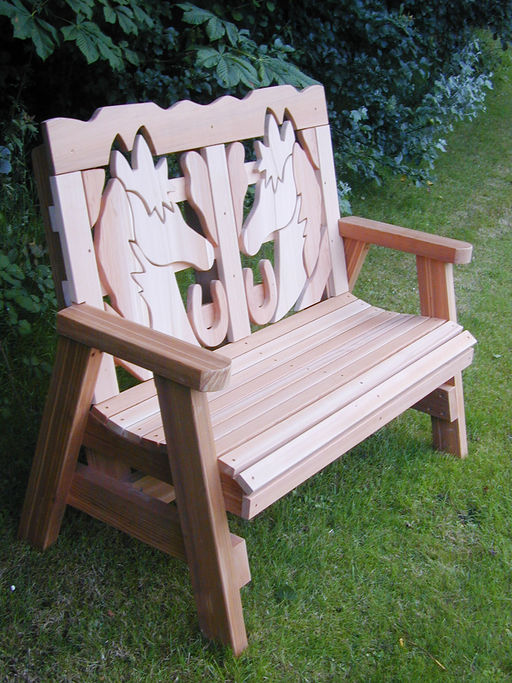
The only significant departure from the plans, was I built this one from Western Red Cedar rather than tanalised CLS 4x2" timber. As a result the construction is slightly more substantial since my finished 4x2" was much closer to that actual dimension that you will get with CLS.
I also altered the way the centre seat rest fixes such that is is lap jointed to the rear centre upright. This places the support in the middle of the span of slats rather than slightly offset.
Second Bench
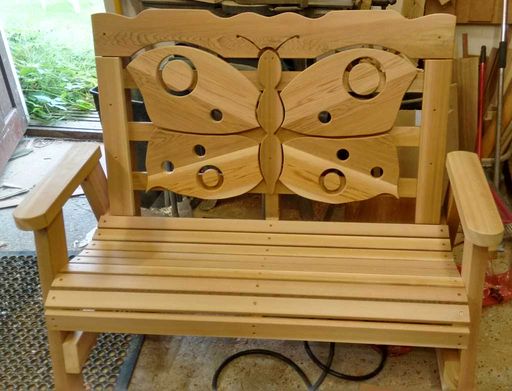
Since I had enough timber for another. I decided to build a second bench with a different "scene" in place of thee Horse theme of the first. So a group effort here, SWMBO came up with the idea and provided the sketch of the idea, and DDD was press-ganged into transferring the design onto a sheet of MDF that I could then cut out for use as a template.
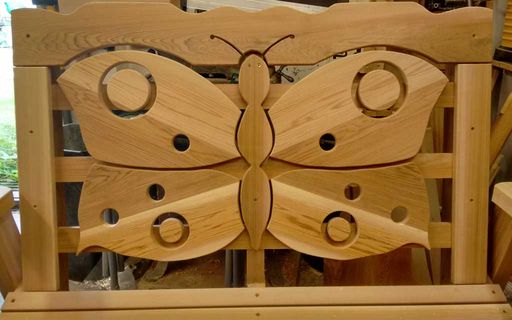
This one is actually less fiddly to cut out on the band saw than the horses. The piercings were done using hole saws (apart from the big spot which was easier to cut out on the scroll saw). The back centre splat was sculpted to become part of the scene. The edges were moved in slightly to make a narrower back. which also saved having to cut them to fit round the bench arms. The other change was to add slightly more depth to the profile of the seat guides. Lastly the top rail was changed to fit the new scene and also had the antennae cut into it since this avoided having very slim (and hence weak) bits of design to cut out and fix.
Finishing
Both the above pictures show the bench with its timber unfinished. Since its made from Western Red Cedar, it could be left like this since its a durable timber - it would slowly weather to a nice silver finish. However decided to give it a coat of teak oil to darken the colour and help preserve the look for a bit longer. Shown below, before and after:
