Difference between revisions of "Making an exterior door frame"
(First draft - needs a tidy) |
(→Procedure: Add Dean's comments on horns. More section tittles.) |
||
| Line 11: | Line 11: | ||
==Procedure== | ==Procedure== | ||
| + | ===Making the threshold=== | ||
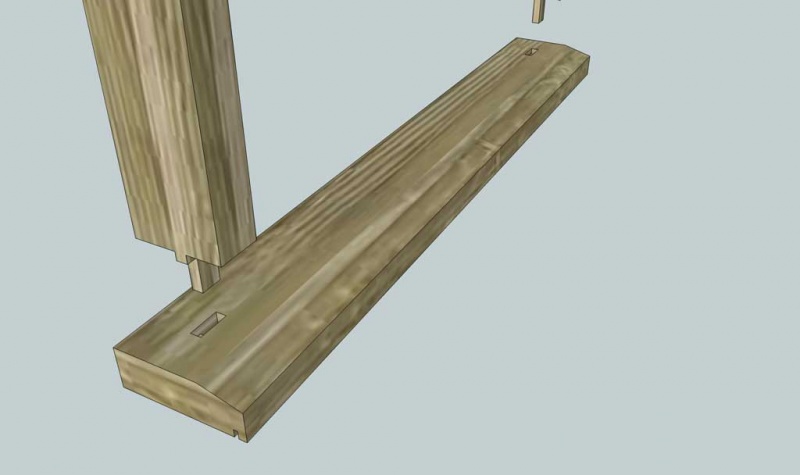
If a threshold rail is required, this needs a bevel cut on the leading edge, and ideally a grove on the underside of the outside lip, to act as a drip bead. Machining is ideally done on a table saw, however a hand held circular saw will also suffice. | If a threshold rail is required, this needs a bevel cut on the leading edge, and ideally a grove on the underside of the outside lip, to act as a drip bead. Machining is ideally done on a table saw, however a hand held circular saw will also suffice. | ||
[[image:ThresholdRail.jpg|800px]] | [[image:ThresholdRail.jpg|800px]] | ||
| + | ===Making jambs and top rail=== | ||
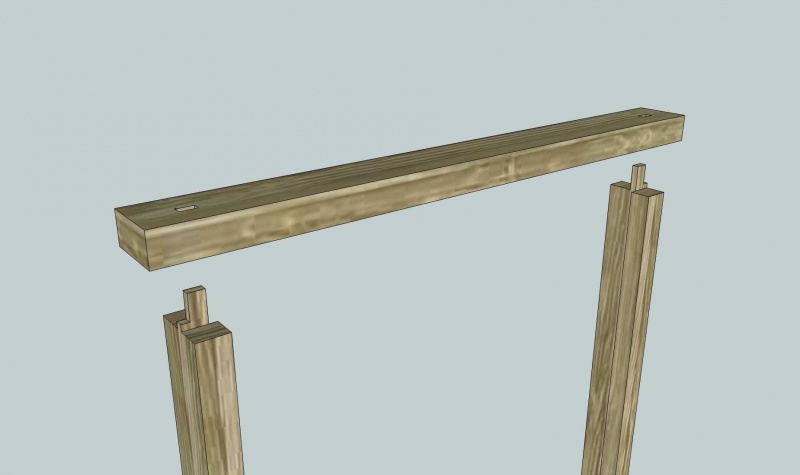
Next mark out the mortice and tenon joints on the ends of the rails (top end only if not using a threshold rail). The tenon here is 1/2" thick, and inset from the back and the outside of the jamb by 1/2" also. This allows more material toward the front and inside of the fram to allow for the rebate. | Next mark out the mortice and tenon joints on the ends of the rails (top end only if not using a threshold rail). The tenon here is 1/2" thick, and inset from the back and the outside of the jamb by 1/2" also. This allows more material toward the front and inside of the fram to allow for the rebate. | ||
| Line 24: | Line 26: | ||
[[image:FrameThresholdMT.jpg|800px]] | [[image:FrameThresholdMT.jpg|800px]] | ||
| + | |||
| + | It is also common to cut the top rail (and sometimes the bottom threshold) a little wider than the exact frame size, so as to leave "horns" sticking out from the outside of the frame, such that the assembled unit has 50-75mm of timber protruding horizontally from all four | ||
| + | corners. This can help with installation into 'rough' openings where the sides are not perfectly perpendicular or material has fallen away during removal of the old frame. The jambs can then be 'packed out' where required and fixed through the packing. A lot of old frames were fitted with 'horns' on them, so there is often a recess left in the (brick) wall fabric. (If not required when it comes to installation the horns on the new frame can simply be sawn off or cut down to suit). Finally, horns also help protect the frame | ||
| + | during construction, storage and transportation. | ||
| + | |||
| + | [[image:FrameWithHorns.jpg|800px]] | ||
The final stage before assembly is to cut the rebate with the router. The actual width of the rebate will need to be set for your particular door thickness. A minimum depth of 1/2" is recommended. The rebate on the jambs is a straightforward rebate along the full length of the inner rear side of the frame. | The final stage before assembly is to cut the rebate with the router. The actual width of the rebate will need to be set for your particular door thickness. A minimum depth of 1/2" is recommended. The rebate on the jambs is a straightforward rebate along the full length of the inner rear side of the frame. | ||
| Line 29: | Line 37: | ||
The rebate for the top rail is a stopped rebate - i.e. it does not extend to the full width of the rail, and instead stops a distance from the ends of the rail equal to the thickness of the jambs minus the depth of their rebate. | The rebate for the top rail is a stopped rebate - i.e. it does not extend to the full width of the rail, and instead stops a distance from the ends of the rail equal to the thickness of the jambs minus the depth of their rebate. | ||
| + | ===Adding rebate=== | ||
[[image:FrameRailRebate.jpg|800px]] | [[image:FrameRailRebate.jpg|800px]] | ||
| + | ==Result== | ||
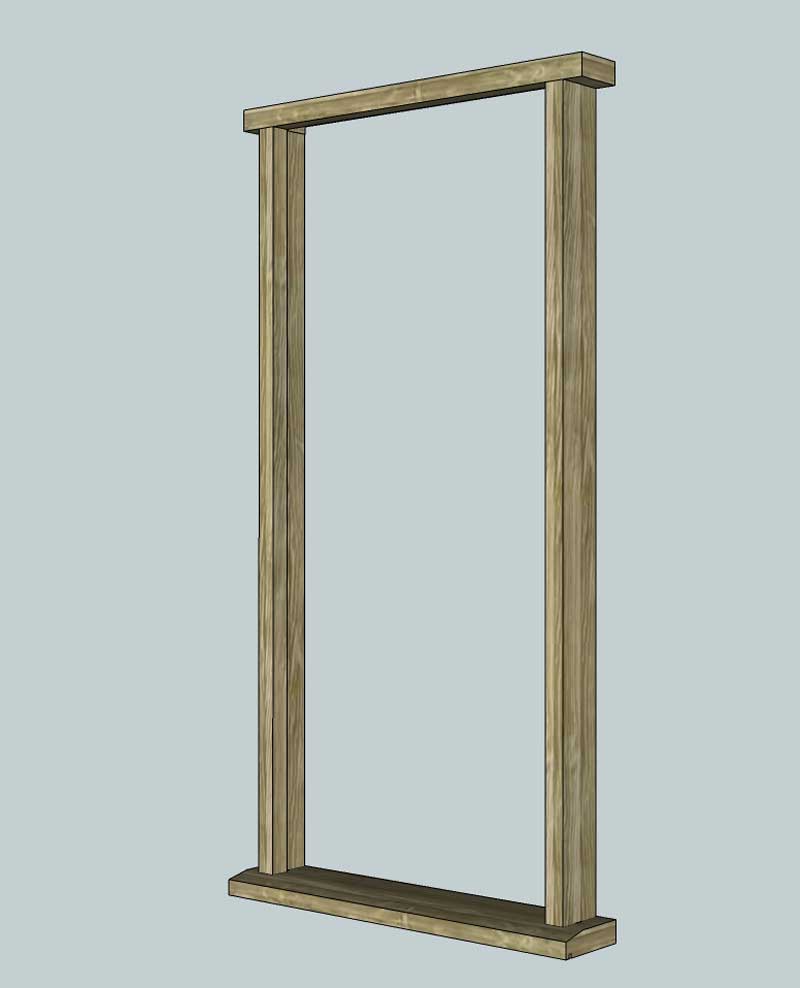
The finished result when glued up and assembled should look something like: | The finished result when glued up and assembled should look something like: | ||
[[image:FrameAssembledWithRebates.jpg|800px]] | [[image:FrameAssembledWithRebates.jpg|800px]] | ||
| − | |||
==See Also== | ==See Also== | ||
Revision as of 17:02, 6 September 2011
Work in progress...
Introduction
This article describes one of a number of techniques for making an external door frame. Unlike a normal internal frame or door lining, an external frame needs of more substantial construction, and for security needs to have moulded door stops built into the frame, rather than supplementary door stops applied after installation.
Tools
This design will suit someone with access to basic hand tools and a router. A mortising machine will speed up construction but is not essential. A circular saw or table saw would be handy if making the (optional) threshold rail.
Materials
For the two door jambs, you will need 100x50mm stock, and the same for the top rail. A bottom threshold rail may or may not be required. If it is then this should be made from 150x50mm stock. Wood can be hardwood or softwood depending on requirements.
Procedure
Making the threshold
If a threshold rail is required, this needs a bevel cut on the leading edge, and ideally a grove on the underside of the outside lip, to act as a drip bead. Machining is ideally done on a table saw, however a hand held circular saw will also suffice.
Making jambs and top rail
Next mark out the mortice and tenon joints on the ends of the rails (top end only if not using a threshold rail). The tenon here is 1/2" thick, and inset from the back and the outside of the jamb by 1/2" also. This allows more material toward the front and inside of the fram to allow for the rebate.
Cut the tenons either using a saw or your router. (see large tenon jig for one option)
Cut the mortices either by drilling away most of the waste and squaring up with a chisel (see the technique illustrated here) or using a mortising machine with a half inch chisel.
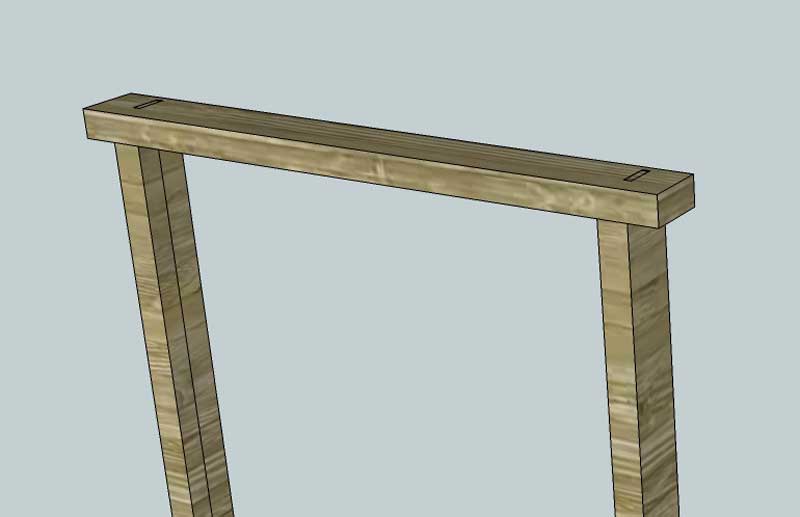
It is also common to cut the top rail (and sometimes the bottom threshold) a little wider than the exact frame size, so as to leave "horns" sticking out from the outside of the frame, such that the assembled unit has 50-75mm of timber protruding horizontally from all four corners. This can help with installation into 'rough' openings where the sides are not perfectly perpendicular or material has fallen away during removal of the old frame. The jambs can then be 'packed out' where required and fixed through the packing. A lot of old frames were fitted with 'horns' on them, so there is often a recess left in the (brick) wall fabric. (If not required when it comes to installation the horns on the new frame can simply be sawn off or cut down to suit). Finally, horns also help protect the frame during construction, storage and transportation.
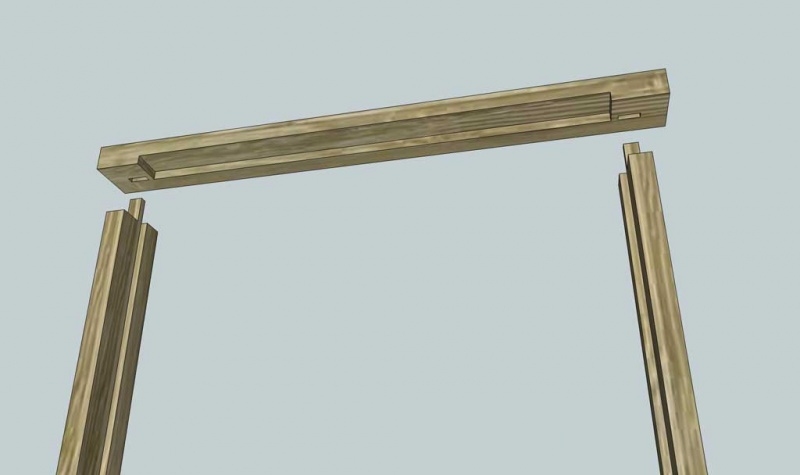
The final stage before assembly is to cut the rebate with the router. The actual width of the rebate will need to be set for your particular door thickness. A minimum depth of 1/2" is recommended. The rebate on the jambs is a straightforward rebate along the full length of the inner rear side of the frame.
The rebate for the top rail is a stopped rebate - i.e. it does not extend to the full width of the rail, and instead stops a distance from the ends of the rail equal to the thickness of the jambs minus the depth of their rebate.
Adding rebate
Result
The finished result when glued up and assembled should look something like:

