Making equally spaced cuts
Introduction
This article describes a simple technique that can be used on a router table or a table saw to produce repeated cuts with perfect spacing. This allows decorative work like the production of detil mouldings, or joinery work like producing comb or box joint fingers.
Setup
To setup for repeat cuts you need some form of fence that will travel perpendicular to your cutter - so a mitre fence for a table saw or router table, or perhaps a sledge for a table saw.
Steps:
- Install a cutter or the required cut size (or with a table saw, shim and fit a dado blade to create the required kerf).
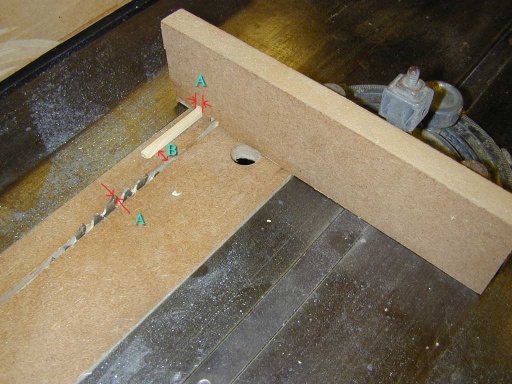
- place a sacrificial fence onto the guide, extend it beyond the cutter / blade position and make a cut partly through it. This will create a notch to which we will fit the spacer key. The notch will be an exact match for the cutter width.
- Cut a key from some scrap that is a snug fit for the notch, and glue it into place in the notch.
- Now fix the sacrificial fence to the guide. The distance (shown as B on the photo above) will dictate the spacing between cuts
If you make the distance between cuts identical to the width of the cuts, then you now have all you need to make interlocking finger or box joints - a very quick and easy way of making strong corner joints in cases, boxes, and drawers.
Making the cuts
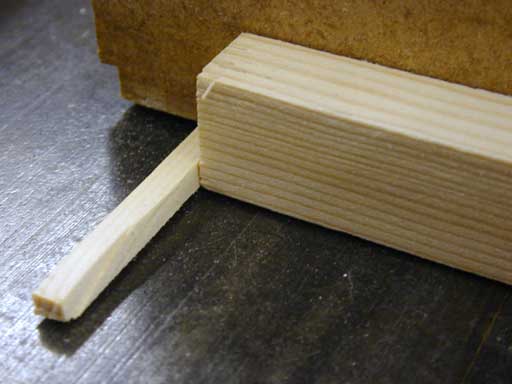
Slide the stock upto the key, and make the first cut:
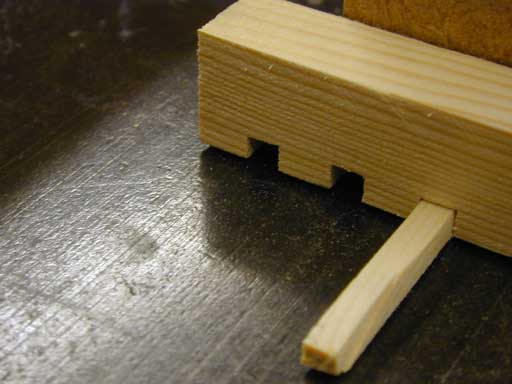
Then lift the stock and place the cut over the key, and make the next cut. Each cut is then used to provide an index for the next:
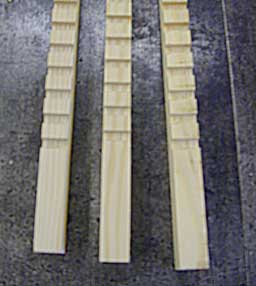
When making decorative mouldings, you can use a much wider section of stock than that ultimately required, so it can then be ripped down to create multiple lengths of the notched moulding.
Notes
A table saw with dado set is probably the most flexible setup for this work, but a radial arm saw or even a sliding compound mitre saw would also work if it has a trenching capability.
Not all table saws have the required arbour length to allow a full dado stack to be fitted, however smaller cuts can be made by fitting a pair of normal blades at once - just take care to alight the teeth so that they don't catch on each other. That will allow 1/4" to 3/8" cuts to be made in a single pass on most table saws.


