Difference between revisions of "Pipe repair"
(more on options later) |
(asstd) |
||
| Line 12: | Line 12: | ||
Parts & [[tools]] - a couple of fairly big [[screwdriver]]s were also used as levers to move the [[pipe]] a tiny bit so the [[nut]] could turn. | Parts & [[tools]] - a couple of fairly big [[screwdriver]]s were also used as levers to move the [[pipe]] a tiny bit so the [[nut]] could turn. | ||
| − | You should be able to do it without spare olives, but I've had enough incidences of needing a new olive to | + | You should be able to do it without spare olives, but I've had enough incidences of needing a new olive to take spares. |
First drain the pipework. | First drain the pipework. | ||
| − | * If its mains cold water, turn off the main stopcock and open a tap | + | * If its mains cold water, turn off the main stopcock and open a tap lower than the damaged area. |
| − | * In this case its a central heating circuit, so a garden hose was pushed onto a draincock on the central heating (dip hose end in boiling water then it pushes on easily), and the drain point was opened until pressure reading dropped to zero. | + | * In this case its a central heating circuit, so a [[garden]] hose was pushed onto a draincock on the central heating (dip hose end in boiling water then it pushes on easily) (CH drain points are somewhere at the lowest level of the CH pipework), and the drain point was opened until pressure reading dropped to zero. |
* If its a hot water feed, turn off main water stopcock and turn on a hot tap below the level of the damage. | * If its a hot water feed, turn off main water stopcock and turn on a hot tap below the level of the damage. | ||
| − | + | Measure pipe diameter and choose your repair option. In this case the pipework could not be moved, limiting the possible choices. A 15mm flexible connector was used. | |
[[image:IMAG2573-3 Mark pipe.jpg|600px]] | [[image:IMAG2573-3 Mark pipe.jpg|600px]] | ||
| − | Mark where to cut the [[pipe]]. Usually a rotating wheel type pipe cutter | + | Mark where to cut the [[pipe]]. Usually a rotating wheel type pipe cutter is used, but here there was no space for one so an oscillating [[saw]] was used. A hack[[saw]] is also possible, but avoid putting force on the pipe by twisting or bending it, distortion of the soft copper can make achieving a seal later problematic. |
| − | Olives won't fit onto a sawn [[pipe]] end, so the pipe ends were filed to remove any external burr. This required getting the file in at a few odd angles. | + | Olives won't fit onto a sawn [[pipe]] end due to the burr, so the pipe ends were filed to remove any external burr. This required getting the file in at a few odd angles. |
[[image:IMAG2575-3.jpg|600px]] | [[image:IMAG2575-3.jpg|600px]] | ||
| − | Slide [[nut]] then olive on | + | Slide [[nut]] then olive on. |
[[image:IMAG2576-3.jpg|600px]] | [[image:IMAG2576-3.jpg|600px]] | ||
| − | + | The author added linseed [[putty]], a practice not everyone agrees with. Many say you should never use gloop with [[compression fitting]]s because they were designed to be used dry. Choice is yours, fwiw I find they're more reliable on old pipes with putty. There are plumbing specific sealants, and any sealant used on potable (drinking) [[water]] must be a potable sealant. | |
| − | |||
| − | |||
[[image:IMAG2578-3 tighten nut.jpg|600px]] | [[image:IMAG2578-3 tighten nut.jpg|600px]] | ||
| − | Tighten each [[nut]]; the 2nd [[wrench]] | + | Tighten each [[nut]]; the 2nd [[wrench]] is held still to stop the new plumbing rotating. I removed a 2nd [[floor]]board to get enough [[tool]] access. I also cut a quarter inch off the side of one of the [[wood]]en joist notches so the new pipe could move very slightly to enable everything to line up & the nut to turn. |
[[image:IMAG2581-3 pipe repaired.jpg|600px]] | [[image:IMAG2581-3 pipe repaired.jpg|600px]] | ||
| − | + | '''Done!''' | |
This was a [[heating]] system pipe. So refill & repressurise heating according to [[boiler]] instructions. Add [[corrosion inhibitor]] ditto. | This was a [[heating]] system pipe. So refill & repressurise heating according to [[boiler]] instructions. Add [[corrosion inhibitor]] ditto. | ||
| + | |||
| + | Turn everything back on and watch for leaks (wipe the joints dry so you can tell if a fresh drop comes out). | ||
[[Nail]] floorboard back down, then you can repeat the whole process. | [[Nail]] floorboard back down, then you can repeat the whole process. | ||
| − | For an emergency repair you can use a [http://www.kiboshpiperepair.com Kibosh | + | ==Repair options== |
| + | For copper pipe you can use compression, pushfit or solder couplings (endfeed or yorkshire aka solder ring). Small holes can be fixed by soldering copper around them. Solder used on drinking water must be lead free. | ||
| + | |||
| + | For copper pipes you can't move at all you'll need either a flexible connector as shown, or a sliding sleeve repair coupler. | ||
| + | |||
| + | Flexibles like the one shown use reinforced plastic hose. Check ratings before using them on hot water or central heating, often they're not rated for enough pressure or temperature. | ||
| + | |||
| + | For plastic pipe you can use compression, pushfit or solvent weld fittings. | ||
| + | |||
| + | For an emergency repair you can use a leather or rubber patch plus a jubilee clip, or a [http://www.kiboshpiperepair.com Kibosh clamp]. | ||
| + | |||
| + | For wastepipe only its also possible to use a rubber patch plus metal washer (bent slightly to match the pipe) and a cable tie. Don't try this with water under pressure! | ||
| + | |||
| + | ==1970s copper pipe== | ||
| + | Some 1970s copper pipe contained impurities that cause corrosion pinholing. If you're unlucky enough to have such pipe, once one pinhole appears more follow quickly, and the pipe needs replacement. | ||
Latest revision as of 01:09, 30 November 2014
How to repair a leaking pipe - a beginner's guide
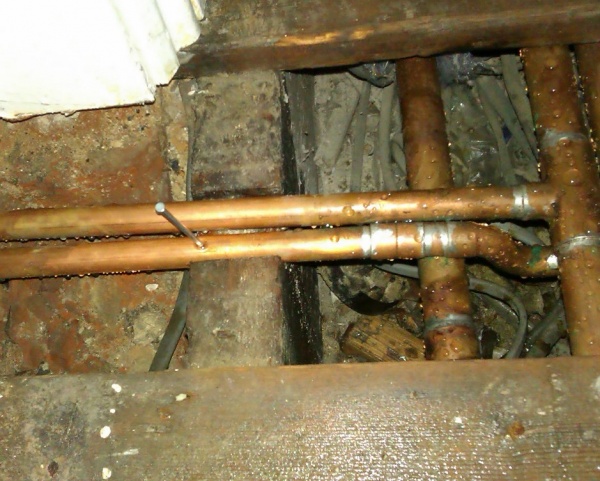
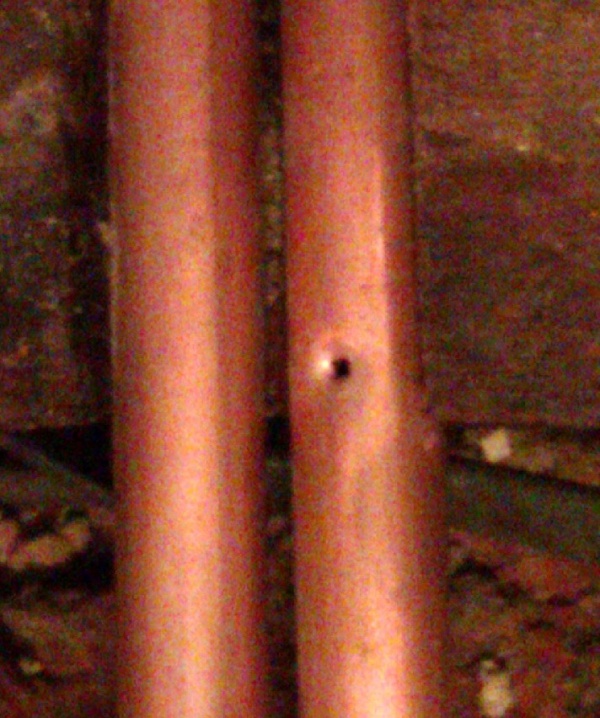
The homeowner decided to install a fountain by wacking a nail through a floorboard and into a pipe.
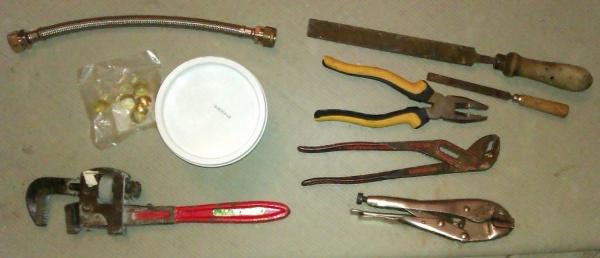
Parts & tools - a couple of fairly big screwdrivers were also used as levers to move the pipe a tiny bit so the nut could turn.
You should be able to do it without spare olives, but I've had enough incidences of needing a new olive to take spares.
First drain the pipework.
- If its mains cold water, turn off the main stopcock and open a tap lower than the damaged area.
- In this case its a central heating circuit, so a garden hose was pushed onto a draincock on the central heating (dip hose end in boiling water then it pushes on easily) (CH drain points are somewhere at the lowest level of the CH pipework), and the drain point was opened until pressure reading dropped to zero.
- If its a hot water feed, turn off main water stopcock and turn on a hot tap below the level of the damage.
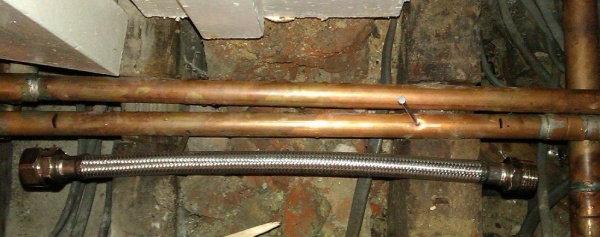
Measure pipe diameter and choose your repair option. In this case the pipework could not be moved, limiting the possible choices. A 15mm flexible connector was used.
Mark where to cut the pipe. Usually a rotating wheel type pipe cutter is used, but here there was no space for one so an oscillating saw was used. A hacksaw is also possible, but avoid putting force on the pipe by twisting or bending it, distortion of the soft copper can make achieving a seal later problematic.
Olives won't fit onto a sawn pipe end due to the burr, so the pipe ends were filed to remove any external burr. This required getting the file in at a few odd angles.
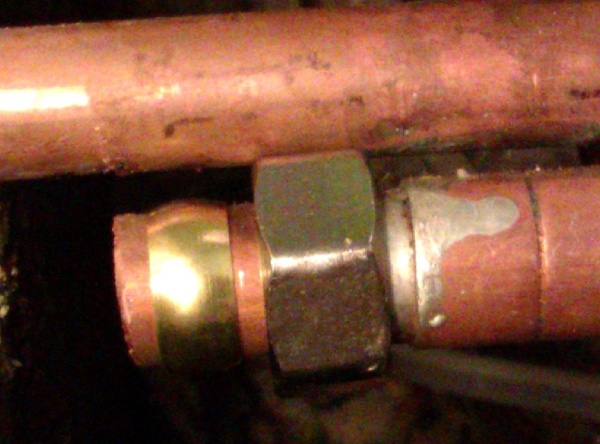
Slide nut then olive on.
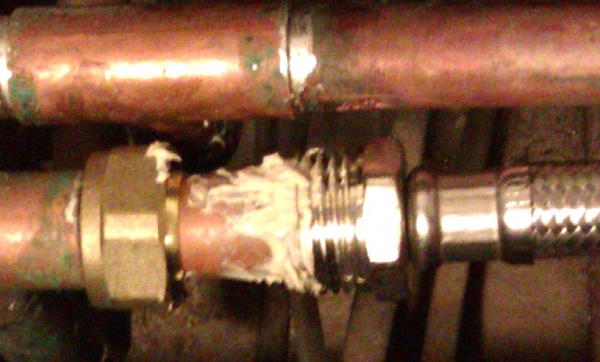
The author added linseed putty, a practice not everyone agrees with. Many say you should never use gloop with compression fittings because they were designed to be used dry. Choice is yours, fwiw I find they're more reliable on old pipes with putty. There are plumbing specific sealants, and any sealant used on potable (drinking) water must be a potable sealant.
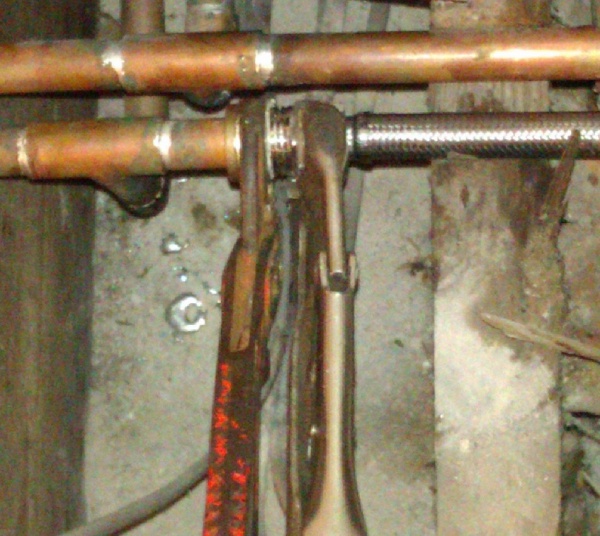
Tighten each nut; the 2nd wrench is held still to stop the new plumbing rotating. I removed a 2nd floorboard to get enough tool access. I also cut a quarter inch off the side of one of the wooden joist notches so the new pipe could move very slightly to enable everything to line up & the nut to turn.
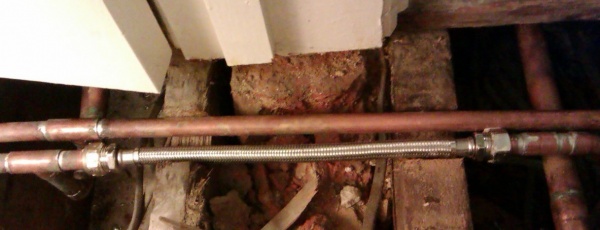
Done!
This was a heating system pipe. So refill & repressurise heating according to boiler instructions. Add corrosion inhibitor ditto.
Turn everything back on and watch for leaks (wipe the joints dry so you can tell if a fresh drop comes out).
Nail floorboard back down, then you can repeat the whole process.
Repair options
For copper pipe you can use compression, pushfit or solder couplings (endfeed or yorkshire aka solder ring). Small holes can be fixed by soldering copper around them. Solder used on drinking water must be lead free.
For copper pipes you can't move at all you'll need either a flexible connector as shown, or a sliding sleeve repair coupler.
Flexibles like the one shown use reinforced plastic hose. Check ratings before using them on hot water or central heating, often they're not rated for enough pressure or temperature.
For plastic pipe you can use compression, pushfit or solvent weld fittings.
For an emergency repair you can use a leather or rubber patch plus a jubilee clip, or a Kibosh clamp.
For wastepipe only its also possible to use a rubber patch plus metal washer (bent slightly to match the pipe) and a cable tie. Don't try this with water under pressure!
1970s copper pipe
Some 1970s copper pipe contained impurities that cause corrosion pinholing. If you're unlucky enough to have such pipe, once one pinhole appears more follow quickly, and the pipe needs replacement.
