Difference between revisions of "Plasterboarding"
(asstd) |
(various) |
||
| Line 2: | Line 2: | ||
==See also== | ==See also== | ||
| − | *[[Sheet Materials#Plasterboard| | + | *[[Sheet Materials#Plasterboard|Plasterboard]] |
*[[Partition_Wall]] | *[[Partition_Wall]] | ||
*[[:Category:Plastering|Plastering articles]] | *[[:Category:Plastering|Plastering articles]] | ||
| Line 16: | Line 16: | ||
==Sheet Size== | ==Sheet Size== | ||
* Sheet sizes are commonly 2.4 x 1.2m (aka 8ft by 4ft, most usual size), and 1.8m x 0.9m (6x3) (for easier handling, especially on ceilings). Trying to use whole 8x4s for ceilings isn't recommended, they're too heavy and big to handle easily. | * Sheet sizes are commonly 2.4 x 1.2m (aka 8ft by 4ft, most usual size), and 1.8m x 0.9m (6x3) (for easier handling, especially on ceilings). Trying to use whole 8x4s for ceilings isn't recommended, they're too heavy and big to handle easily. | ||
| + | |||
| + | Also available are: | ||
| + | * 4' x 3' (1220mm x 900mm) | ||
| + | * 9' x 4' and 10' x 4' boards, very handy with high ceilings. | ||
== Types == | == Types == | ||
| Line 27: | Line 31: | ||
Note: some older types of board had one side designed for [[paint]]ing and one designed for skimming. The approach seems to be less common these days (2009), with one side only designated as the face side. Fit the board the right way around for best results. The facing side has no paper joins or edges, the back has, and often has information printed on it. Its no biggie to use the board the wrong way, it just means more chance of paper peeling and a slightly less consistently finished surface. | Note: some older types of board had one side designed for [[paint]]ing and one designed for skimming. The approach seems to be less common these days (2009), with one side only designated as the face side. Fit the board the right way around for best results. The facing side has no paper joins or edges, the back has, and often has information printed on it. Its no biggie to use the board the wrong way, it just means more chance of paper peeling and a slightly less consistently finished surface. | ||
| − | ==Edge | + | ==Edge shapes== |
* Taper - for filling prior to [[paint]]ing direct. | * Taper - for filling prior to [[paint]]ing direct. | ||
| + | * Recessed edge - also for [[Filler|filling]] with no [[Plaster|skim coat]] | ||
* Square edge - used when a skim coat of [[plaster]] is going to be applied. | * Square edge - used when a skim coat of [[plaster]] is going to be applied. | ||
| − | |||
== Permuations == | == Permuations == | ||
| Line 49: | Line 53: | ||
==Tools== | ==Tools== | ||
Useful [[:Category:Tools|tools]] include... | Useful [[:Category:Tools|tools]] include... | ||
| − | |||
* Utility [[knife]] & blades, or wallpaper [[knives]] | * Utility [[knife]] & blades, or wallpaper [[knives]] | ||
* You can't have too many tape measures. | * You can't have too many tape measures. | ||
| Line 56: | Line 59: | ||
* pointy shaped [[saw]], eg padsaw | * pointy shaped [[saw]], eg padsaw | ||
* Cordless drill or similar for screwdriving | * Cordless drill or similar for screwdriving | ||
| + | * [[Dead man prop]] for plasterboarding ceilings | ||
* Plasterboard [[Hex bits|screwdriving bit]] can help if you're not good at setting screw depth correctly. | * Plasterboard [[Hex bits|screwdriving bit]] can help if you're not good at setting screw depth correctly. | ||
Also nice: | Also nice: | ||
| − | * The [http://www.gyprocbladerunner.com/index.php Gyproc bladerunner] | + | * The [http://www.gyprocbladerunner.com/index.php Gyproc bladerunner] gets a big thumbs up for making board cutting much faster & more accurate. |
* plasterboard rasps with guides | * plasterboard rasps with guides | ||
* [[Oscillating tools|Fein Multimaster]] type tool excellent for doing quick, precise cutouts for sockets. | * [[Oscillating tools|Fein Multimaster]] type tool excellent for doing quick, precise cutouts for sockets. | ||
* Board-lifter handles, and skates/trolleys are useful to manoeuvre boards easier. Both are easily homemade. | * Board-lifter handles, and skates/trolleys are useful to manoeuvre boards easier. Both are easily homemade. | ||
* Laser guide if working on a bigger scale | * Laser guide if working on a bigger scale | ||
| + | * A decent collated screwgun speeds things up enormously | ||
| + | * For curved cuts, a metal-cutting blade in a jigsaw works well. | ||
| Line 90: | Line 96: | ||
All in all it takes less space, and less handling of the board. You also are less likely to damage a board getting in and out of cutting positions. | All in all it takes less space, and less handling of the board. You also are less likely to damage a board getting in and out of cutting positions. | ||
| − | |||
| − | |||
| − | |||
== Fiddly cuts == | == Fiddly cuts == | ||
| Line 111: | Line 114: | ||
* Put enough [[screws]] or [[nails]] in to support the board so it feels firm all over. Every 30cm is a reasonable gauge (you want to avoid any parts of the boards being able to flex significantly if you are going to skim plaster it). Obviously, rafter or [[Stud wall|studwork]] puts limits on screw spacings in one direction. | * Put enough [[screws]] or [[nails]] in to support the board so it feels firm all over. Every 30cm is a reasonable gauge (you want to avoid any parts of the boards being able to flex significantly if you are going to skim plaster it). Obviously, rafter or [[Stud wall|studwork]] puts limits on screw spacings in one direction. | ||
| − | === | + | ===Ceiling work=== |
1.8 x 0.9m x 9mm board is easily handled by two people without additional props. One person should have the [[screwdriver]] at the ready with plenty of screws and be in a position to rest the board on their head periodically whilst reaching for the next screw. Once a couple of well spaced screws are in supporting the whole board, both people can let go and concentrate on getting the rest of the screws in. | 1.8 x 0.9m x 9mm board is easily handled by two people without additional props. One person should have the [[screwdriver]] at the ready with plenty of screws and be in a position to rest the board on their head periodically whilst reaching for the next screw. Once a couple of well spaced screws are in supporting the whole board, both people can let go and concentrate on getting the rest of the screws in. | ||
| Line 118: | Line 121: | ||
* [[Lifting Prop|Plasterboard prop]]. Cheaper ready made solution. | * [[Lifting Prop|Plasterboard prop]]. Cheaper ready made solution. | ||
* [[Dead_man_prop|DIY prop]] or dead man: may be made from a length of wood and a short T bar fixed across the top. | * [[Dead_man_prop|DIY prop]] or dead man: may be made from a length of wood and a short T bar fixed across the top. | ||
| + | * An less common method is to nail a length of rope between a spread of joists, hanging down a little below ceiling level. You can then lift the board overhead, and slide one end into the rope loop. That will then take the weight of one end while you fix the other. | ||
== To brickwork and old plaster == | == To brickwork and old plaster == | ||
| Line 144: | Line 148: | ||
# Wet the board to soften it, fix into place and let it dry | # Wet the board to soften it, fix into place and let it dry | ||
# For greater flexibility use a flexible plasterboard intended for the job | # For greater flexibility use a flexible plasterboard intended for the job | ||
| + | |||
| + | |||
| + | =Plastering= | ||
| + | A gap of about 3-5 mm should be left between boards when fitting. This enables the plaster to squish through to the rear, holding it in place more firmly and reducing cracking and stopping plaster falling out. | ||
| + | |||
| + | Board joints not supported all along by woodwork are inevitable, but should be minimised. These are by far the weakest part of any plastered wall or ceiling, and most likely to crack. | ||
| + | |||
| + | [[Tapes|Plasterboard joint tape]] is put over the joint before the plaster or filler is applied. This is an open mesh tape of plastic or fibreglass, and it reinforces the plaster joint to prevent cracking or pieces falling out. | ||
| + | |||
| + | There are 2 plastering options: | ||
| + | # full skim coat covering the whole area. Excellent result, but significant work & skill | ||
| + | # Fill the edge gaps only. Good result, much less work, less skill needed | ||
| + | |||
| + | When a joint fill only is used, wiping the filler/plaster on with a float makes for a fast job. | ||
| + | |||
| + | Its also an option to just stick paper tape over the joints, and no plaster, but this is only really suitable for locations like garages where a good finish is not required. | ||
| + | |||
Revision as of 02:39, 28 February 2011
General plasterboarding information, tips and tricks
See also
- Plasterboard
- Partition_Wall
- Plastering articles
- With thanks to the contributers at uk.d-i-y Usenet group, original thread here: [1]
Thickness
- Common thicknesses are 9.5mm and 12.5mm.
- 9mm is a good choice for ceilings, where extra weight would make the job harder
- 9 is not very robust for wall use, 12 is a good deal tougher for very little more cost, and its better acoustically.
- 2 layers of PB can be used for extra robustness, better acoustics and longer fire resistance. Sticking the 2 layers together makes them even tougher.
- Thicker sizes, eg 15mm or 18mm exist as well as thinner, eg 6mm.
Sheet Size
- Sheet sizes are commonly 2.4 x 1.2m (aka 8ft by 4ft, most usual size), and 1.8m x 0.9m (6x3) (for easier handling, especially on ceilings). Trying to use whole 8x4s for ceilings isn't recommended, they're too heavy and big to handle easily.
Also available are:
- 4' x 3' (1220mm x 900mm)
- 9' x 4' and 10' x 4' boards, very handy with high ceilings.
Types
- Plain - paper both sides. Usually beige or grey in colour. Most PB is this type
- Vapour barrier or vapour check - usually with a metallised plastic film (which may degrade radio signals such as cordless telephones or Wifi).
- Fire check - usually pink in colour
- Moisture shield - for areas of high humidity, usually green.
- Sound block or acoustic plasterboard - usually blue.
- Various combinations of the above properties, dependant on manufacturer.
Note: some older types of board had one side designed for painting and one designed for skimming. The approach seems to be less common these days (2009), with one side only designated as the face side. Fit the board the right way around for best results. The facing side has no paper joins or edges, the back has, and often has information printed on it. Its no biggie to use the board the wrong way, it just means more chance of paper peeling and a slightly less consistently finished surface.
Edge shapes
- Taper - for filling prior to painting direct.
- Recessed edge - also for filling with no skim coat
- Square edge - used when a skim coat of plaster is going to be applied.
Permuations
Not every permutation of edge, type, size and thickness are available so you should check with your local supplier before committing to a particular design.
Building regulations
For certain applications, you may need to meet certain levels of fire resistance or acoustic performance. For now, this is an area too involved to cover here, so please seek the advice of your local Building Control department at your Borough/District Council if you have any doubts.
Sometimes you may be asked to fit two overlapping layers of plasterboard with staggered joints to allow longer fire resistance times.
Otherwise, use 9.5mm for ceilings and 12.5mm for walls as a sensible default, in whatever sheet sizes are most convenient.
Cables & pipes
Screwing into them is less than ideal. Photographing the studwork before you put the boards on gives you a record of pipe & cable runs.
Steel plates are cheaply available to protect pipes & wires where they pass through uprights. It takes little effort to fit them before boarding.
Tools
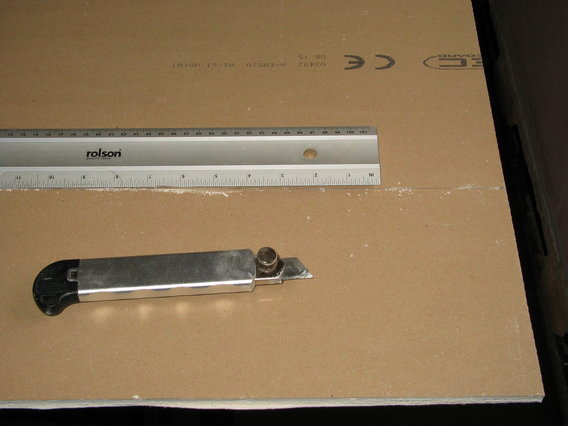
Useful tools include...
- Utility knife & blades, or wallpaper knives
- You can't have too many tape measures.
- as long-as-possible metal ruler, ideally 1-2m - but a large spirit level or even a straight piece of timber can substitute
- big tee square (or a hardboard offcut will do)
- pointy shaped saw, eg padsaw
- Cordless drill or similar for screwdriving
- Dead man prop for plasterboarding ceilings
- Plasterboard screwdriving bit can help if you're not good at setting screw depth correctly.
Also nice:
- The Gyproc bladerunner gets a big thumbs up for making board cutting much faster & more accurate.
- plasterboard rasps with guides
- Fein Multimaster type tool excellent for doing quick, precise cutouts for sockets.
- Board-lifter handles, and skates/trolleys are useful to manoeuvre boards easier. Both are easily homemade.
- Laser guide if working on a bigger scale
- A decent collated screwgun speeds things up enormously
- For curved cuts, a metal-cutting blade in a jigsaw works well.
Cutting plasterboard
There are three basic types of cut most commonly needed:
Straight cut across full board
- Used all the time when boarding large areas
- Very easy and clean to do.
- Place board across a couple of supports (eg sawhorses, workmates or even lumps of timber or bricks if nothing else to hand). Be sure the board is well supported near the new cut and stable.
- Mark the cut line
- Score through the paper layer on one side of the board with a sharp stanley type knife. A couple of lighter strokes are better (and safer) than applying serious pressure. Always work the knife away from your body and hands - it's very easy for the knife to slip.
- Position the board so that one of the supports runs parallel and just behind the score line.
- Put the knife away(!)
- Using both hands (better two people, if the cut is long, eg 2.4m board), gently rotate the board edge downwards. The board should snap cleanly along the scored line.
- The cut section of the board will continue to hang on the layer of cardboard on the back. Do not attempt to rip by tearing the cut section off - it will make a mess.
- Retrieve the knife and whilst supporting the cut section at 45-90 degrees, simply cut through the remaining paper. The result should be a clean straight edge, mostly square with almost no dust.
- If desired the edge may be cleaned up with sandpaper, a coarse file, a coarse hand stone (this bit makes some mess) or a knife.


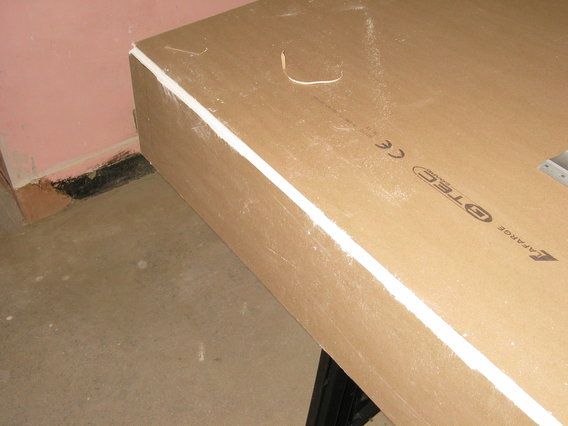
Alternative method requiring less space and handling
(Copied with edits, with thanks to the original author)
- Have the board vertical, leaning against a wall.
- Use a metal straight edge (long level typically), mark two points and align the level holding the bottom of it with your foot, and the top with one hand, then score with the other.
- Snap the board by hitting it in the middle of the back of the cut, and separate.
All in all it takes less space, and less handling of the board. You also are less likely to damage a board getting in and out of cutting positions.
Fiddly cuts
- You'll need a narrow bladed saw, such as a padsaw, or a knife. A hacksaw blade in a holder will suffice for small works.
- For extended work or cutting square holes for lightswitches, proper plasterboard saws are available which have pointy ends for piercing the board and coarse teeth.
Removing a rectangular section from a corner or edge can be done with a combination of sawing and scoring for the final cut, or with a knife.
Fixing plasterboard
To wood (eg ceilings and wooden studwork)
- The sheets may be screwed (best) or nailed (old fashioned method, not so good as nails can loosen) directly to the studwork or ceiling rafters.
- For nailing, plasterboard nails are needed, though the consensus on uk.d-i-y is that they are nowhere near as good as using screws.
- For screwing, use purpose made drywall screws. These have a continuous thread, bugle head (designed not to tear the paper which weakens the fixing), a very sharp point for self drilling, a thin shank for easy pilotless insertion, and are not liable to corrode. On the end of a small cordless electric screwdriver, these generally go in single handed, quickly and securely. The heads become "lost" in the surface of the plasterboard. Non-PB screws make a mess of the plasterboard, and create a weaker fixing
- Purpose made driver bits are available that help to prevent the screw going in too deep.


- Be aware if you are screwing or nailing over an area with low support (eg a hole in the previous plasterboard that you are covering. The screws can crack small sections of your new board especially near the edge.
- Put enough screws or nails in to support the board so it feels firm all over. Every 30cm is a reasonable gauge (you want to avoid any parts of the boards being able to flex significantly if you are going to skim plaster it). Obviously, rafter or studwork puts limits on screw spacings in one direction.
Ceiling work
1.8 x 0.9m x 9mm board is easily handled by two people without additional props. One person should have the screwdriver at the ready with plenty of screws and be in a position to rest the board on their head periodically whilst reaching for the next screw. Once a couple of well spaced screws are in supporting the whole board, both people can let go and concentrate on getting the rest of the screws in.
Working single handedly is also possible using a prop. A variety of tools are available or can be made:
- Plasterboard lifters Google search. Expensive and generally used by contractors on large projects, but also hireable.
- Plasterboard prop. Cheaper ready made solution.
- DIY prop or dead man: may be made from a length of wood and a short T bar fixed across the top.
- An less common method is to nail a length of rope between a spread of joists, hanging down a little below ceiling level. You can then lift the board overhead, and slide one end into the rope loop. That will then take the weight of one end while you fix the other.
To brickwork and old plaster
Board is often fixed using blobs of drywall adhesive Google search at regular intervals.
(Copied mostly verbatim with thanks to the original author)
D&D (Dot and Dab) is used on newbuild as well as old plaster and brickwork, certainly on 'thermalite' type blocks, the lightweight insulative ones are only really fit to have D&D as most other plasters won't adhere - even dry lining adhesive (DLA) will only stick to it once it's been damped down, indeed, all surfaces to have D&D should be damped down but thermalite thoroughly due to the high suction.
Mixing DLA is similar to mixing other plaster, except it's more sticky obviously and it should be mixed slightly thicker if you are going over very uneven surfaces, so that you can use huge blobs to get the board out to the desired level, if you mix it too wet, you can't build it out thick enough. Working time is normally 45mins, but it can last longer.
Make sure the wall to be lined is free from nails, screws and other protusions and any old plaster is sound. Flaky or loose plaster should be removed, as should any old wallpaper, and painted surfaces should be scored with a blade or scrabbler to form a key, and a coat of dilute (1:1) PVA and water applied prior to work commencing - it doesn't matter if this is wet or left to dry, brick or blockwork just requires wetting with plain water as mentioned above.
Some people apply the DLA to the wall and others apply it to the back of the board, personally I prefer to apply it to the wall because a board can get very heavy with two dozen blobs of DLA on the back of it so I will describe this method.
Only apply the DLA to the part of the wall which is to be covered by one board (you may need to measure) and using a gauger or small trowel apply snowball sized blobs to the wall about every 12ins, try to keep the blobs even because large ones will cause a bulge, while very small ones will probably not touch the back of the board.
Once all the blobs are in place, offer the board to the wall, but remember that if you are working on a bare wall, you will need some pieces of scrap timber as spacers at the bottom so that the board is not in contact with the floor, an inch or two is sufficient, this is assuming there is no skirting board already in place. Once the board is in contact with the DLA, use a spirit level (about 3 ft long if you have one) in all directions to make sure the board is not bulging anywhere and then proceed with the blobs for the next board, bearing in mind that on large walls, the joints should be staggered in a similar way to brickwork, this is to avoid long straight joints which are prone to cracking, even though you will still get a long straight joint in one direction, there's no need for two!
(End of contributed material)
This link has some very good pictures: Ultimate Handyman
Curved Plasterboard
There are 2 ways to fit plasterboard to curves.
- Wet the board to soften it, fix into place and let it dry
- For greater flexibility use a flexible plasterboard intended for the job
Plastering
A gap of about 3-5 mm should be left between boards when fitting. This enables the plaster to squish through to the rear, holding it in place more firmly and reducing cracking and stopping plaster falling out.
Board joints not supported all along by woodwork are inevitable, but should be minimised. These are by far the weakest part of any plastered wall or ceiling, and most likely to crack.
Plasterboard joint tape is put over the joint before the plaster or filler is applied. This is an open mesh tape of plastic or fibreglass, and it reinforces the plaster joint to prevent cracking or pieces falling out.
There are 2 plastering options:
- full skim coat covering the whole area. Excellent result, but significant work & skill
- Fill the edge gaps only. Good result, much less work, less skill needed
When a joint fill only is used, wiping the filler/plaster on with a float makes for a fast job.
Its also an option to just stick paper tape over the joints, and no plaster, but this is only really suitable for locations like garages where a good finish is not required.