The never ending patio rebuild
A long rambling saga that started with a gust of wind...
Introduction
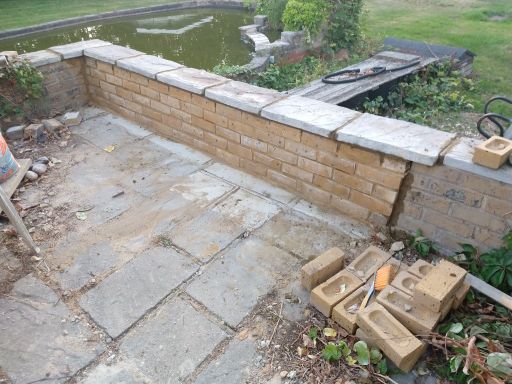
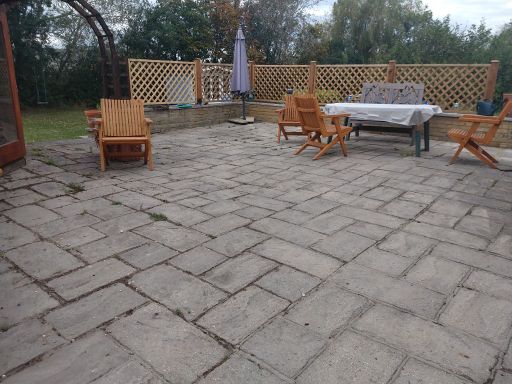
Our patio is a fairly substantial affair, that was created by the previous owners of the house to address a number of issues. One to cope with the reasonably high drop from the house floor level to the outside ground level, and possibly also as a place to "hide" a large quantity of spoil dug out in the creation of a large pond! (this last bit is conjecture - maybe they really wanted over 70 sq m of patio space).
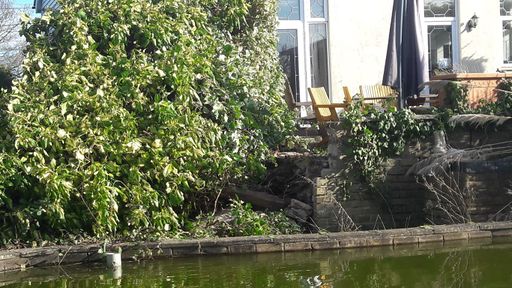
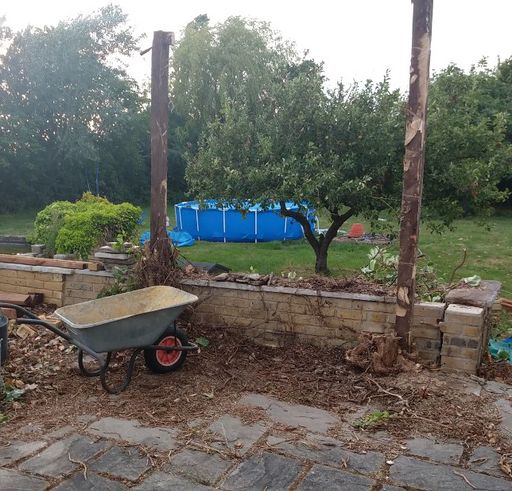
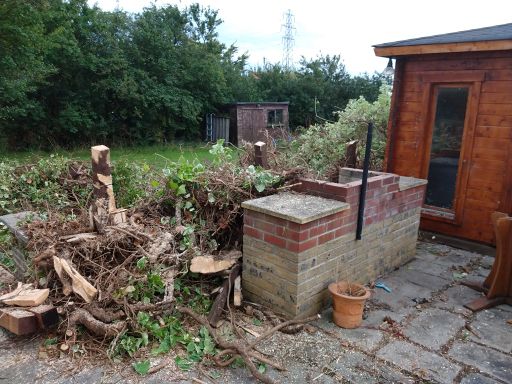
So, to the gust of wind; early in 2020 there were a couple of hurricane force winds. One coming from an unusual direction for these parts, and as a casualty it claimed a tall hedge. Now when I say tall, it was over 3m at this point. Construction was a fairly elaborate wooden trellis system supported on 4 fence posts, and then a mass of ivy and other evergreen shrubbery. So in the wind, a post snapped, and another fell over. The problem here being that these posts were set into the edge of the patio on the inside of a dwarf wall. So when the hedge fell over, so did the wall, and we were greeted by this leaning tower of green, with a wall under it somewhere.
So here is where the tale begins.
Setting the scene
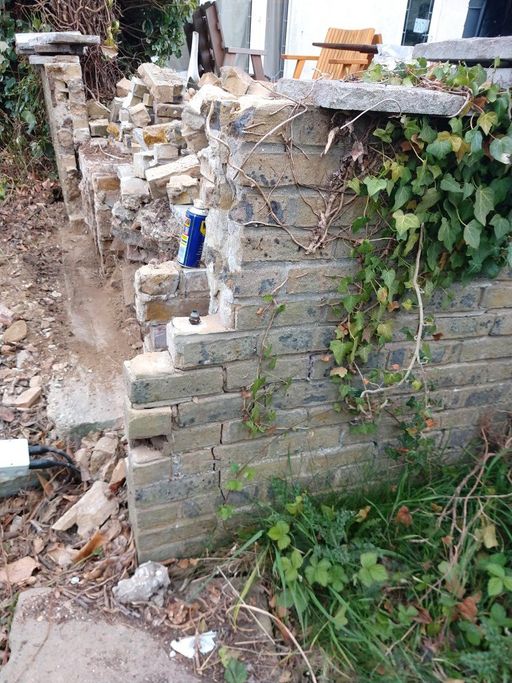
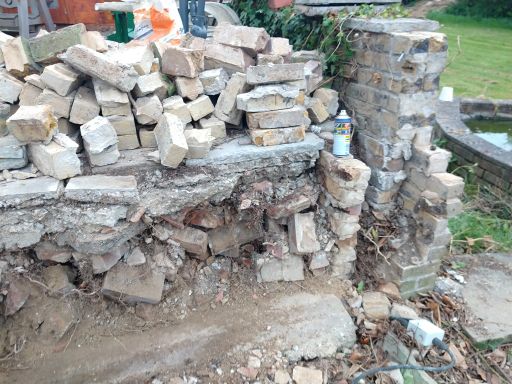
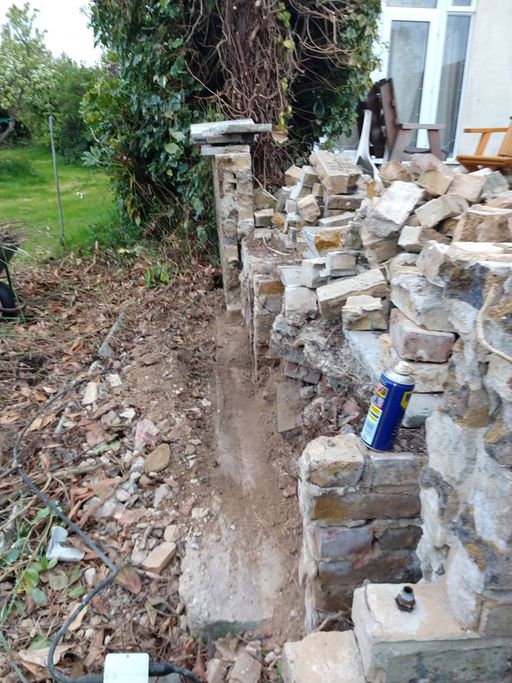
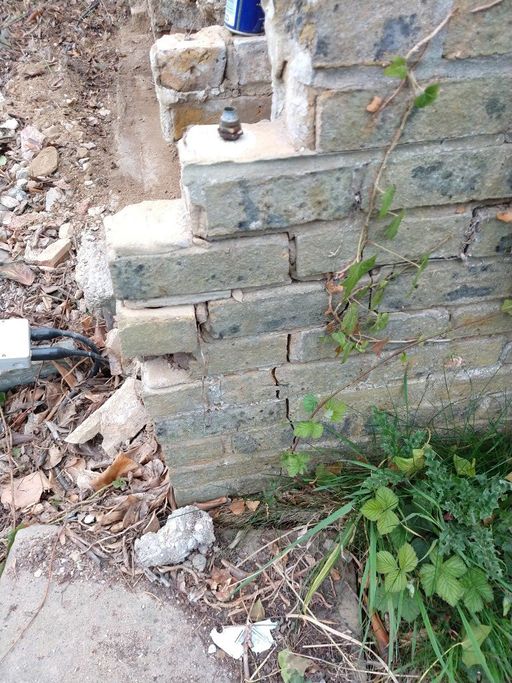
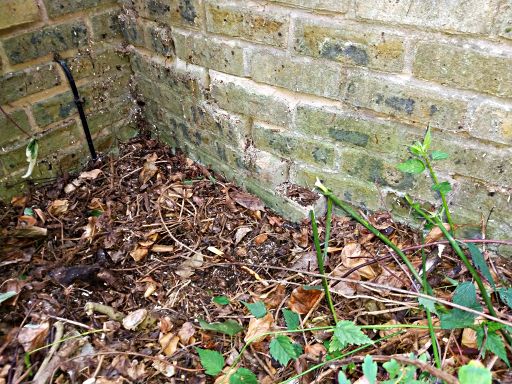
Fallen over
At the time it was too cold and wet, and beyond observing a there was now a large section of missing hedge, and wall to boot, that was about the end of the investigation! Warmer drier weather was awaited.
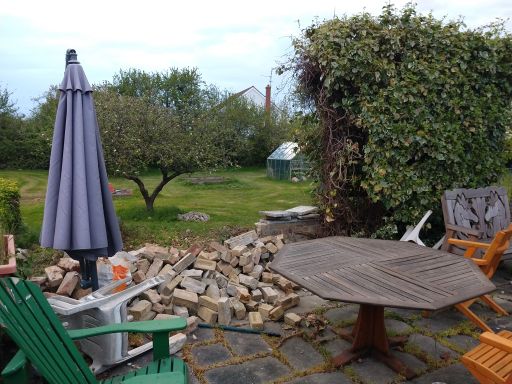
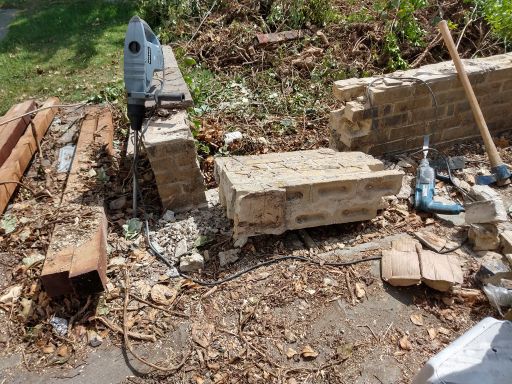
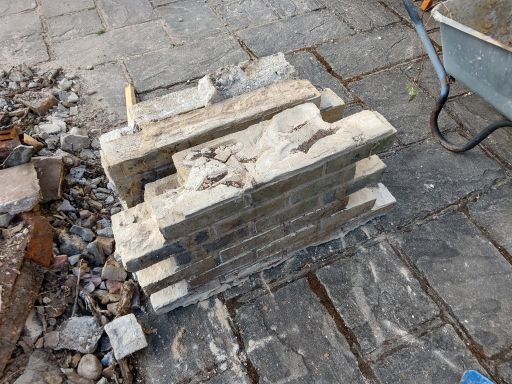
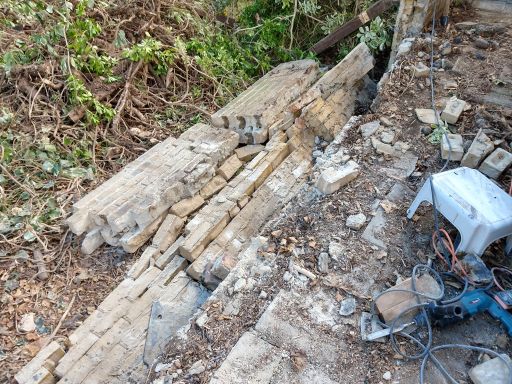
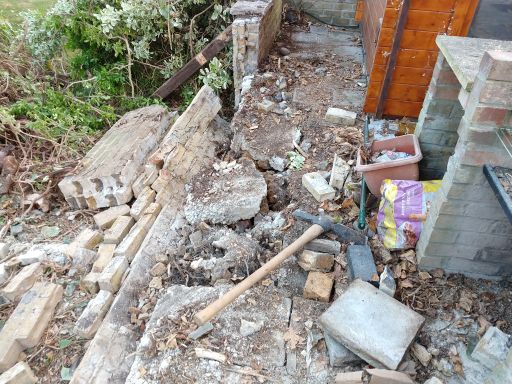
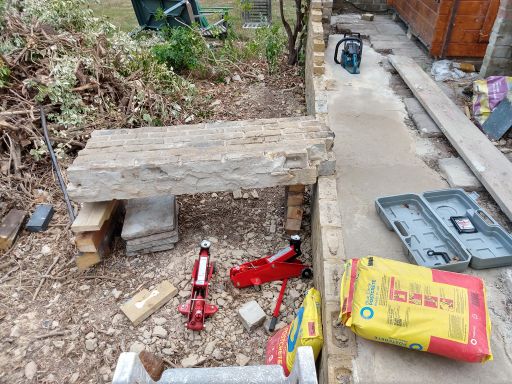
So after a couple of months it warmed up enough to get stuck in. The hedge cleared and dumped on the bonfire, we were left with a now horizontal wall in a few large sections. Setting about that with a chisel in a SDS Max drill turned that into a pile of bricks. To have any chance of re-using the bricks they all needed cleaning up and separating from the mortar still attached to most of them. So the Masonry cutting sawbench was concocted, and that made a fairly quick job of that.
Plan of action
The obvious bit was to rebuild the wall, however there were other changes that were due. Firstly those hedges to each side of the patio. They were impossible to maintain, and too overbearing, blocking all views to the sides.
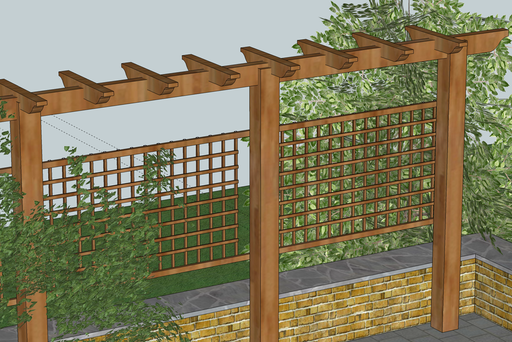
The construction of the trellis was such that it made it near enough impossible to trim the top of the hedge from the ground - even with a long reach hedge trimmer, there were cunningly placed horizontal beams at the top that made it difficult to get in and actually cut anything (to be fair it probably looked quite nice when covered with only sparse vegetation, but by the time it was an impenetrable wall of green leaf it was far less attractive). It probably used to look like:
You can see the end of the top beam poking out in this photo
Previously I had to put up a scaffold tower to get up level with the top, then long reach tools to get into the 5 to 6' depth of hedge to trim it. Needless to say it did not get done often enough. Also there was the worry that the root system of the hedge was going to cause damage to things around it.
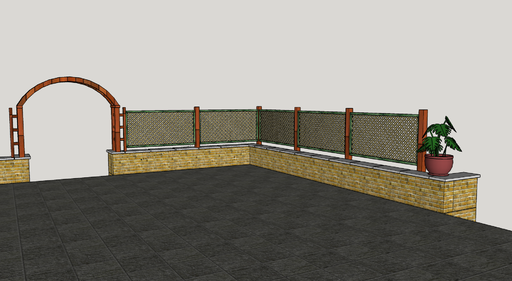
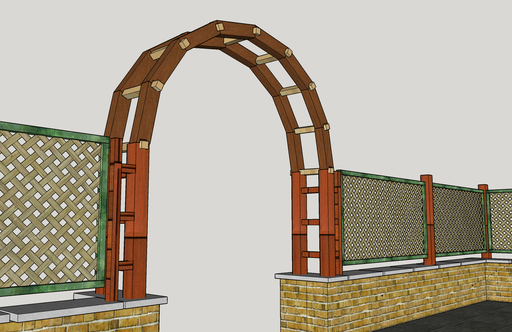
So we decided we needed to not only fix the broken bit, but do away with the tall hedges and replace them with something more attractive and manageable. That led to the inevitable sketch up model:
The idea being a barrier tall enough to screen you when sat down, but still let some light through, and allow a view out over the rest of the garden when standing. So a finished level of about 1.4m was decided.
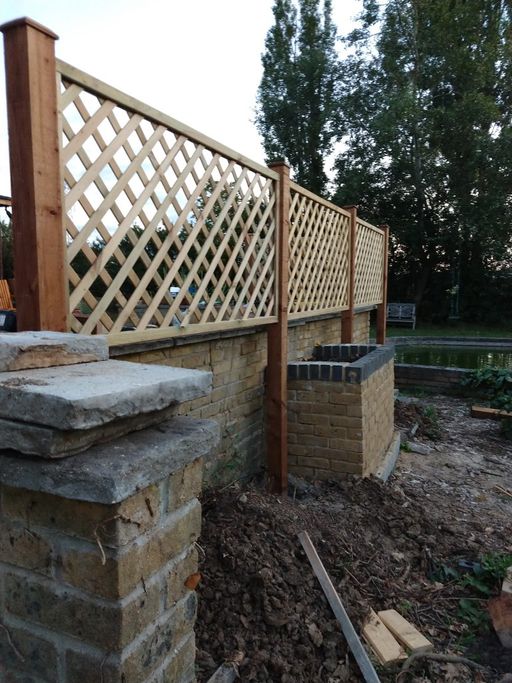
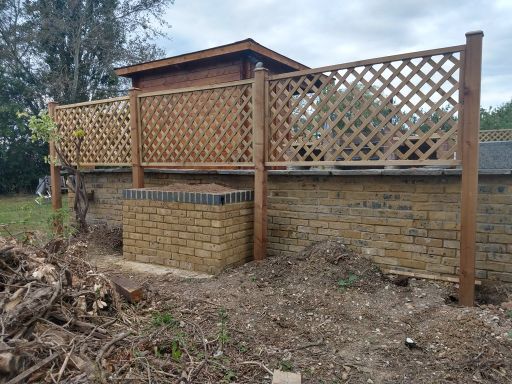
So all that remained was to fix the broken wall, repair any other bits that looked dodgy, and take the hedge and trellis out of the patio altogether. Stick a new trellis outside the perimeter, fixed into the ground, and create some purpose made raised beds well away from the house to accommodate something pretty and climbing that can then be trained over the new trellis.
Simple enough...
Odd Construction
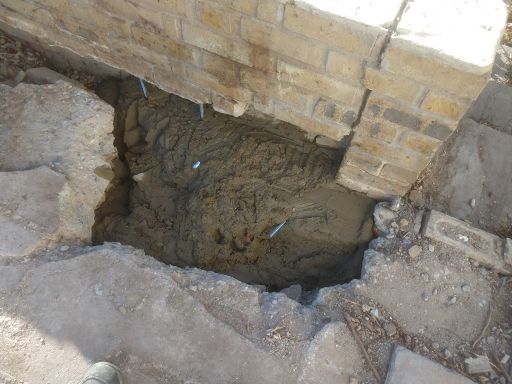
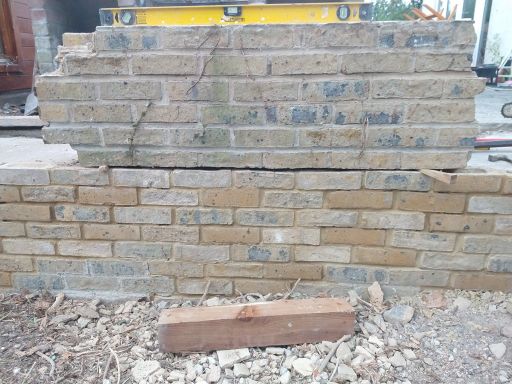
Closer inspection of the wall, revealed a slight oddity to its construction - it only had one leg! It seems that a "half brick" thick retaining wall had been built up to the floor level of the patio. Then this was probably back filled and capped in concrete, and the final perimeter wall (now a full brick thickness) built on top of that. Creating what looks like a fairly substantial solid wall from the top, but with only one leaf at the bottom. As the patio had settled a little over the years, the inner course of bricks were in some places now held up by thin air.
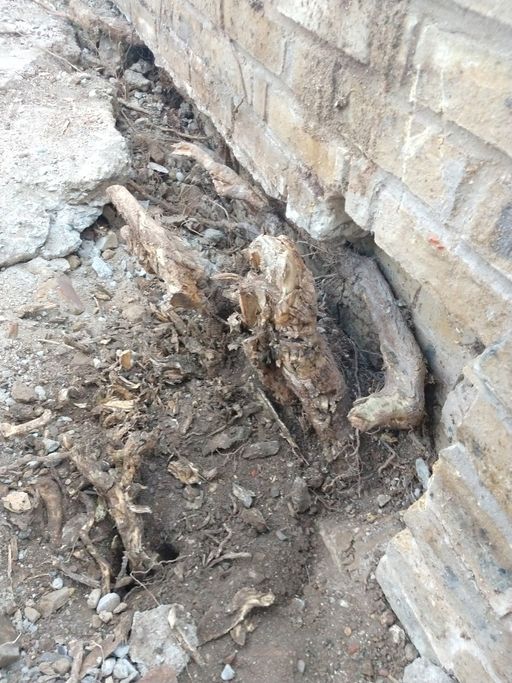
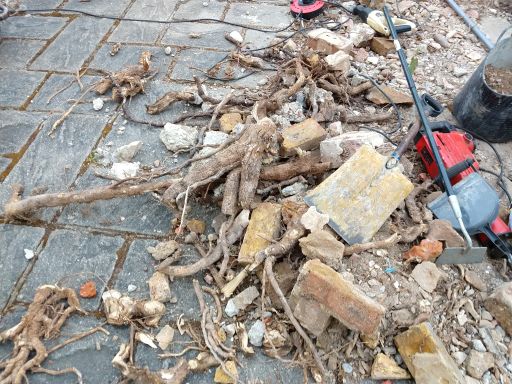
It was also noticeable just how much root there was stuck into the fabric of it all. Part of the difficulty being the original builder had only allowed a small 9" cross section pit at three points as beds of soil to grow the hedge in. Needless to say as that grew so did its roots, and when push came to shove, they were not going to stop in their allocated space. The easiest thing to push out the way at that point being the wall.
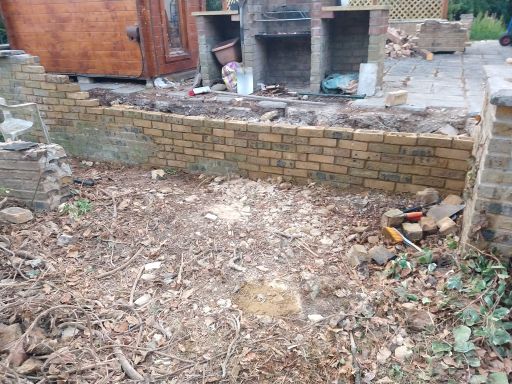
Not looking too bad
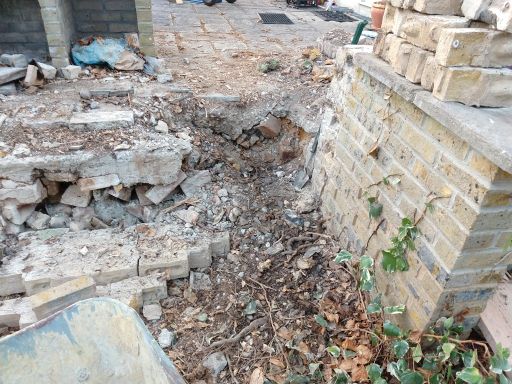
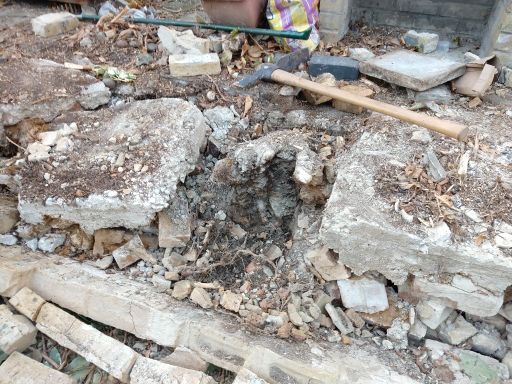
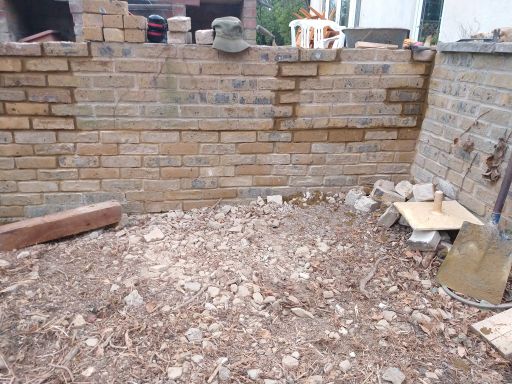
Having got the old wall cleared, and the foundation exposed, we could see that the remaining section of wall, had a slight lean, but not too much. It might even be possible to straighten a bit.
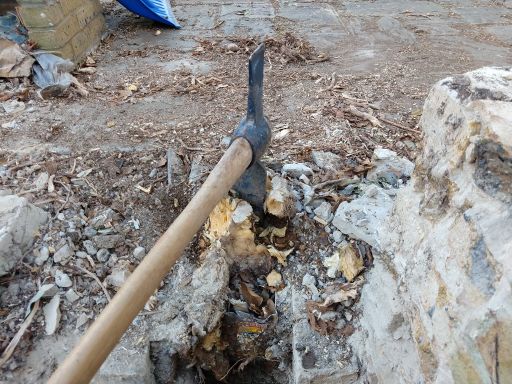
So next job was shifting all the roots
Rebuilding the wall
So June is upon us, the evenings are long, and so I can spend two to three hours a night on this after work (even if it does mean getting too well acquainted with the local mosquitoes!)
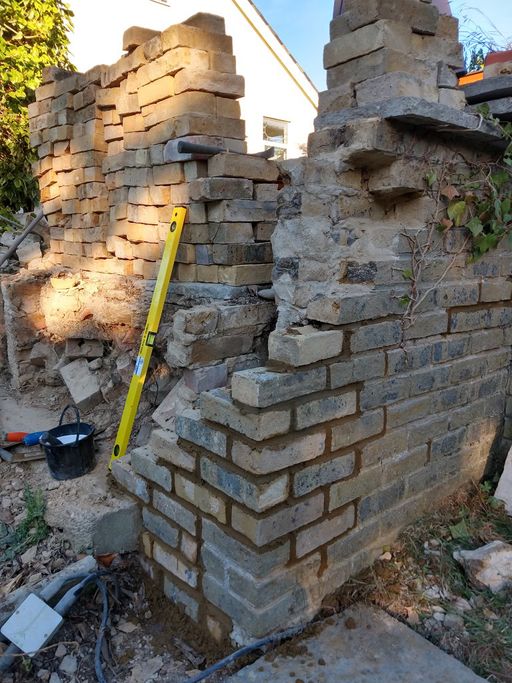
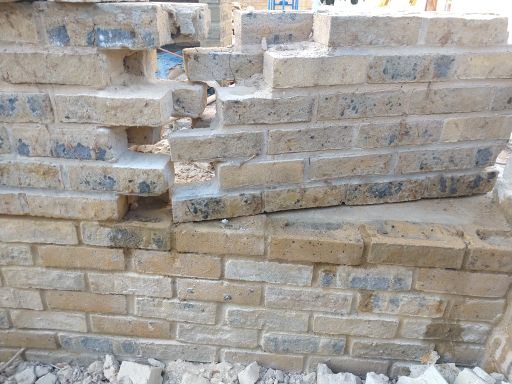
First bit to fix was the corner - that had lots of broken half bricks still stuck in it, and a few cracked whole ones.
Editors note: from here on there will be lots of talk of brickwork. This would be a good time highlight that I am a novice bricklayer, so please don't take anything here as a suggestion of best practice! If anything just take away the knowledge that having almost no bricklaying experience, you can still get usable results, and by the end if it you may not be so bad any more! (also remember this is rustic garden brickwork, not a house)
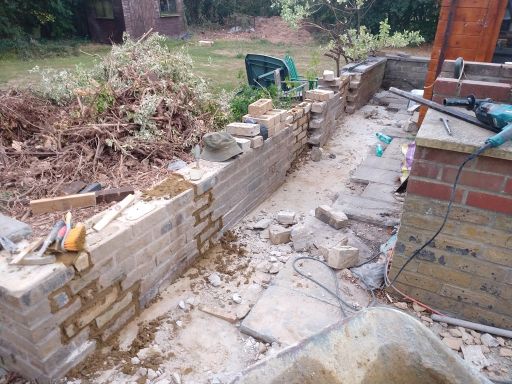
So using a brick removing chisel in the SDS drill, I took out all of those. And started getting the corners in, trying to stay square and plumb:
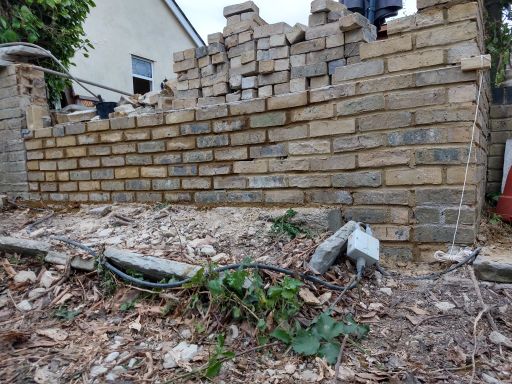
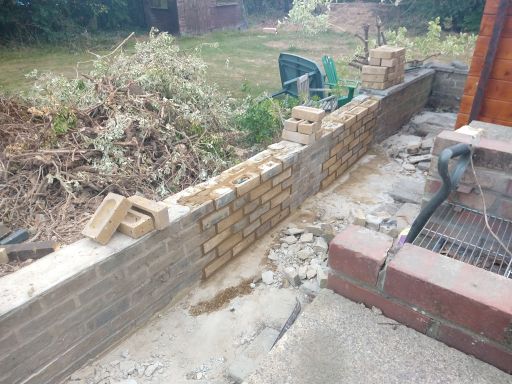
Next the lower bit of the wall:
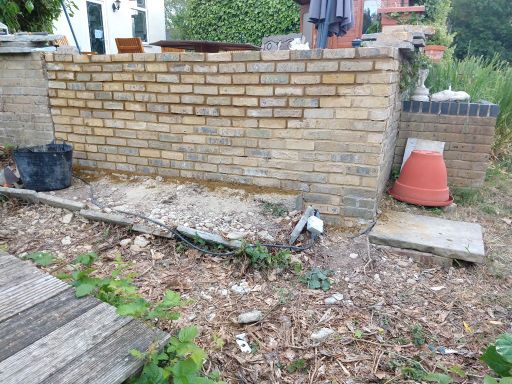
Then finally
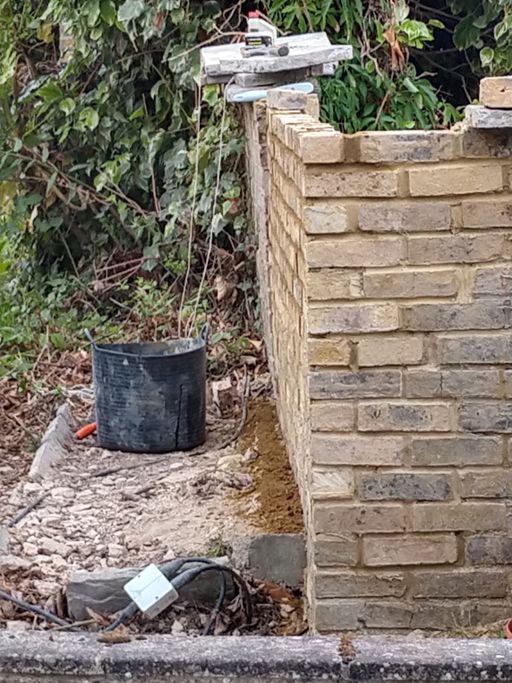
At this point I was realising that the original brickwork seemed to change bed thickness seemingly at random. That made matching it actually quite difficult! However it was up to height. When looked at from the end, you could see the lean it the bit or original wall still standing, but nothing a raised flower bed would not hide.
Raised flower bed
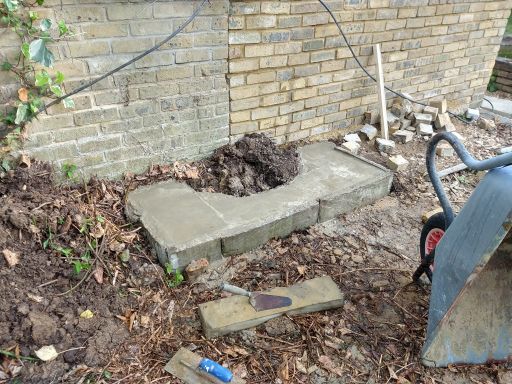
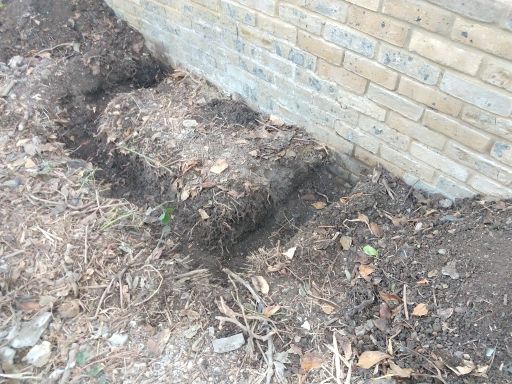
Started by digging an 18" deep foundation (that's well into the Essex clay in these parts), and the used some spare capping stones to shutter up the top. Three or four barrows of concrete later:
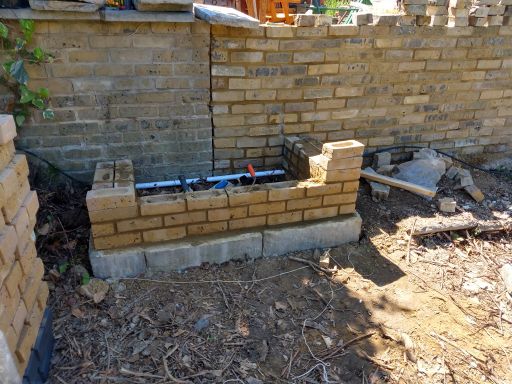
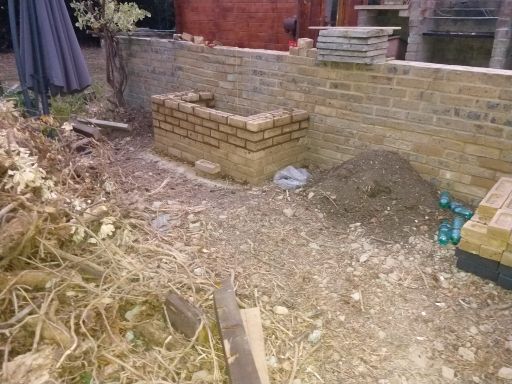
Then start building up the bed
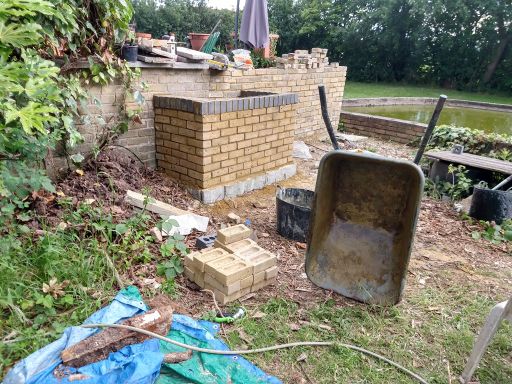
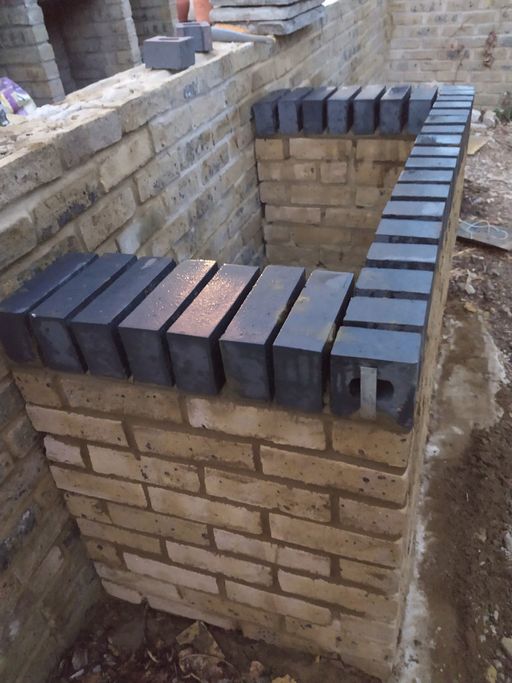
Before finishing and doing a (slightly wonky!) soldier course of blue engineering bricks on top:
Backfilling
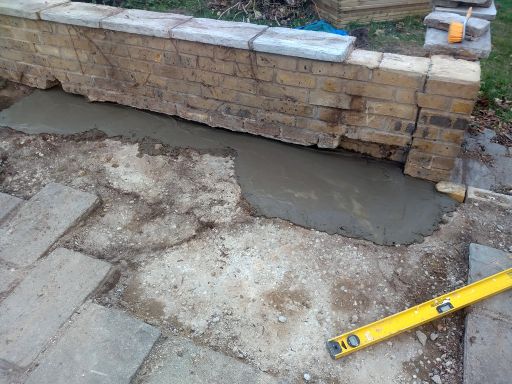
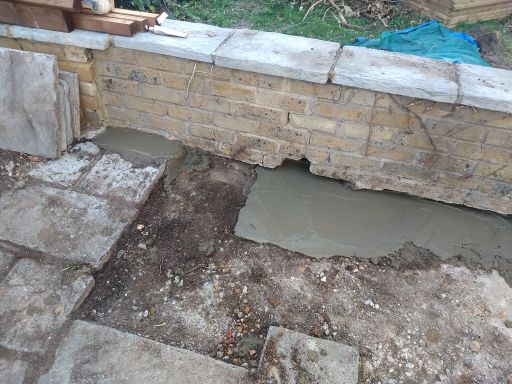
Now that the new wall has had a chance to set up a bit, and it has a buttress, we can back fill the space behind it with concrete to replace all the soil and other bits of assorted masonry that fell out of the edge.
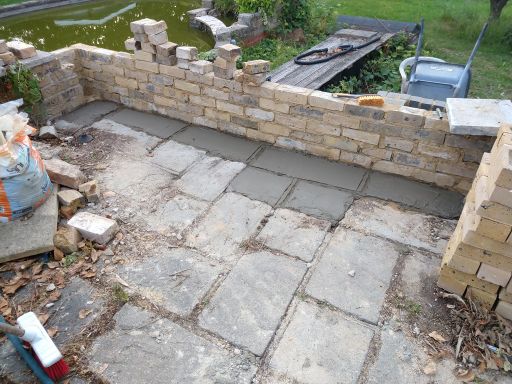
Since we were not going to have enough slabs to completely redo the top (many of the originals were cut out to make space for the beds and the fence posts), I patterned some joint lines into the top of the drying concrete.
Once that had gone off, I could now rebuild the inner leaf of the wall that sat on the patio, and replace the capping stones on top:
(the capping stones don't line up with the old ones yet - but we can move the old ones later!)
Take down the hedge
Now it should get easier from here, we just need to take down the remaining bit of hedge...
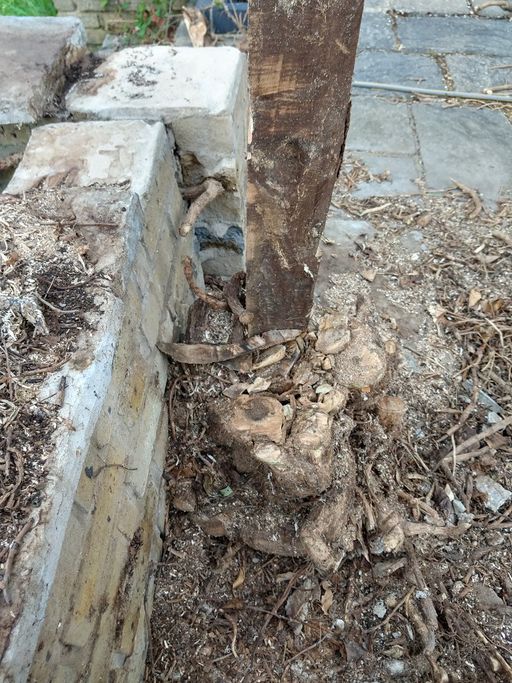
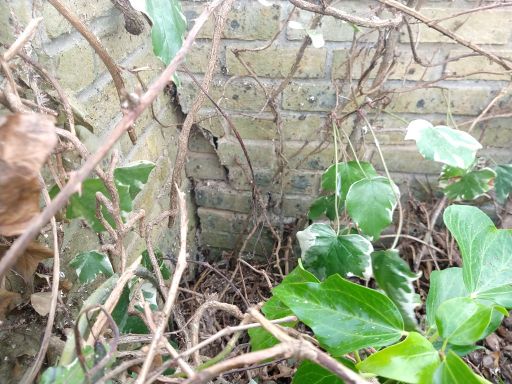
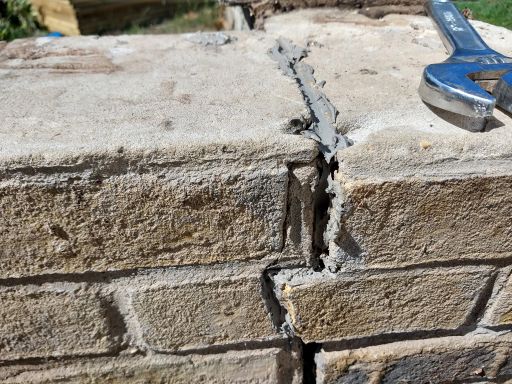
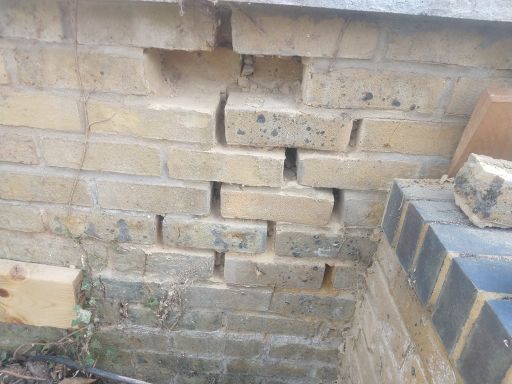
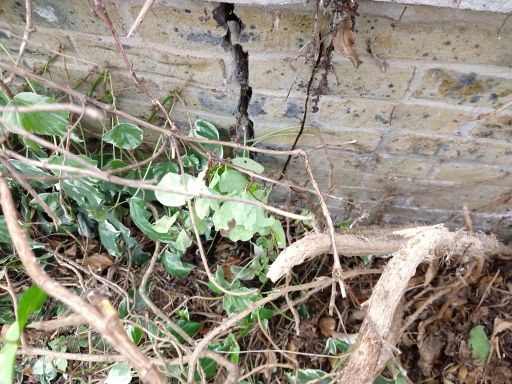
Now this is where the scope of the job starts to creep a bit. The observant will notice a crack at the right hand corner of the wall. Closer inspection is a bit more worrying:
Goodness gracious, great balls of... erm root!
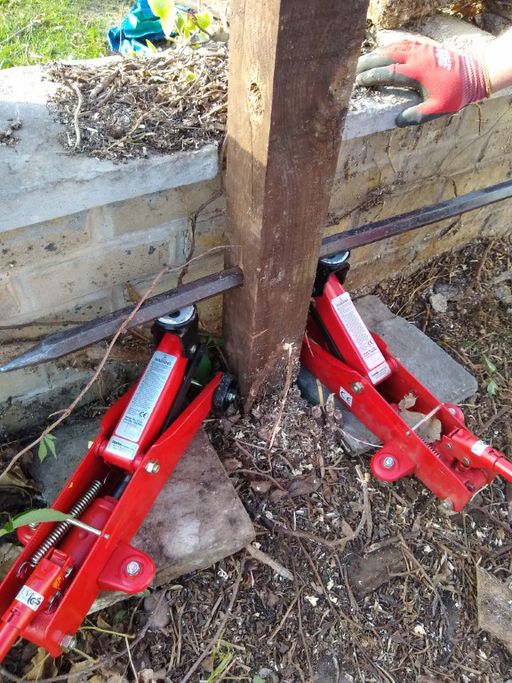
So before going much further, lets get those posts out of the way. I drilled a 32mm hole with a spade bit right through the post, then used a couple of trolley jacks with my large bar as a jacking point:
Now back to the damage. It seems that the roots at this end are far more substantial, and have pushed the wall over by a significant amount. It's surprising it's still standing (especially considering its one legged construction).
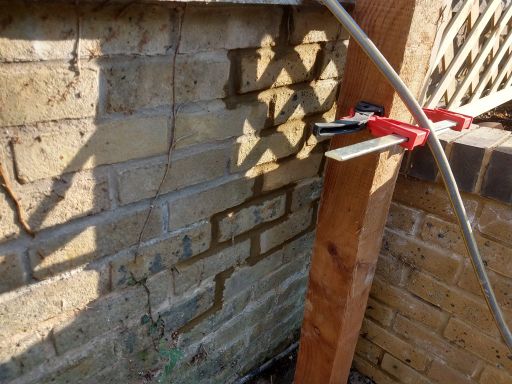
All this had been obscured by hedge previously. Hacking through undergrowth on the outside of the wall also showed significant damage:
Split right down the corner, and
The bottom of the wall was falling apart and also being pushed by something.
Propping it up
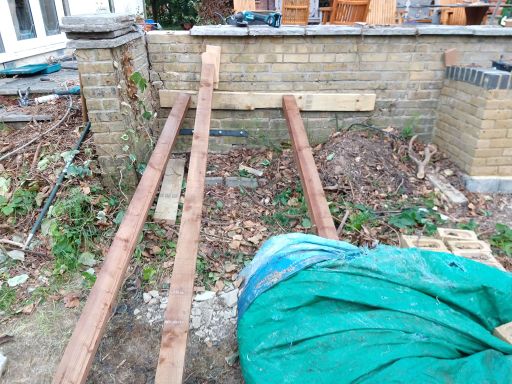
At this point it was clear there was not much holding up this end of the wall (the other end was nicely trapped behind the buttress), so I pressed some of the new fence posts into service as wall props:
The other end of the posts is set into a wedge shaped slot cut into the lawn with a backing pad to spread the load at the end
Straightening the wall
Now it was at least supported enough not to fall over, but there was still the problem of how to straighten it. It was obvious that could not happen with whatever was pushing it out of line still there.
So we now start the excavate the patio stage!
Digging down looking for roots.
The deeper we got, the more we found:
Eventually we were right down to outside ground level. Just to add insult to injury, at some point in the past, someone had placed some very large decorative pebbles around the base of the trees. These has slowly been assimilated into the mass of root. They were now ideally placed to blunt every saw blade or chain that you tried to get through the mass of root! In the end the cheap "greenwood" blades for the reciprocating saw proved the easiest since it did not matter so much when one of those hit a stone.
Once all the roots where out, there was now a fighting chance of straightening the wall. The first bit to fix was the "pushed out" section at the base. Easiest way to do that was to prop a length of scrap 6x2" against it with my foot, and clomp it gently with the 14lb sledge hammer until it was all back in line.
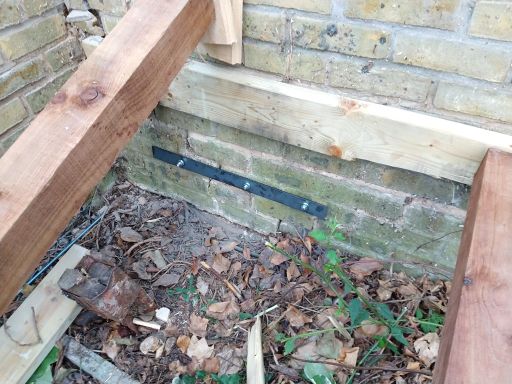
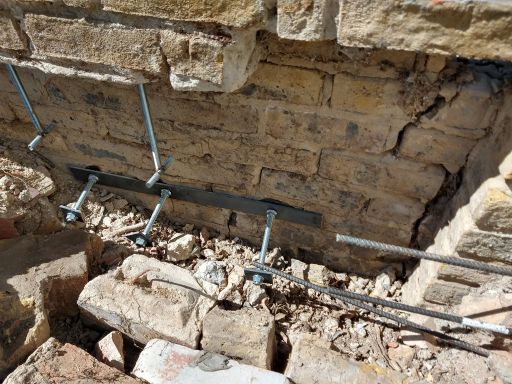
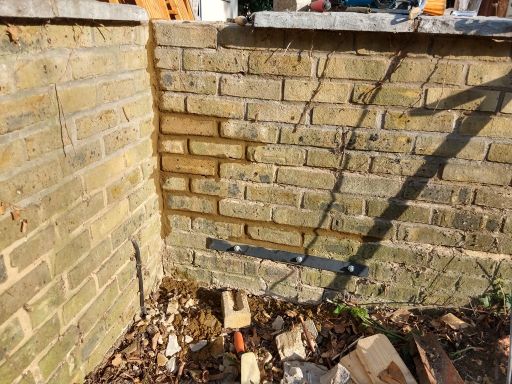
Next job was to give it a bit of bracing. I had some 50mm x 5mm flat bar, so cut and drilled some lengths of that. Sandwiched the wall between them, and drilled and bolted right through with some 12mm studding. I left the internal studding "long" so that it would eventually be set in concrete and help to fix everything together:
and outside:
Now the wall could be straightened. This was done by progressively tapping down the ends of the fence post props with the sledge. Inch by inch the wall moved more upright. At one point it stopped moving but it was just caught on a bit of masonry against the side wall. A quick tickle with the SDS freed that.
Rejoining the wall
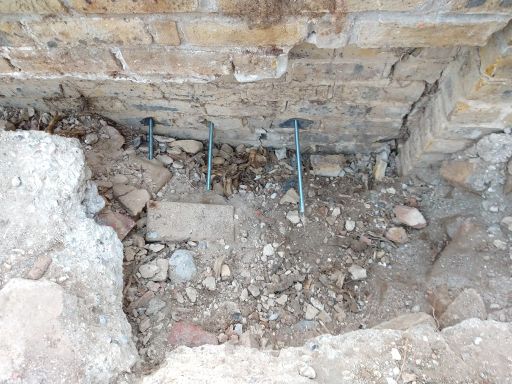
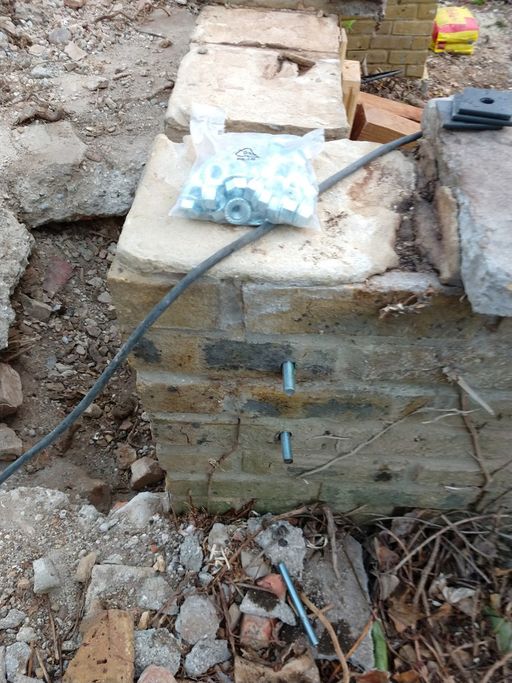
Now the wall was upright, I needed a way of keeping it that way. The first job was to pin it to the returning wall that flanked some steps down from the patio. I drilled through with a long 14mm SDS bit. Then pumped some bonding resin deep into the holes (taking care to only bond the ends of the studding and not the section that passed through the flank wall) and tapped some 12mm rod home into the resin. Once this had set (about 15 mins in the summer heat!)
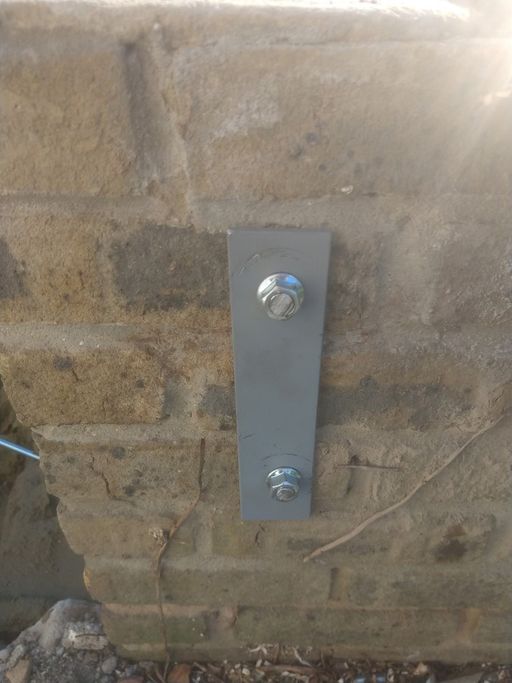
I made up a load spreading plate from some more flat bar, and fixed that on the ends of the studs:
Tightening each nut in turn to slowly pull the bits of wall together. I pumped a bit more resin into the join before bringing it tight.
Doing the same on the outside leaf:
Now that was all pinned back together, I needed a way to consolidate it all. I added to plate washers to the end of the bracing studs poking into the hole in the patio, and put some more metalwork around the corner where the two walls met:
Concrete was to be the final "glue"
Fixing the bits of wall in place, and locking them to the end wall
And the other end.
Starting some trellis
For change of pace I decided to get some of the new trellis in place.
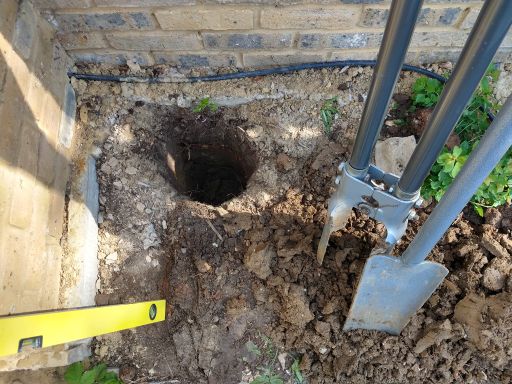
So that meant digging some 24" deep fence post holes:
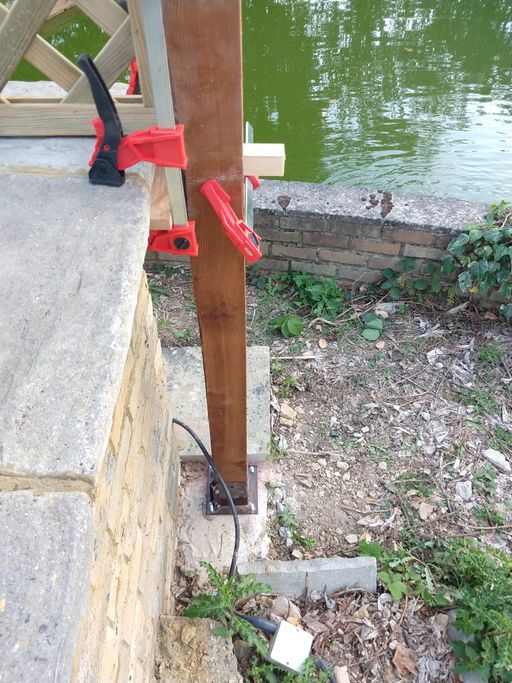
One was over a section of masonry beside a drain, so I had to mount that in a shoe bolted to a concrete pad:
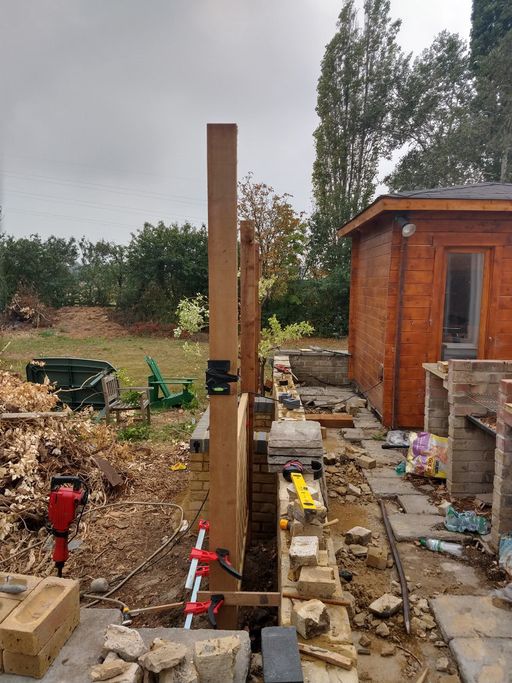
Having the wall close was handy since I could use some clamps and scraps of wood to hold the post plumb when fixing. (the post base being levelled on bonding resin).
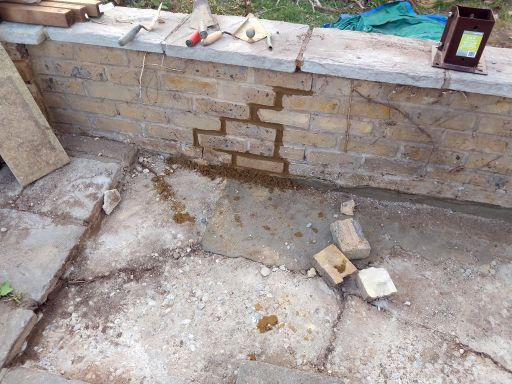
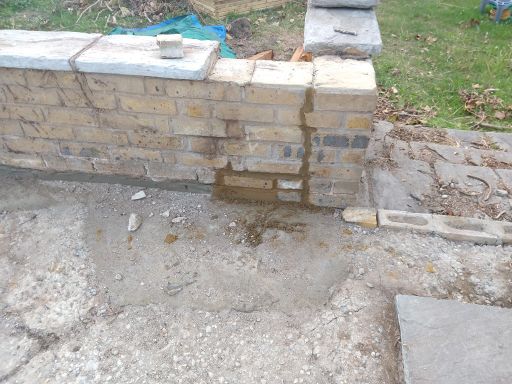
Of course it did not take long to realise that it would be much easier to fix the last cracks in the wall before the fence posts were in place. So some more work with the brick removal chisel:
So finally with the post in place:
and a bit at the other end:
So that is most of that wall done - save for relaying the slabs on the patio, and redoing the capping stones,
Oh, and a bit of tarting up of the cracks on the inside:
I also packed the gap between the patio level and the underside of the inner leaf of wall with concrete.
The final wall
So with that done, I was hoping it was going to be a bit less hassle (spot a theme emerging here yet?). First job was to get choppy with the chainsaw and knock down that hedge:
Alas once one could see the state of the wall close up, the news was less encouraging. Although it was not as obviously distorted as the other side, it was broken through top to bottom in four places:
So the choice was now, do I dig down on the inside, extract root, straighten the wall and chop out re-brick and re-point all the cracks, or just knock it over, pull out any roots and build it again?
In the end I decided that the latter course was probably less work. What is more, I could cheat by taking the wall apart in sections.
Then stack them up ready for re-use:
I think after about section three, I worked out it was taking rather a long time to neatly cut free "toothed out" sections (not only that, the gearbox on the SDS was getting too hot to hold!). So for the last bit, I employed the "push it over and be done with it" technique:
Hunt the root
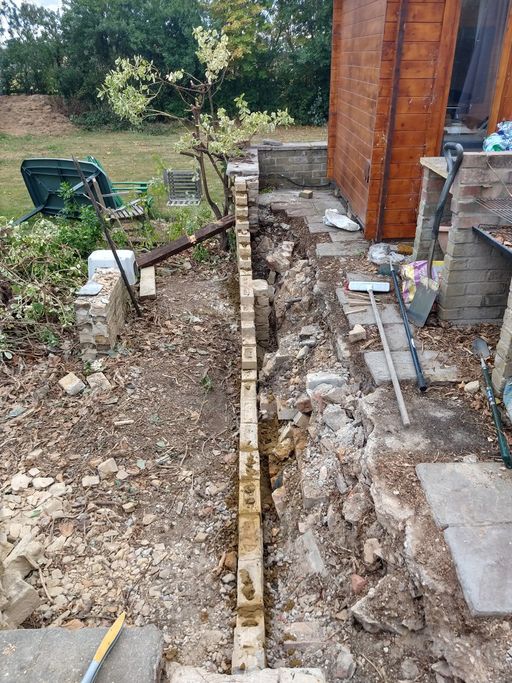
Now this was a bit surprising, whereas on the last wall, much of the root had been close to the wall, that did not seem to be the case here. Also another problem became apparent with the wall out of the way, the whole edge of the patio was cracked through under the slabs. It then became clear where the roots were this time.
(which also suggested the "take the wall down" approach might not have been the fastest solution after all!)
So dig out more roots:
Got that out
Then the next:
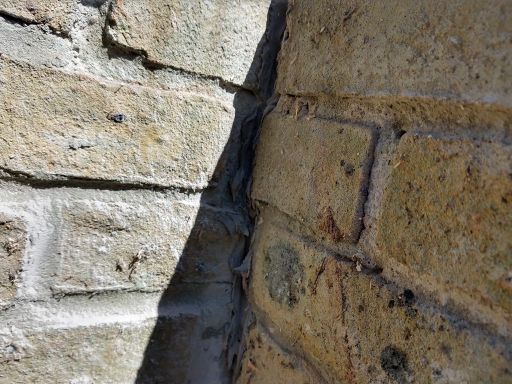
The last main root was just behind the edge of the last bit of wall that I did not take down. (for some reason they put expansion gaps in the walls - but only the outer leaf! - but that did make a natural break.
Once that was out, the wall could be returned to the vertical, and reattached to the returning wall:
That firmed that bit up nicely - although I did not spot until later that not only was it leaning over, it has also shifted out a bit at the end away from the corner and was no longer square.
Find the foundation
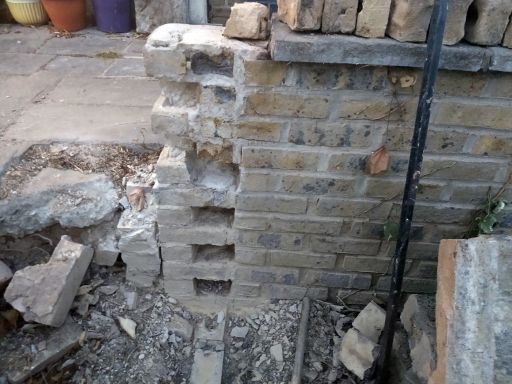
Next job was clearing enough stuff out of the way to find a decent foundation. While I was at that, I toothed out some recesses in the flank wall to allow the corner to be rejoined:
(I do like that brick removal chisel!)
Put the sections back together
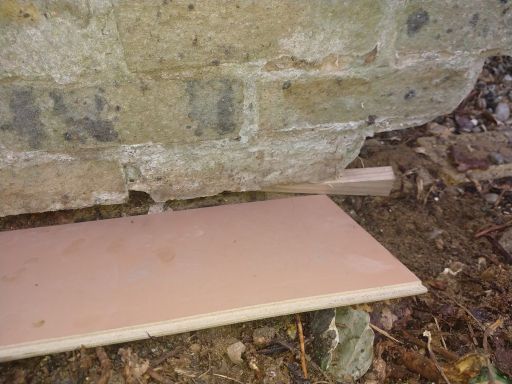
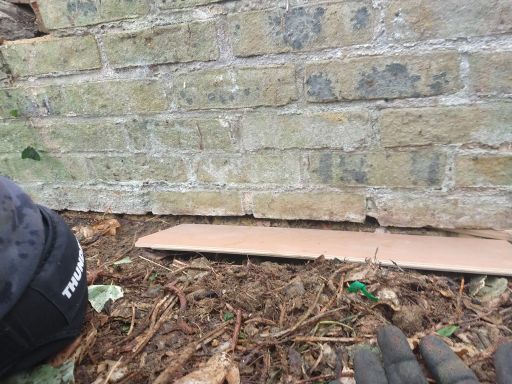
Now it was time to rebuild the bottom of that wall up to patio floor level. This time however there were some ready made chunks. Since these were too heavy to just pick up and drop onto a bed of mortar, it was easier to manhandle and leaver them into place first, and then use some oak wedges to open up the mortar bed gap and get the section nice and plumb.
Then chuck some muck on the bit of scrap laminate floor:
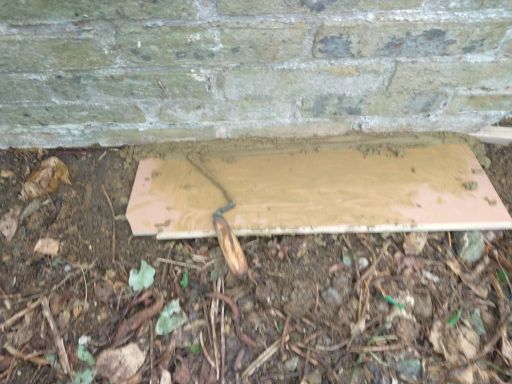
And fully fill the bed using a very narrow flat trowel:
(That trowel was narrowest of a set of three long rectangular trowels from bought from toolstation years ago. The other two are not much use, but that one is fantastic for repointing and poking mortar into narrow gaps)
So then I cleaned up some more reclaimed bricks (masonry cutting sawbench again), and added some new ones, and got the rest of the lower wall built:
However, joining the remaining section at the corner meant there was a slight deviation as it was out of square.
(Still, raised beds can hide all manner of wonky bits!)
The department of over engineering rang...
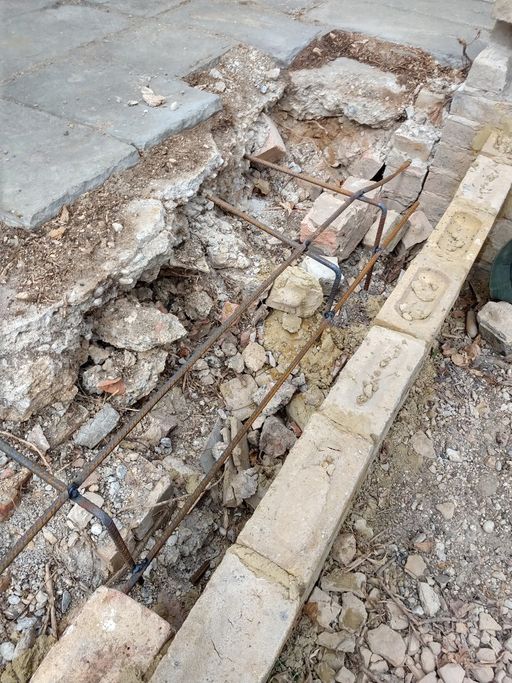
Once the base of the wall was back in, it was time to work out what to do to tie everything back together nicely - especially the bits of patio that had broken off. So I decided some rebar was the order of the day.
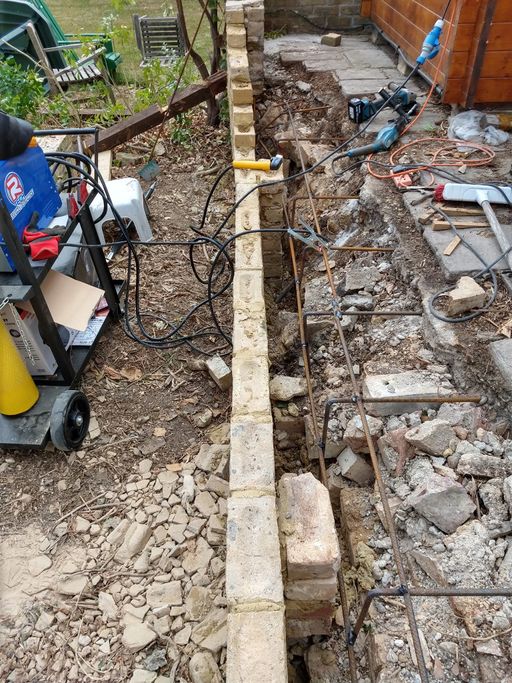
First I drilled 14mm holes into the edge of the sub floor concrete on the patio every 600mm or so (or at least where there was some solid stuff to fix too!). Then I cut off some lengths of 12mm rebar, and using a MAPP gas torch to spot heat them, stuck some 90 degree bends in the bar. Finally I resin bonded them into the holes such that it gave a horizontal run out toward the wall about 2" down from the final concrete surface, and then descended towards the base of the wall.
Then to really over do it, ran some full length sections of rebar, and welded them to the L shaped bits:
(there is about 20m of rebar in there now)
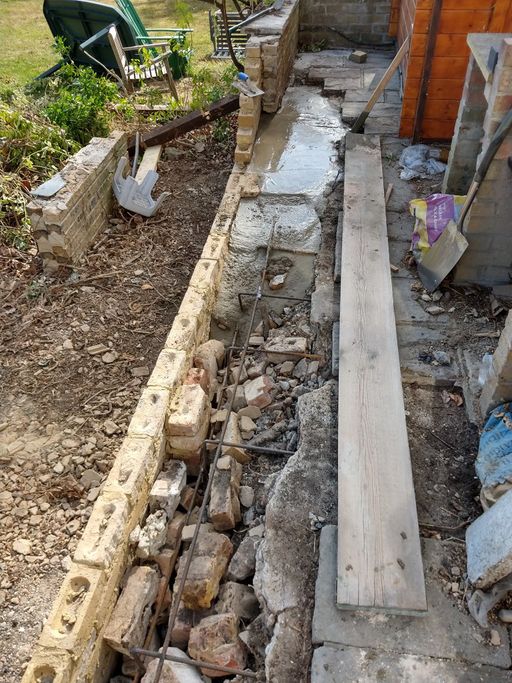
Then finally we were ready for back filling. So I padded out the space with some hardcore (making sure there was still space for plenty of concrete round the rebar), and started loading the mixer:
First few barrows in
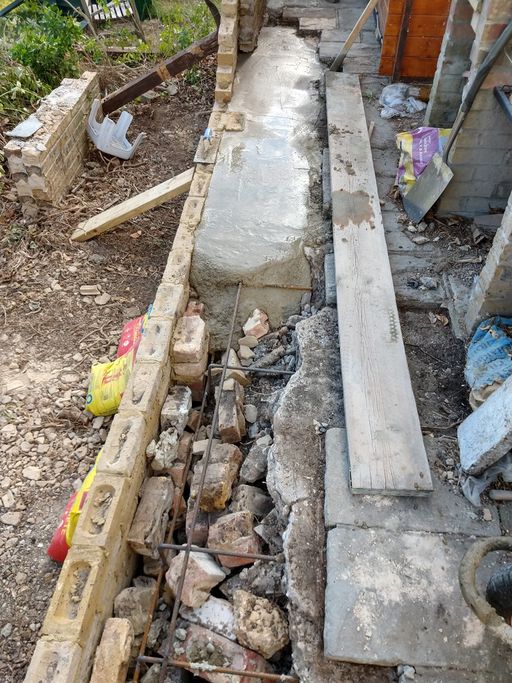
And more
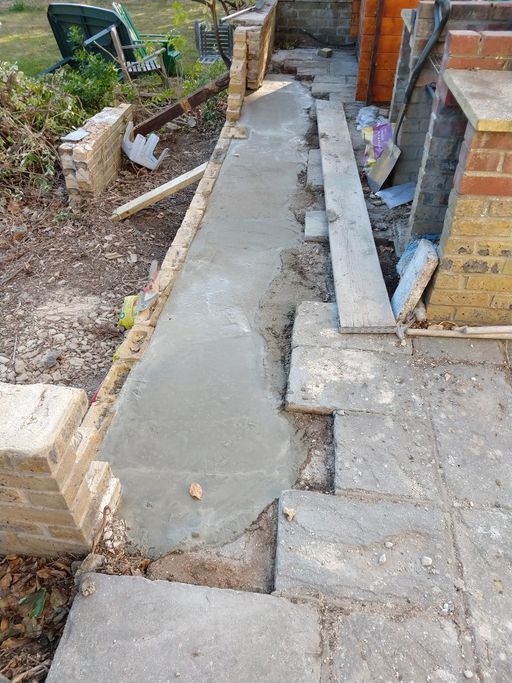
Last bit in. (that was just over one bulk bag of all in one ballast to knock up that lot. On the bright side I did manage to co-opt my son into loading the mixer while I ran the barrows!)
Once all that had gone off, we could stick the top of the wall back. Some of that was still in sections, which I had set aside on the patio. Alas one rather large lump was down at ground level, and there was no easy way to get that on a trolley and up a ramp. So some "inch by inch, stone age shifting" needed to be employed with jacks and blocks:
Once one end was up to patio level, we needed to spin it round into the line of the wall, and get it upright. There was no easy way to do that safely with blocks and chocks - we needed a wider stable base to support the free end. So in the end I convinced current favourite son, that if I could pick up the free end for him, he could quickly slide a workmate under it. Fortunately it was now at a perfect height for a nice wide stance power lift, to pick the end up a couple of inches and hold it for long enough for him to faff about with the workmate!
(turns out it was quite heavy, I think my end must have been getting on for 160kg - so there is no way I would have tried lifting that from the floor)
Now that could be wedged up and levelled, ready for pointing in:
After that, I could tooth the end, and start setting in the smaller lumps:
That finally got all of the outer leaf in:
With a few gaps in the inner one:
Filled those in with a mix of new and reclaimed bricks:
The last raised bed
Lastly we needed a raised bed on this side as well (more for completeness and to have somewhere to grow something for the trellis in this case rather than buttressing). So dug a foundation:
And started on the bed:
Got that built:
More fencing
Now I could get some posts in:
Some of those turned out to be right on top of the edge of the foundation and other buried masonry, but nothing the big breaker could not make short work of. (although it has to be said, it is tiring to use below ground level - since every time it sinks itself into a hole, someone needs to pull it free and lift it out again, and it's blink'in heavy!)
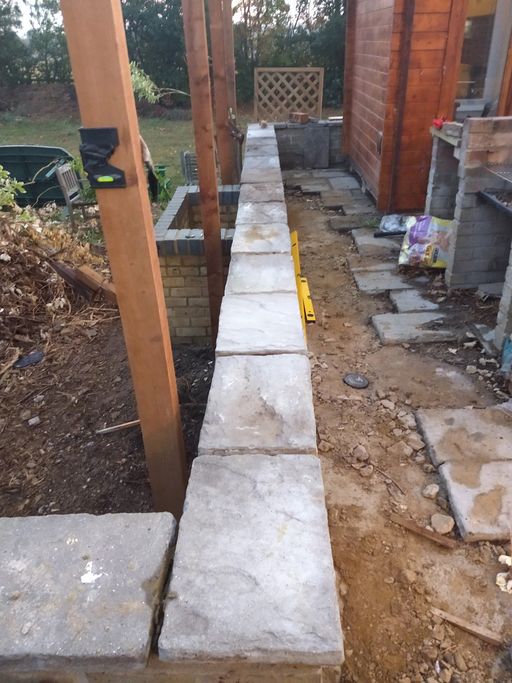
Once all the posts and trellis was in, I then laid a course of "Wonky be gone (tm)" capping stones, to make it all look nice and straight:
Handy tip: Once the capping stones are pointed in, any mortar stains near the joints are easy to clean off with a wire wheel in an angle grinder set to a lowish speed. Same trick works for getting stains of the blue engineering bricks as well.
Relaying Slabs
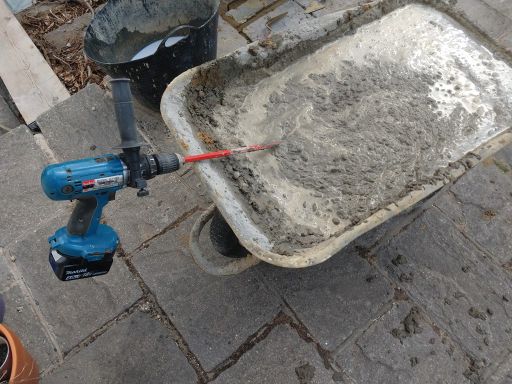
At last, getting onto some of the finishing jobs now, one of the more tedious being relaying all the missing slabs. Alas we were short quite a few, but I figured I would use the same trick to fake up a few. So mixed a barrow of concrete:
Handy tip: for times when you can't be bothered to set up a mixer, a mixing paddle on a decent 18V drill in low gear will do a fairly quick job of a barrow full - however make sure you fit the side handle if you don't want a sore wrist! Also since you can't run the drill fast (unless you like being covered in concrete splatter!), it's a good idea to let it spin a full speed every few mins to let it cool itself off a bit. I found I can do 3 to 4 barrows full on a 4Ah battery.
I also had a bag of "past it" grey cement based floor tile adhesive in the workshop. So I mixed some of that into the concrete to darken the grey and closer match that of the slabs.
Anyway, a mix of real and fake slabs:
Time for some woodwork
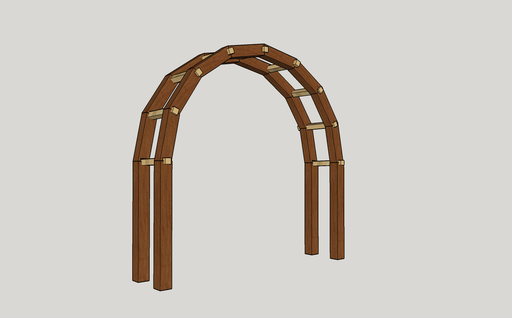
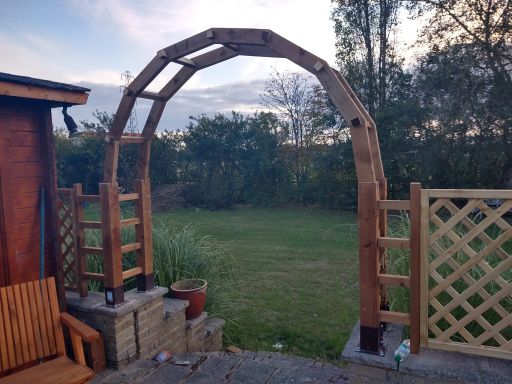
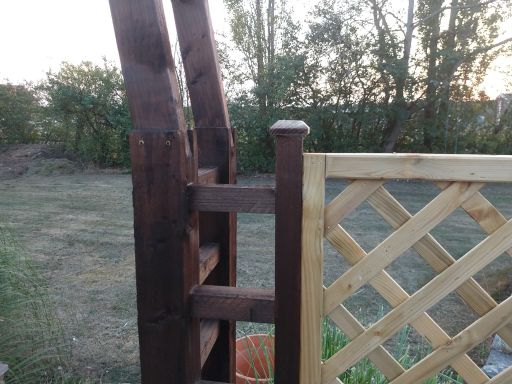
Now a chance to leave the wet trades behind for a bit, and do some woodwork. My original sketchup model had an arch on it that would span one set of steps at the end of the patio. It also needed some decorative side supports (that will also be used to make up some space where the actual gap is not an exact multiple of trellis panel lengths.
The posts
First job was the base section. This was made from some 4x4" fence post, joined by 2x2" horizontal rails. I wanted these to be strong, so decided that traditional mortice and tenon joinery was probably the best way.
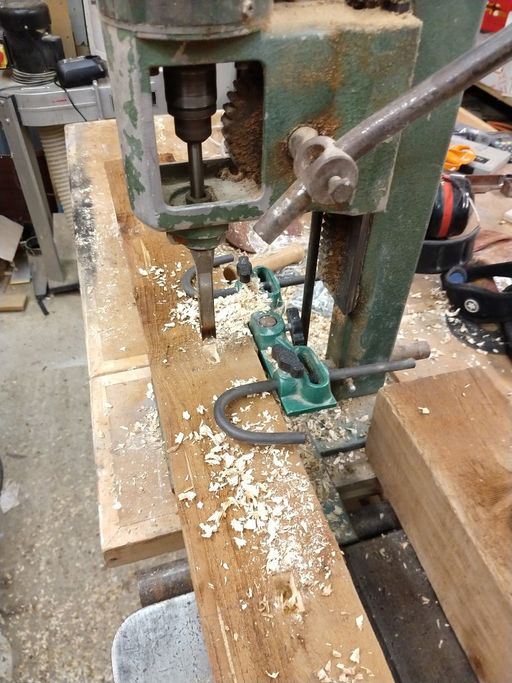
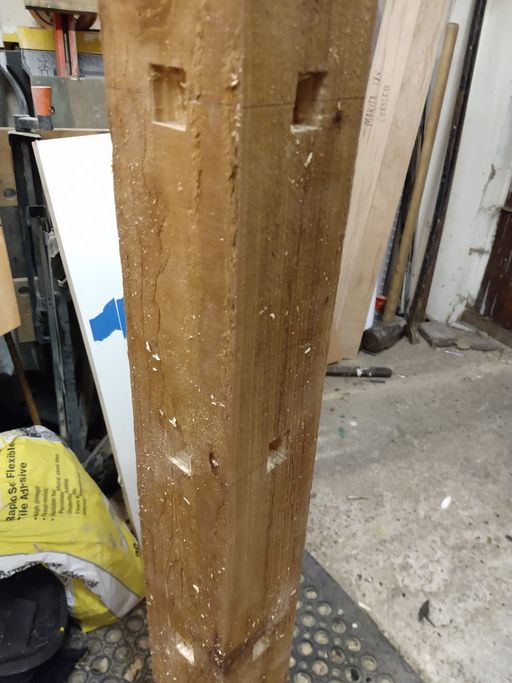
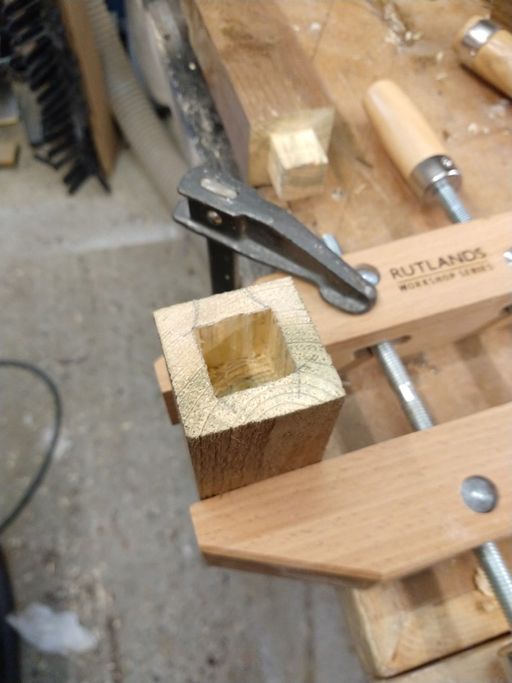
Ideally I wanted 1" square mortices, but did not have a mortice chisel (or machine!) big enough to do those, so instead did a pair of half inch mortices right next to each other to one side of the post centre line, and then flipped the wood round to do a matching pair right next to them the other side:
This created the mortices:
(getting "cabinet making" levels of accuracy is not really possible when working on sawn wood - since while you can measure accurately from the edges, you don't have control over how far those edges are from the other side of the same bit of wood)
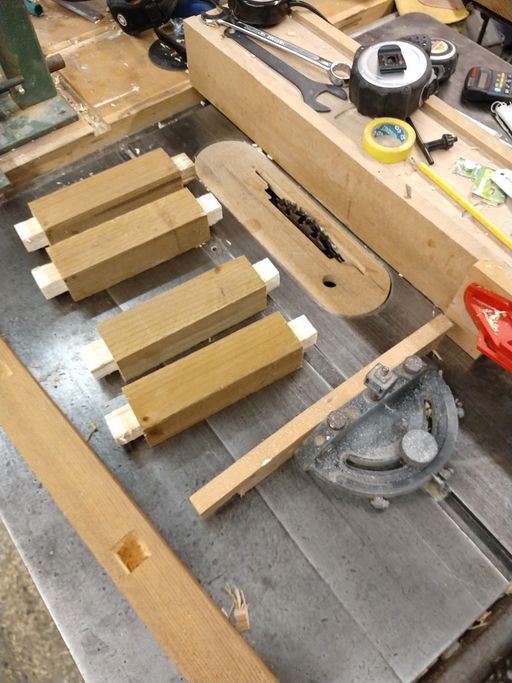
Next the rails. These I did with a dado stack in the table saw, using the mitre guide to keep them square, and a spacer block clamped to the fence to set the end stop. Each side took two passes to get the full length of mortice. I did all 4 sides to be left with a square peg tenon:
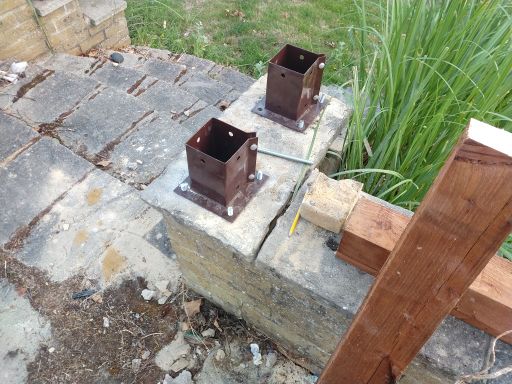
These needed to be measured very carefully to match the actual spacing of the fence post sockets that I had mounted on the walls.
That all worked well, apart from one slight cockup, I did a test cut to start, but realised later that I had as a result left myself short of one last bit of timber (and this was the kiln dried sawn 2x2" tanalised stuff that it was not going to be easy to get more of, since it was "delivery only" stuff I ordered it from a specialist fencing suppler along with all the other fence stuff). So I had to do another impromptu mortice in the end of an offcut to join a couple of bits together to make a whole one:
(used the pillar drill to hog out the bulk with a forstner bit, and squared it with a chisel)
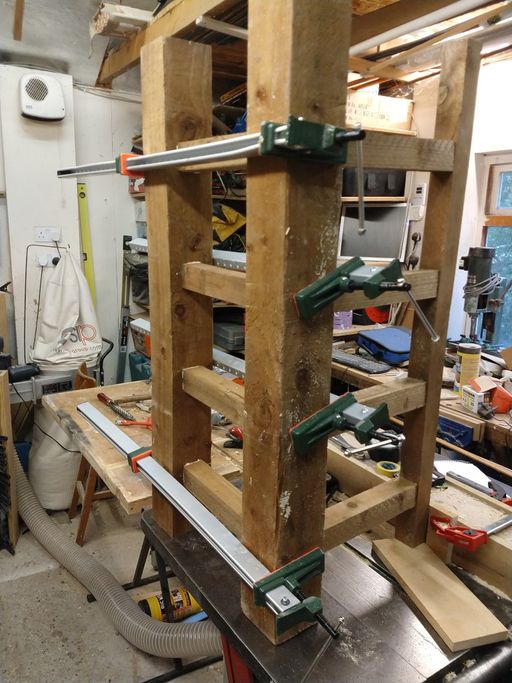
Finally we could glue up the base section with plenty of Titebond III:
(I did this in two "sides" rather than try to glue and clamp both directions at once).
Rather satisfyingly, these just slipped into place in the post sockets with no fuss!
The studs are around 8" long, so they got right through the capping stone and into two courses of brick for extra strength, and also to try and prevent any leverage on the post breaking out the top bricks. I also used a step drill to open out the holes in the bases for the studs to 14mm to give a couple of mm of wiggle, just in case it was needed for alignment.
The Arch
I could actually use sketchup here to not only model the number of segments but also get it to work out the dimensions for me. If you draw a curve in sketchup, you can change the number of polygon segments using CTRL+ and CTRL- after you place the curve (you can have from 2 (i.e. a triangle), to a rather excessive 999 segments). Once drawn, you can then get the exact lengths required of a segment by using the measurement tool.
(getting the lengths and angles "spot on" is important when trying to make the diameter of the arch come out at an exact width).
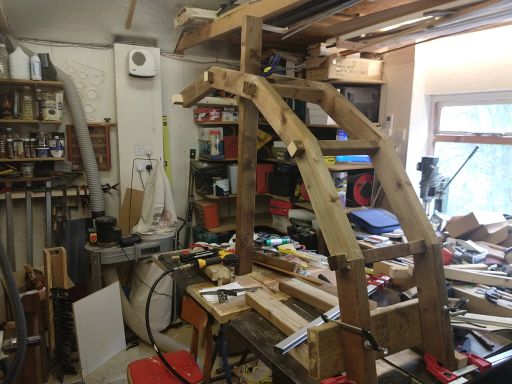
Now I needed to decide how to build this. At first I was thinking of making up segments to make 4 arches out of 4x2", and gluing them up in (offset) pairs to make two 4x4" sides. However this seemed heavier than was really needed, not to mention to make it look good I would need to route off all the edges to create a curve without angles jutting out all over. So in the end I decided on a simple 4x2" each side, with the angles left visible.
Then there was the question of how to join them. In the end I decided I could use the cross rails as a kind of loose tenon.
With hindsight, this is not the way I would do it next time - Instead, cutting saddle joints into the ends of the segments and using draw bored loose tenons (i.e. like those I used on the outer ring of this table) would have made for much easier assembly, and a stronger final result. One would just need to cut 2" square holes right through each joint afterwards for the cross rails.
First I cut my segments on the mitre saw. I did some test cuts on scrap timber to make sure I could get just under a half circle of arch spot on with the ends of the last segments coming out inline, before cutting the real ones.
Annoyingly my timber was ink jet printed with all manner of stuff including its rating, and size, and the name of the chaps dog that machined it! So I needed to give it a rough sand with a 40 grit disc on a random orbit sander to get this off!
Then I cut the rebates in the ends of the segments using passes over the dado stack on the table saw. To hold them safely at the right angle to keep end end flat on the table, I used a traditional table saw tenon jig to hold them.
To allow a little room for error, I tweaked the fit of each mortice as I went along on the bandsaw (just stroking the sides of the joints with the side of the blade to pare away small amounts of wood). Then I assembled them a segment at a time using gripfill as an adhesive since this is waterproof but also gap filling, and sets slow enough to allow a bit of wiggle room.
To pin each bit in place as I went, I shot some very fine 50mm 18g bad nails into the joints just to stop things slipping about.
I used a post clamped to a cross rail to support the free end during the build.
Once the whole thing was together, I set it down on the floor, and clamped it's base to a couple of "story sticks" that had the exact arch span marked on them. At this stage the arch had enough "give" to stretch or compress and inch or two at the base. This set the proper span. Lastly I used a framing nailer to fire some 90mm ring shank nails into the tops of each arch section so that it went right through the cross rail as well and fixed it all more firmly in place.
The final jobs was to work out how to mount that on the posts. I had originally planned to use a set of cross braces to do that as well:
but decided the spacing was too close to the top rail that joined the base posts together, and it would have looked a bit "busy". So in the end elected to cut a saddle joint into the tops of the base posts, so that the ends of the arch could be set right into the posts, and pinned in place with a couple of long screws:
(I gave it some dark brown wood stain as well to even out all the bits that had been sanded, and make sure all the joins have a bit of rot and weather protection)
It probably is strong enough to use as a set of "difficult" monkey bars, but I am not, and I really don't need it strong enough to hold me anyway!
Tidying up
At last it was time to start clearing the mess. So I ordered a 6 yard skip (with a tonne of topsoil in it to fill all those raised beds!) and started barrowing the pile of crap in the middle of the patio into it (having first unloaded all the soil!). Then I set about pressure washing everything. I also washed the walls to remove the dirt and green algae from the old re-used bricks to freshen their looks up a bit. This made the wall look far more consistent, and less obvious where the new bricks were:
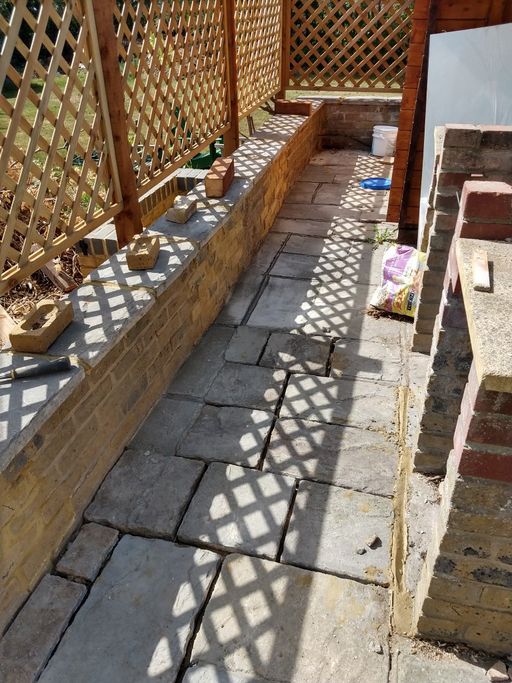
Also got the patio looking a bit clearer:
(also we could now squeeze in a BBQ before we ran out of summer)
Add some home made caps to the small posts:
Reinstate the electrics
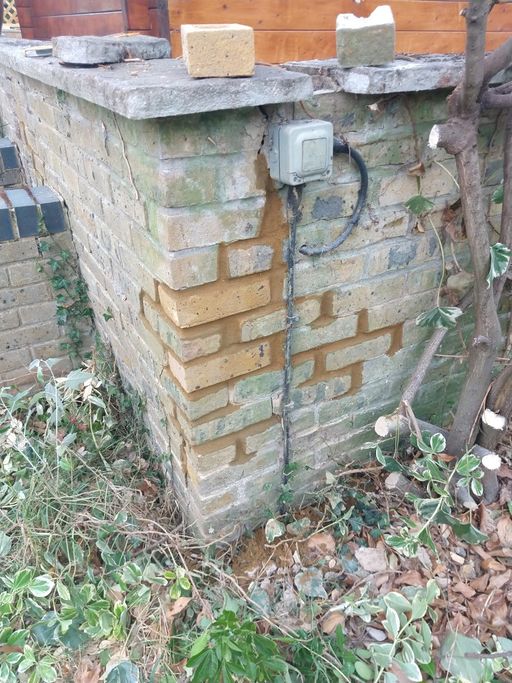
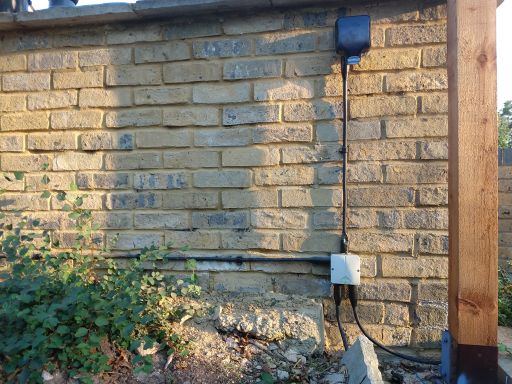
One tidyup job to do was to put back the electrical socket that was on the outside of the wall that fell (it got smashed along with the junction box it was connected to). So previously I had just replaced the junction box and just removed the socket as a temporary measure to make it safe again.
So I spent rather too many uncomfortable hours down and floor level where I had to kneel and reach over a couple of flower beds to reach it. All the exiting glands needed replacing (the original installer had use interior glands rather than waterproof ones), a new stub of SWA installed up to the new socket, and then I also put a double socket "back to back" on the inside of patio, behind the one you see here.
To Do
All done for the moment, until we can get planting in the spring...
Notes
So there you go, my summer 2020 lockdown fitness regime!
Materials:
So far I have used:
- 3 x Bulk bags of 20mm Ballast/Sand & Gravel (about 1/3rd of a bag left at the moment)
- 2 x Building Sand Bulk Bag (couple of barrows full of that left)
- 396 x Terca Bricks 65mm Smeed Dean London Stock Brick
- 19 x Rugby Premium Cement
- 52 x Ibstock Staffordshire Slate Blue Smooth 65mm Brick
- 7 x Steel Rod 12mm dia, 3m Long
- 10 x Heavy Duty Lattice 0.9m panels
- 7 x Bolt down post anchor
- 10 x Wood post 3.0m high 100 x 100
- 4 x Wall plate 3.6m high 100 x 50 Brown
- 3 x 2.4m high 50mm x 50mm Timber Post Brown
- 10 x Post Cap Large Brown
- 14 x Bags of Postcrete 20KG
- approx 9m of 12mm threaded rod
- 6 x Fischer FIS VL 300 T Vinylester Resin 300ml
- 1 x 6 yard skip, 1 tonne top soil (only £18 when ordered in the skip).
Not to mention a pile of site nitrile foam gloves and at least two 230mm diamond discs for the angle grinder, and gallons of bottled water to pour into me to try and keep up with the rate of loss when working in the sun at 25°C and over.
