Difference between revisions of "Wicker chair rattan replacement"
(Work in progress) |
(First draft) |
||
| Line 28: | Line 28: | ||
Some of the reed came out easily enough - some bits were actually loose. A few bits were quite tight. There was also a significant variation between different chairs. | Some of the reed came out easily enough - some bits were actually loose. A few bits were quite tight. There was also a significant variation between different chairs. | ||
| + | On the easy ones I could get long runs out in one piece: | ||
| + | |||
| + | [[image:RattanBeadLongLength.jpg|512px]] | ||
| + | |||
| + | Others were small bits at a time. (Some guides advocate drilling small holes in the reed to allow water or alcohol to get into the base of the groove to soften the glue. | ||
| + | |||
| + | One of the problems I soon found was that this rattan had been fixed in place with staples in the base of the groove in various places, and that made getting those sections of reed out difficult. | ||
| + | |||
| + | ==== Pulling the staples ==== | ||
| + | Getting the staples out was the next challenge. These being set in the bottom of a narrow groove. Eventually after searching about I found an old pair of pointed nose pliers that were small enough to get to the staple, but also strong enough to get some grip. Alas it was still not possible to get enough grip with those, but by using a large pair of combination pliers to grip and compress the nose of the small pliers, I could lift the handle while pivoting on the nose of the big pliers (using a paint scraper as hard surface to lever from), it was possible to pull them: | ||
| − | |||
| − | |||
[[image:PullingDifficultStaple.jpg|512px]] | [[image:PullingDifficultStaple.jpg|512px]] | ||
| − | + | ||
| − | + | The last prep job was to sand and clean the groove: | |
| + | |||
[[image:RattanChairSanding.jpg|512px]] | [[image:RattanChairSanding.jpg|512px]] | ||
| − | + | ||
| − | [[image: | + | Taking some time to round over the inner edge of the groove so that there is no sharp edge to damage the new rattan. |
| − | [[ | + | |
| + | === Fitting the new rattan === | ||
| + | The next job was to cut a section of rattan to roughly the right size with a small overlap all round. Then cut a length of reed to approximate length. The rattan pattern is a fairy common one that creates small "hex" cells. The reed was just a 5mm round reed. (both ordered from Ali express since it was somewhat cheaper than from the more traditional furniture restoration / wicker suppliers that I could find). | ||
| + | |||
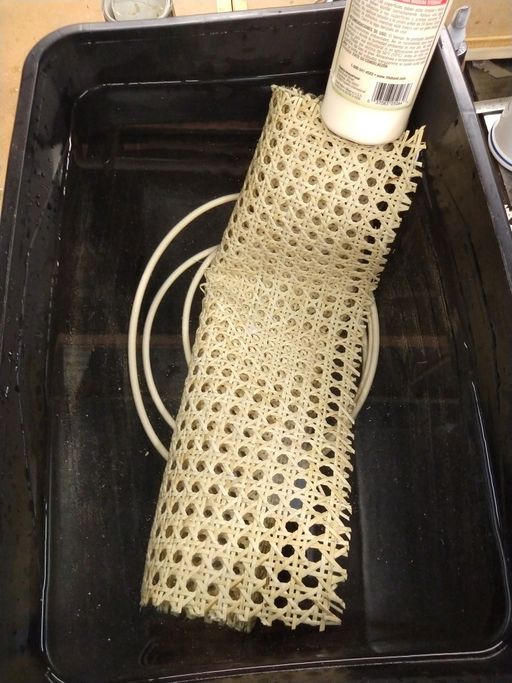
| + | Before it can be used it needs to be softened by soaking in warm water. I found a paint scuttle was just about large enough to get it folded in there (and a bottle or Tightbond a handy weight to stop it floating!): | ||
| + | |||
| + | [[image:SoakingNewRattan.jpg|512px]] | ||
| + | |||
| + | While that was soaking I made myself some [[Wedge#Small wedges|small wedges]]. After 30 minutes of soaking, we were ready to start: | ||
| + | |||
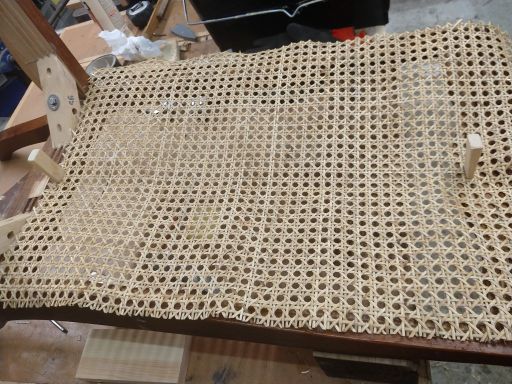
[[image:RattanReplacement2.jpg|512px]] | [[image:RattanReplacement2.jpg|512px]] | ||
| + | |||
| + | A couple of wedges pin it in place, then add more on each side to hold it firmly: | ||
| + | |||
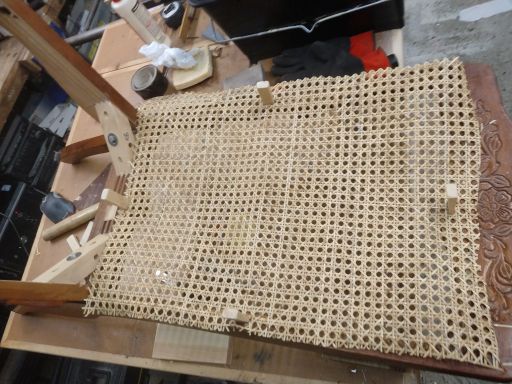
[[image:RattanReplacement3.jpg|512px]] | [[image:RattanReplacement3.jpg|512px]] | ||
| + | |||
| + | Adding more as we go: | ||
| + | |||
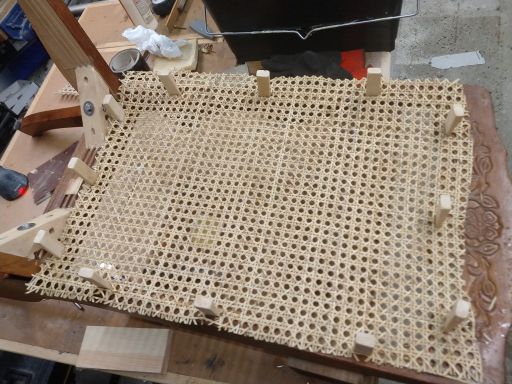
[[image:RattanReplacement4.jpg|512px]] | [[image:RattanReplacement4.jpg|512px]] | ||
| + | |||
| + | Once it was well wedged, I could use a spare wedge to start hammering the rattan into the groove all the way round: | ||
| + | |||
[[image:RattanReplacement5.jpg|512px]] | [[image:RattanReplacement5.jpg|512px]] | ||
| + | |||
| + | Once pushed into the groove all round the rattan stays in place nicely without the wedges: | ||
| + | |||
| + | [[image:RattanReplacementTrimming.jpg|512px]] | ||
| + | |||
| + | At this point I could trim off all the bits on the outside of the groove so that the free edge will be completely hidden by the reed. | ||
| + | |||
| + | === Gluing up === | ||
| + | Now I could apply a generous bead of glue all round the groove. I am using [http://www.titebond.com/product/glues/9e9995b4-08eb-4fc6-8254-c47daa20f8ed Titebond Hide Glue]here: | ||
| + | |||
| + | [[image:RattanReplacementGluing.jpg|512px]] | ||
| + | |||
| + | Starting at the bottom (where the join in the reed will be hidden by the cushion), I could start driving in the reed: | ||
| + | |||
| + | [[image:RattanReplacementBeadStart.jpg|512px]] | ||
| + | |||
| + | First with a rubber face hammer, and then with a small wood push stick to drive it a bit deeper into the groove. | ||
| + | |||
| + | The damp reed is quite soft and can be gently bent round the corners: | ||
| + | |||
[[image:RattanReplacementBeadFitting.jpg|512px]] | [[image:RattanReplacementBeadFitting.jpg|512px]] | ||
| − | [[image: | + | |
| − | [[image: | + | Once I was all the way around the reed could be trimmed to length and the final section driven home. |
| − | + | ||
| − | + | === New rattan installed === | |
| + | The end result looked quite pleasing:[[image:FixedRattanChairCloseup.jpg|512px]] | ||
| + | |||
| + | So I mopped up any glue that had squeezed out with a damp sponge, and left it for 48 hours to dry properly. | ||
| + | |||
| + | [[image:FixedRattanChairUnfinished.jpg|512px]] | ||
| + | |||
| + | === Flaming === | ||
| + | The next job prior to finishing was to "flame" the rattan. This is just a quick pass with a blow torch (keeping it moving at all times!) to cause any small strands of rattan to burn and "flame off". That will stop them turning into little sharp spikes to catch skin and clothes once a finish has been applied. | ||
| + | |||
| + | === Finishing === | ||
| + | The next question was what to finish the rattan with. I tried a few experiments with stains and wood oils, but found that the rattan is not very good at taking colour. So decided to go for a polyurethane varnish instead since that would create a strong film finish. Also being quite slow drying will give it more chance to sink in to the rattan and help get a better bond to it. | ||
| + | |||
| + | After a bit of experimentation with colours, I found that a half and half mix of Rustin's Mahogany, and Rustin's Dark Oak looked good. I wanted something that was a similar tone to the original but slight darker. (the chairs were always slightly lighter than their matching table). | ||
| + | |||
| + | I gave the front face of the wood a light sanding with 220 grit paper, and then started painting in the reed: | ||
| + | |||
[[image:RattanReplacementVarnishBead.jpg|512px]] | [[image:RattanReplacementVarnishBead.jpg|512px]] | ||
| + | |||
| + | And moved onto the rest of the back: | ||
| + | |||
| + | |||
[[image:RattanReplacementVarnishFirstCoat.jpg|512px]] | [[image:RattanReplacementVarnishFirstCoat.jpg|512px]] | ||
| − | [[image: | + | |
| + | After getting a good first coat on the front (brushing from multiple directions to make sure all the surfaces were covered), and did a coat on the back: | ||
| + | |||
| + | [[image:RattanReplacementVarnishBack.jpg|512px]] | ||
| + | |||
| + | Left that to dry for a day, and then did a second coat, taking care to feather the new colour into the existing woodwork colour. | ||
| + | |||
| + | === Job Done === | ||
| + | Lastly it was time to reassemble the chairs: | ||
| + | |||
| + | [[image:RattanChairsDone.jpg|512px]] | ||
| + | |||
| + | Then get them back to the table: | ||
| + | |||
| + | [[image:RattanChairFinished.jpg|512px]] | ||
| + | |||
| + | The remainder of the job was just do it all over a few more times! | ||
| + | |||
| + | [[Category:Furniture]] | ||
| + | [[Category:Repair]] | ||
Revision as of 22:20, 13 October 2021
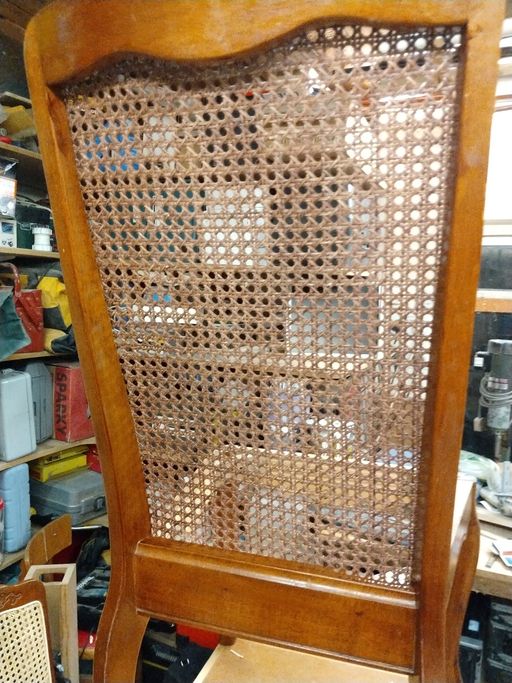
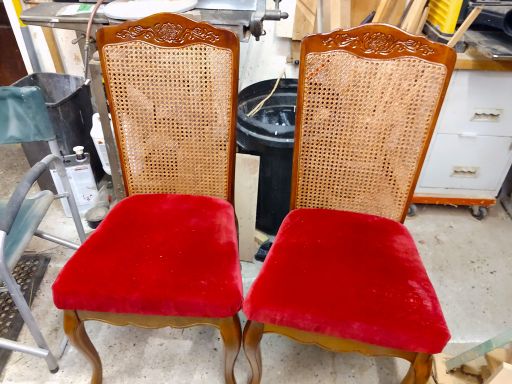
We have a set of six dining chairs, which although mass produced in the far east, are not too bad to look at and are actually very comfortable. Alas at about 28 years of age they are showing some signs of age as more and more bits need fixing or replacement. I have replaced the cushions before, and now the wicker / rattan / cane backing on many of them is also in need of some TLC. So at risk of them becoming a bit like Trigger's Broom, This is the storey of their repair.
The Damage
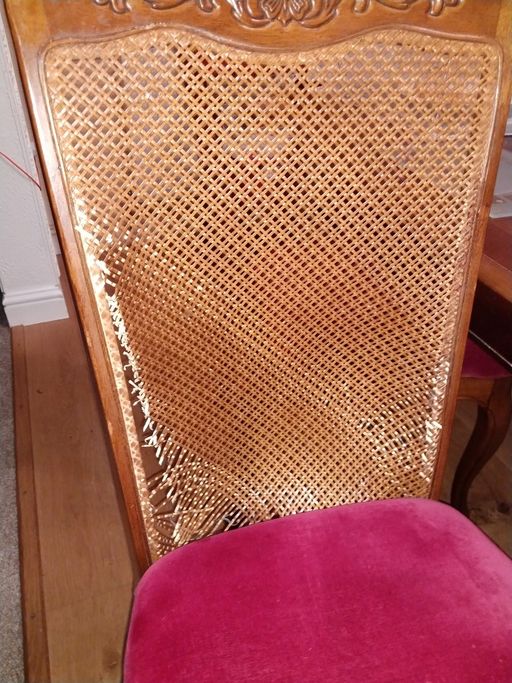
The rattan back seems to be retained using the traditional method of being glued and wedged into a rebate in the wood using a reed section. Alas in some places this has failed where the rattan has pulled out of the grove. On other chairs it has actually torn or strands have been broken near the read, so the only way to fix this properly will be to replace the whole panel. Since weave pattern is not that easy to get it made sense to do all six chairs so the all match, and that way I could use any pattern that suited the chair.
Preparation - Removing the reed
The first job (after taking the cushions off, and taking the arms off the carver chairs), was to get the retaining reed out of it's groove. Traditionally this would be glued in with a hide glue so you have a fighting chance of softening it (moisture, heat, steam etc) to make removal possible. These were a bit of an unknown!
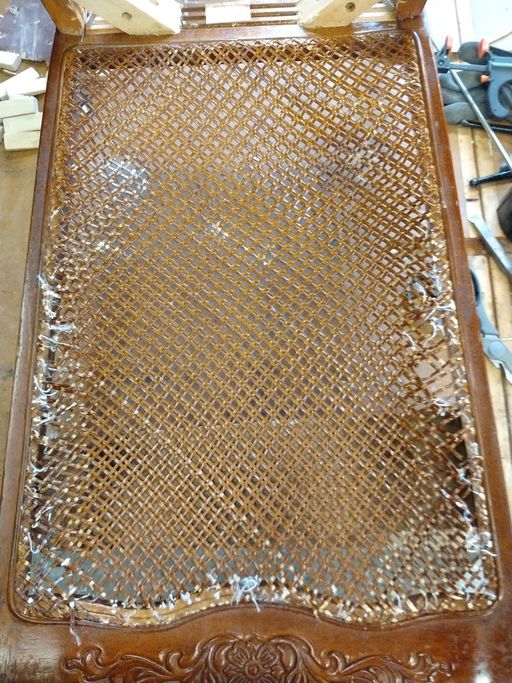
So with the patient on the table:
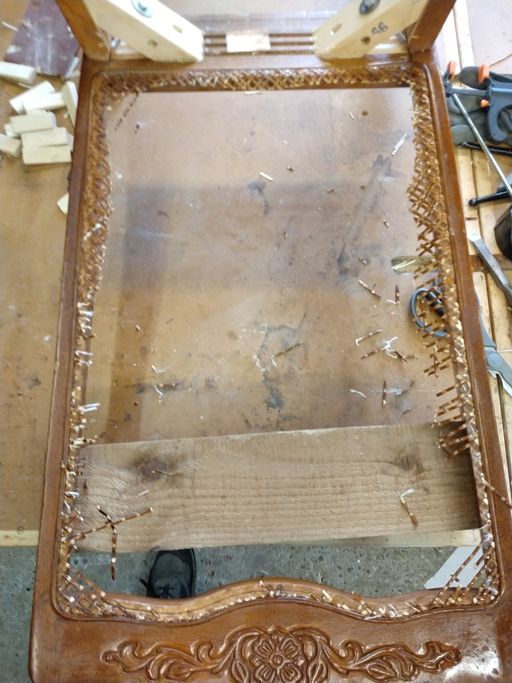
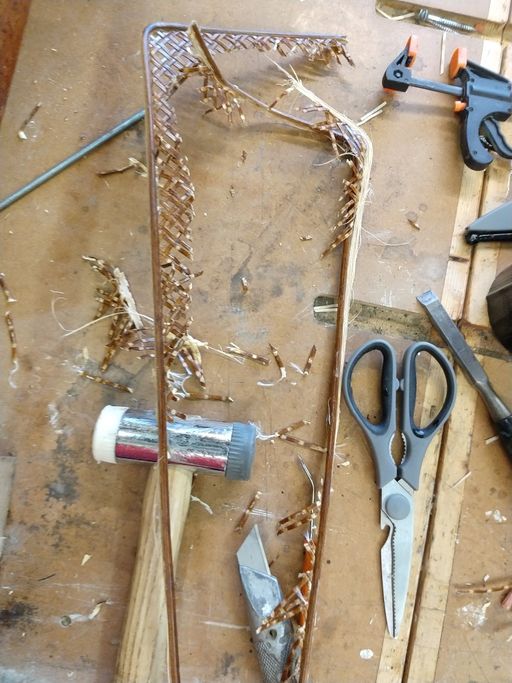
A quick slash with a Stanley knife got rid of the bulk of the rattan:
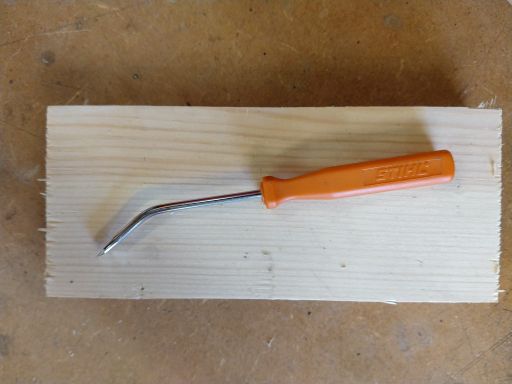
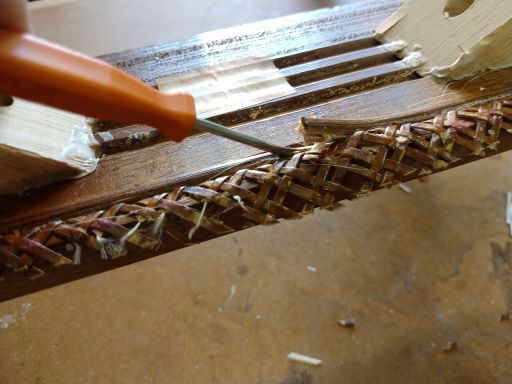
Next I made tool for the job (apparently you can buy things for doing this bit). In this case just a small screwdriver that I did not mind sacrificing! I heated it with a MAPP gas torch and put a bend in, then quenched it. Then sharpened the end on a bench grinder so that it only had one bevel on the top surface.
This was designed to get under the reed and make prying it up easier. It was also strong enough to be hammered along the base of the groove.
Some of the reed came out easily enough - some bits were actually loose. A few bits were quite tight. There was also a significant variation between different chairs.
On the easy ones I could get long runs out in one piece:
Others were small bits at a time. (Some guides advocate drilling small holes in the reed to allow water or alcohol to get into the base of the groove to soften the glue.
One of the problems I soon found was that this rattan had been fixed in place with staples in the base of the groove in various places, and that made getting those sections of reed out difficult.
Pulling the staples
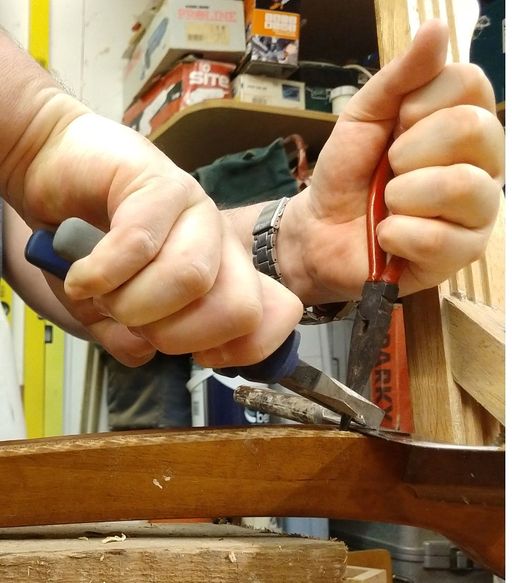
Getting the staples out was the next challenge. These being set in the bottom of a narrow groove. Eventually after searching about I found an old pair of pointed nose pliers that were small enough to get to the staple, but also strong enough to get some grip. Alas it was still not possible to get enough grip with those, but by using a large pair of combination pliers to grip and compress the nose of the small pliers, I could lift the handle while pivoting on the nose of the big pliers (using a paint scraper as hard surface to lever from), it was possible to pull them:
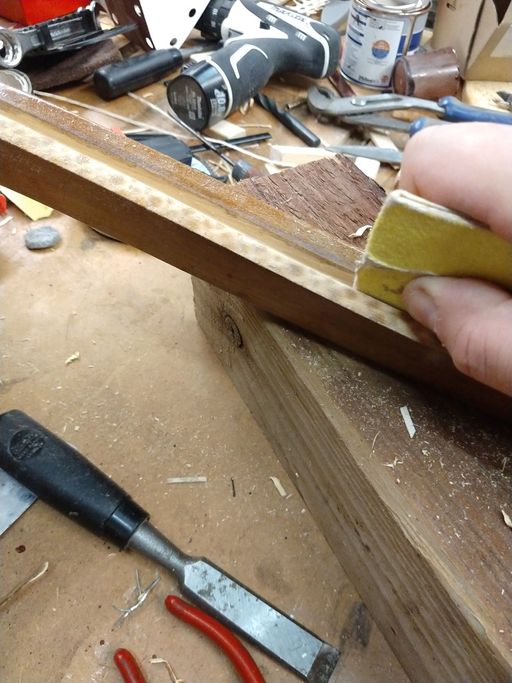
The last prep job was to sand and clean the groove:
Taking some time to round over the inner edge of the groove so that there is no sharp edge to damage the new rattan.
Fitting the new rattan
The next job was to cut a section of rattan to roughly the right size with a small overlap all round. Then cut a length of reed to approximate length. The rattan pattern is a fairy common one that creates small "hex" cells. The reed was just a 5mm round reed. (both ordered from Ali express since it was somewhat cheaper than from the more traditional furniture restoration / wicker suppliers that I could find).
Before it can be used it needs to be softened by soaking in warm water. I found a paint scuttle was just about large enough to get it folded in there (and a bottle or Tightbond a handy weight to stop it floating!):
While that was soaking I made myself some small wedges. After 30 minutes of soaking, we were ready to start:
A couple of wedges pin it in place, then add more on each side to hold it firmly:
Adding more as we go:
Once it was well wedged, I could use a spare wedge to start hammering the rattan into the groove all the way round:
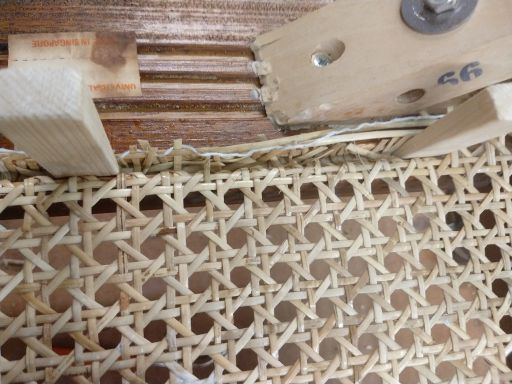
Once pushed into the groove all round the rattan stays in place nicely without the wedges:
At this point I could trim off all the bits on the outside of the groove so that the free edge will be completely hidden by the reed.
Gluing up
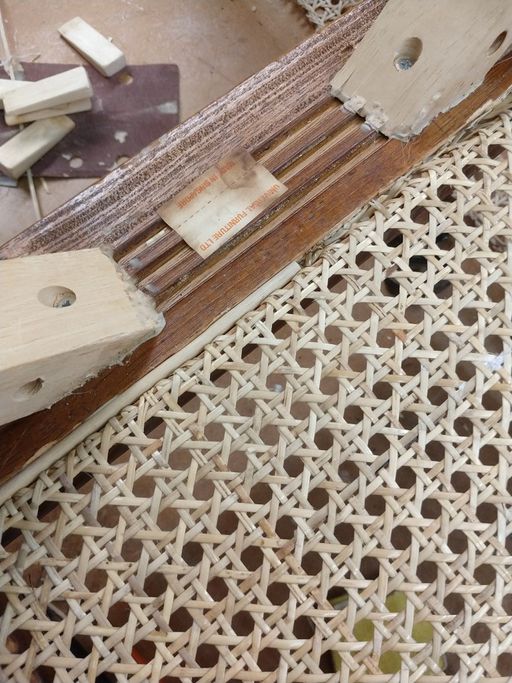
Now I could apply a generous bead of glue all round the groove. I am using Titebond Hide Gluehere:
Starting at the bottom (where the join in the reed will be hidden by the cushion), I could start driving in the reed:
First with a rubber face hammer, and then with a small wood push stick to drive it a bit deeper into the groove.
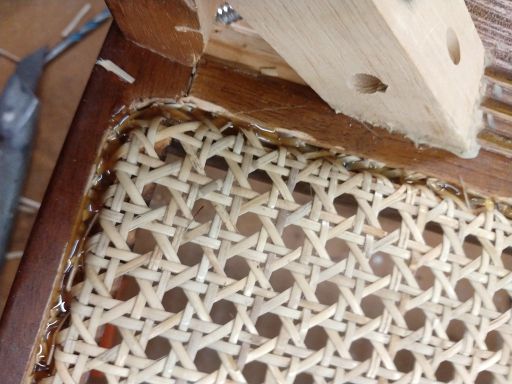
The damp reed is quite soft and can be gently bent round the corners:
Once I was all the way around the reed could be trimmed to length and the final section driven home.
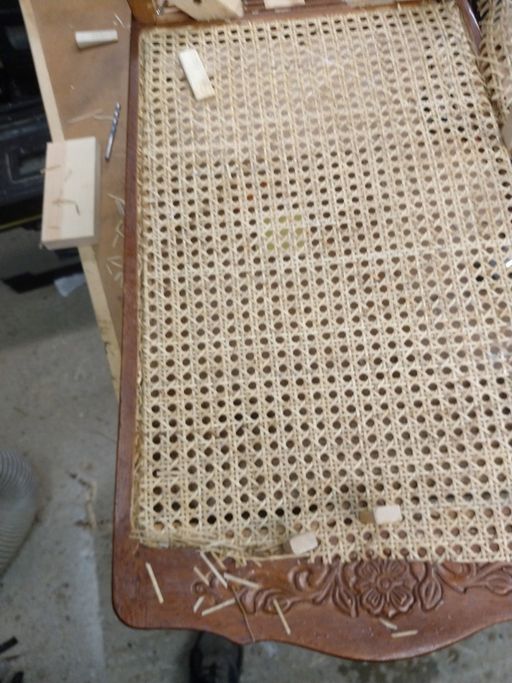
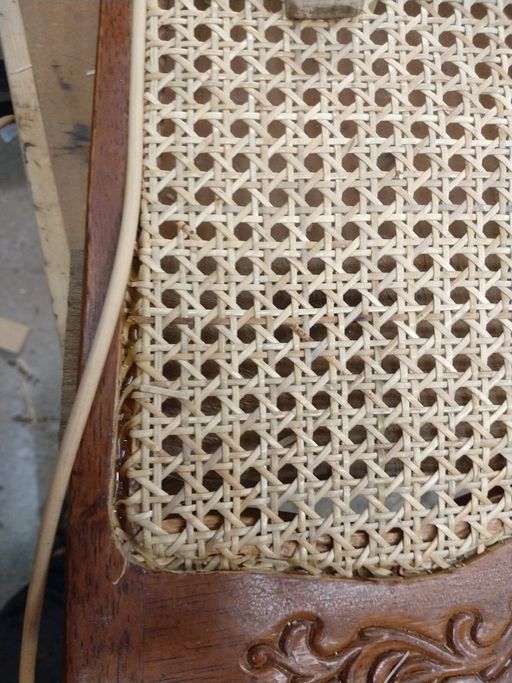
New rattan installed
The end result looked quite pleasing: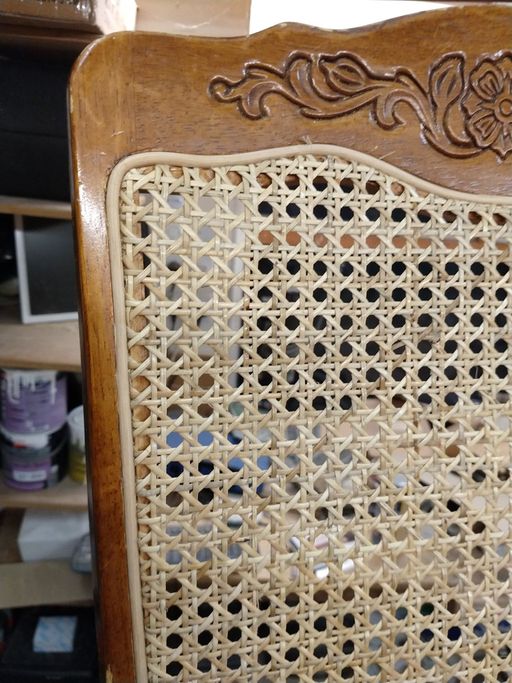
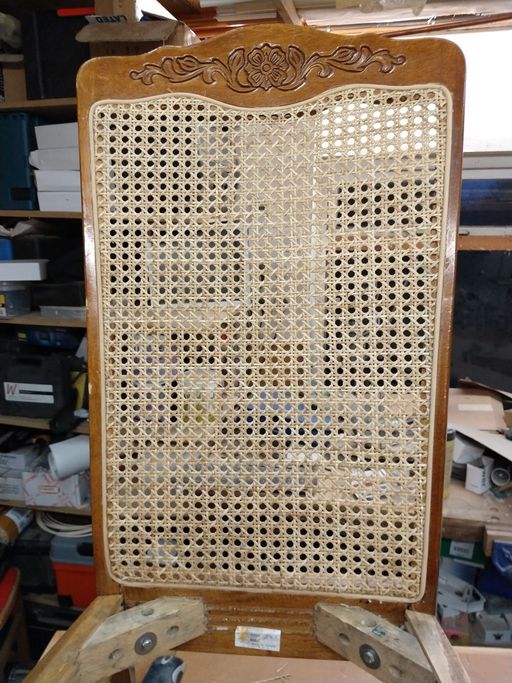
So I mopped up any glue that had squeezed out with a damp sponge, and left it for 48 hours to dry properly.
Flaming
The next job prior to finishing was to "flame" the rattan. This is just a quick pass with a blow torch (keeping it moving at all times!) to cause any small strands of rattan to burn and "flame off". That will stop them turning into little sharp spikes to catch skin and clothes once a finish has been applied.
Finishing
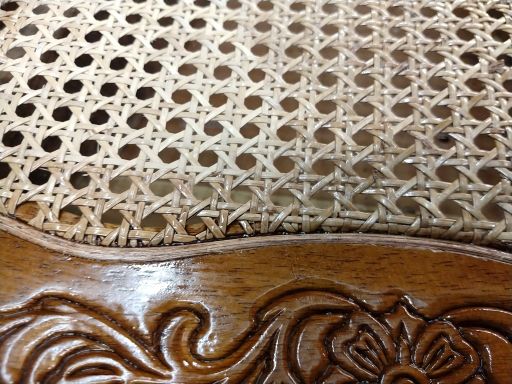
The next question was what to finish the rattan with. I tried a few experiments with stains and wood oils, but found that the rattan is not very good at taking colour. So decided to go for a polyurethane varnish instead since that would create a strong film finish. Also being quite slow drying will give it more chance to sink in to the rattan and help get a better bond to it.
After a bit of experimentation with colours, I found that a half and half mix of Rustin's Mahogany, and Rustin's Dark Oak looked good. I wanted something that was a similar tone to the original but slight darker. (the chairs were always slightly lighter than their matching table).
I gave the front face of the wood a light sanding with 220 grit paper, and then started painting in the reed:
And moved onto the rest of the back:
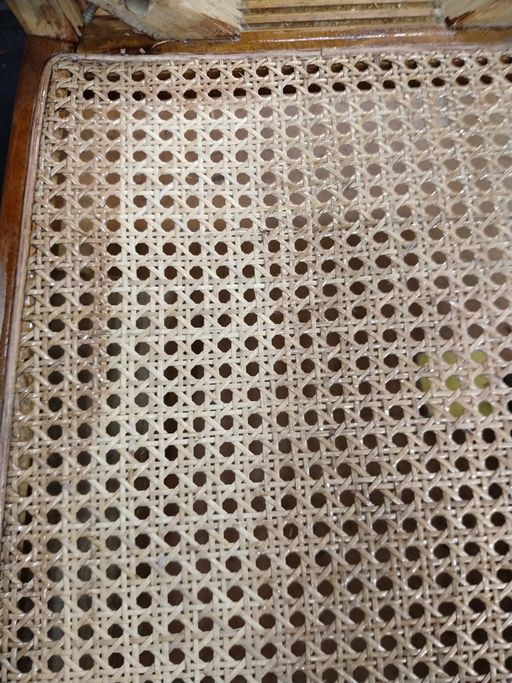
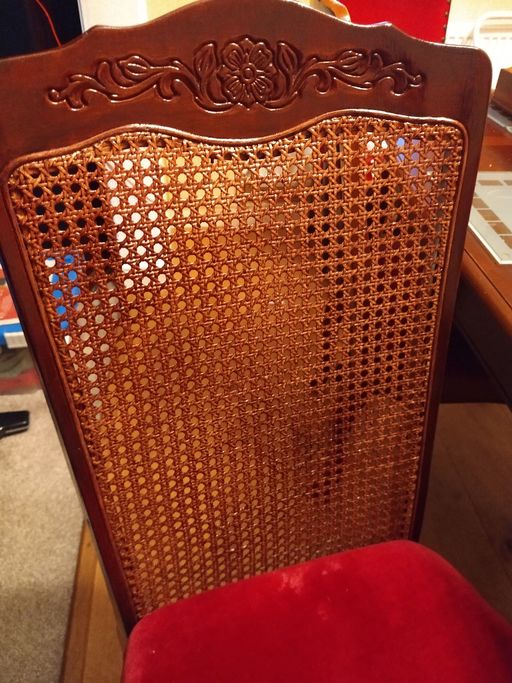
After getting a good first coat on the front (brushing from multiple directions to make sure all the surfaces were covered), and did a coat on the back:
Left that to dry for a day, and then did a second coat, taking care to feather the new colour into the existing woodwork colour.
Job Done
Lastly it was time to reassemble the chairs:
Then get them back to the table:
The remainder of the job was just do it all over a few more times!
