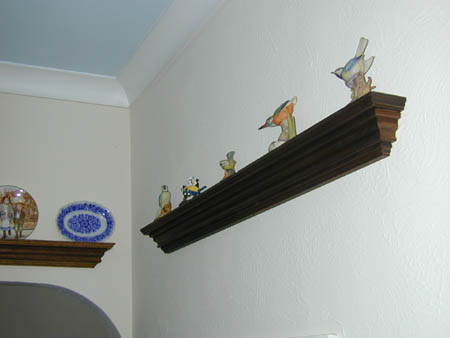
Ornate shelf
Introduction
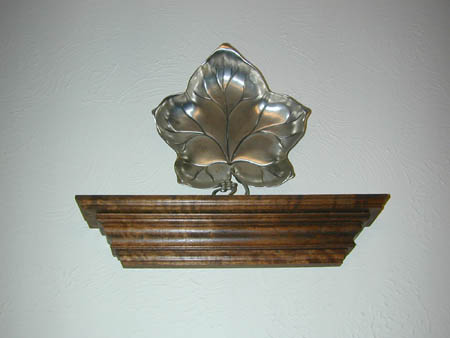
This article describes construction of a ornate display shelf suitable for small plates and other small Objets d′art. Construction is fairly simple, as is easy concealed mounting of the finished shelf.
Materials
The show work on this shelf was done in a generic hardwood of the type sold by many wood outlets as suitable for interior window boards etc. A small amount of softwood or man made sheet material is also used for the rear fixing panel which will ultimately be hidden from view.
Tools
The main tool here is a router. If you plan on making you own crown moulding, then a router table will be necessary. However other variations of the design (say using a cove) would allow construction with a hand held machine. Final assembly is done with glue and biscuits.
Design
The design aims to make a shelf that is practical, but also ornamental in its own right. The one shown here is probably a "Marmite" (i.e. something you love or hate!), but variation would be quite simple using alternative cutters to detail the top and bottom sections of the shelf, and different moulding designs for the infill section.
Material preparation
The first stage is to decide on what shelf lengths are required. The ones shown here were 18" and 4', however other sizes can be designed as required.
For speed, I planed the complete boards using a thicknesser before starting. however this can be done after primary cutting if preferred. For each shelf you will need to cut the main shelf, the lower support, the back plate, and an adequate length of infill.
Cutting
I elected for a 4" deep main shelf, and a 1.5" deep lower support, both about 19mm / 3/4" thickness. The back plate height will be dictated by the height of your infill panel. A thickness of approx 1/2" is adequate. The infill panel can be made from the same thickness of timber as the main shelf in most cases. These were all ripped down to width on the table saw (two complete shelves can be obtained from one 9" wide board).
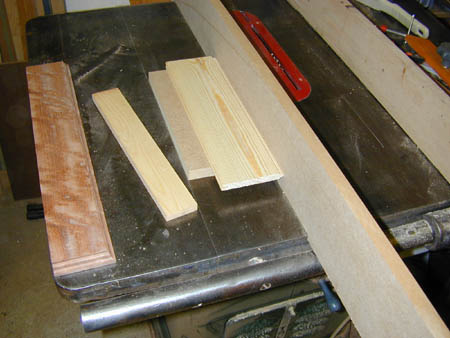
Note the lower panel is several inches shorter than the shelf due to the mitred corners of the infill. The infill will need to be about 6" longer than the shelf to allow adequate material to cut the mitres. The back plate is the shortest, and can be a couple of inches shorter than the lower panel. The exact lengths required will depend on the design used. They can be worked out by calculation (nothing more complicated than a bit of Pythagoras), or by scale drawing and measurement.
Machining
The top shelf
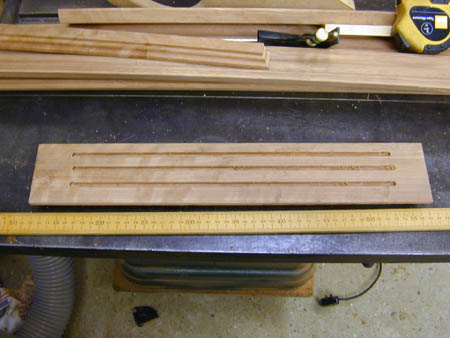
There are two machining activities for the top shelf; the decorative edge on the underside of the shelf, and the plate grooves on the top surface.
The grooves can be cut with a 1/4" straight fluted cutter. I cut three on the shelf at various spacings from the rear of the shelf. This allows for plates with different sizes of bevel to stand safely on edge without any risk of them slipping or tipping forward. The grooves only need to be a few mm deep, and should be "stopped" cuts so that they are not visible at the ends of the shelf when in use. I cut these on the router table, using the fence cutout as a rough guide to the starting and ending points for each cut. At the starting point I supported the shelf over the protruding cutter, and hinged it down onto the spinning cutter to start the groove. Slide the shelf along cutting to grove until the end of the cut is reached, and then carefully lift the shelf off the cutter. Adjust the fence position and then repeat for the other grooves:
(if making several shelves, its easier to groove all of them now since this is the last time we will need a straight cutter)
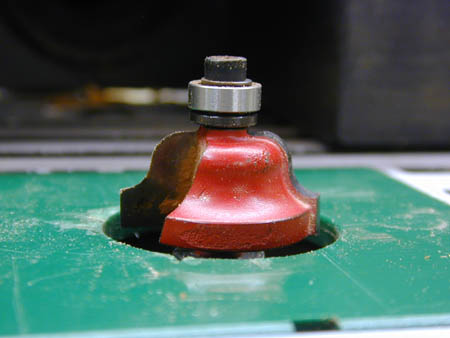
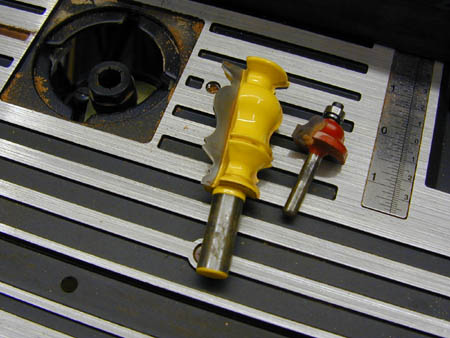
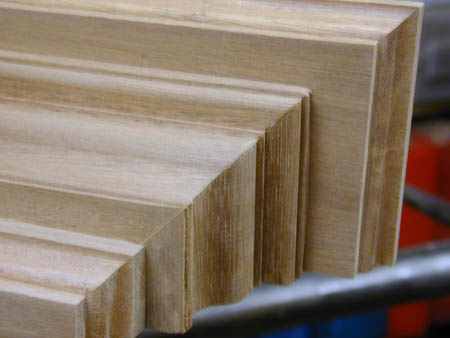
The next operation is to profile the edge of the shelf on the front and both sides (the rear is left square). For this I used a bearing guided ogee cutter:
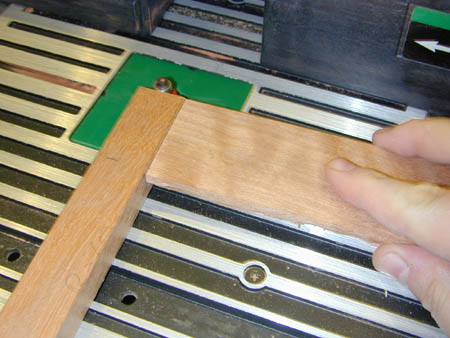
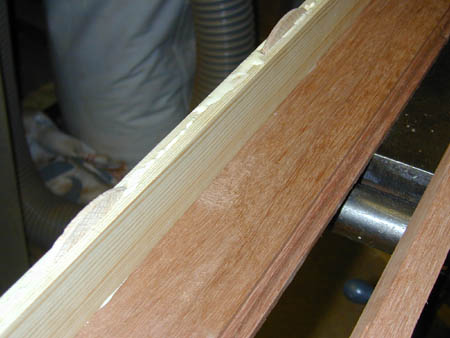
This was set to cut quite "deep" so that the ogee appeared in the middle of the finished shelf thickness, with a square cut step on the lower edge, roughly matching the thickness of the remaining unprofiled section at the top. Take care to take a couple of passes when cutting the end grain, and use a bit of scrap timber to support the cutter as it exits at the end of the cut. This should prevent the end grain splitting away:
Ideally cut the left end of the shelf first, then the width, and finally the right end. This will allow greatest chance to rectify any breakout with the next cut.
The lower panel
The lower panel is edge profiles in exactly the same way as the shelf. However unlike the shelf it needs no grooving.
The infill
In my design I used a crown moulding cutter to prepare the infill:
This is a large cutter that must be used in a table, with a medium speed (approx 12 - 15k rmp). I prepared the table with several fingerboards clamped into position to ensure the timber was held firmly against the fence and also down on the table, since any variation here will show in the finish. I cut each moulding in two passes - the first to half depth, and then a second pass to final depth. (if doing several shelves, then complete all first passes before moving on to the second to save adjusting the table). It is important to make sure that you have enough length of infill panel for each shelf since it is likely that any imperfections in the panel will be evident in the start and end sections of the timber where it enters and exists the finger boarded section of the table.
With the cutter used here there is a natural bevel at one side of the cutter, and this angle was copied to the tilt of the blade on the table saw using a carpenters bevel. The infill can then be cut to final height on the table saw with bevelled cuts that suit the profile.
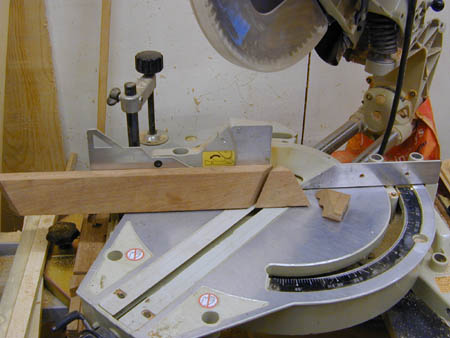
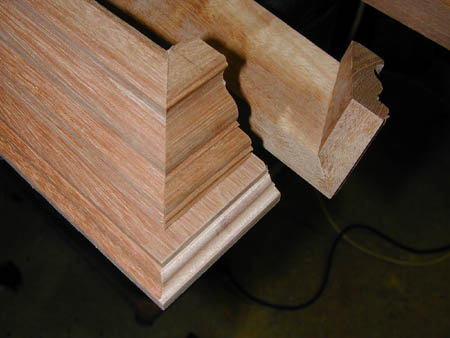
The final task is to cut the mitred ends of the infill. The length of the front of the infill will need to be carfully calculated or measured to get an aesthetically pleasing result. Ideally the finished mitres at each end of the shelf should all align along the same straight line:
I cut these on a sliding compound mitre saw, however a mitre box would also give a good result.
Care will need to be taken since the cut is a compound mitre. This is achieved either as I did by cutting a simple mitre with the work held at the final assembly angle, or by cutting a compound mitre with the work flat on the table or against the fence. Four mitre cuts are required per shelf (two at each end). (In addition a pair of square cuts will be needed to trim the "return" sections of the infill to the right depth for fitting, but these are best left until assembly time).
Assembly
The infill
First I glued up the mitred ends of the infill panel. For this I coated both sides of the joint with impact adhesive, and allowed it to dry to "tacky" prior to assembly. This makes the joint relatively rigid immediately. Tape can be used to add support to the joint while drying fully, or alternatively if you have a headless pinner or brad nailer, then a small pin can be fired into the ends of the mitre to lock the final position.
(note the infill panel is never actually fixed to anything - in the completed assembly it is a friction fit between the shelf and lower panels).
Shelf and lower panel
The shelf and lower panel are fixed to the back panel using biscuits and glue. Start my marking the biscuit positions on the each of the parts. It is easiest to do this by stacking them on top of each other, and then drawing a square line down them in each biscuit position:
The biscuits cuts into the top face of the lower panel, and the under face of the top shelf are straight forward, and are done by plunging the jointer down into the work resting on the edge of a bench.
The joints for the back plate are a little more tricky since there is a fair chance (as was the case here) that the thickness of the back panel is too small to allow a simple plunge cut while the material is laid flat on a bench.
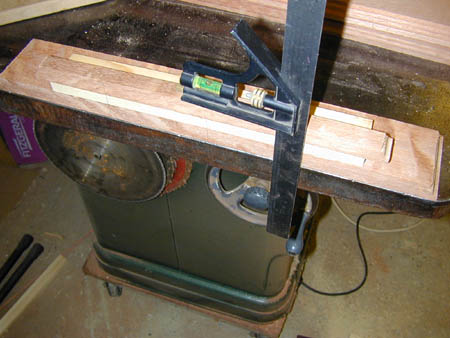
The solution here was to make up a stop (I did this dropping a bit of MDF into a guide slot on the table saw) and then using a couple of bits of scrap timber to arrange a platform that will add some clearance below the edge of the back piece:
Final assembly simply requires biscuiting and glueup. Clamps can hold the top and bottom of the shelf in place while drying.
Fitting the infill
The infill is a friction fit between top and bottom panels. Carefull planing of the top or bottom edges of the infill will allow this fit to be adjusted. It wants to be stiff enough that once pushed into place, there is no danger of it working its way out by vibration, while it also wants to be removable if required to allow dismounting of the shelf. Once the infill is a nice snug fit, the returns at each end can be trimmed to depth to that they reach the wall when hung, and nicely cover the ends of the back panel.
Finishing
Sanding
First stage is final sanding. With "frilly" edges such as those which abound here, a flexible 180 grit wet'n'dry sanding block is ideal, since these can deform to the shape of the profiles. The top and bottom flat surfaces can be finished off with an orbital or delta sander as required.
Staining & waxing
I elected to stain these down using a Coloron jacobean dark oak stain, and allowing that to dry before waxing with Liberon black Bison wax.
Polishing
To get a slight luster on the finished shelf, I buffed the waxed wood using a cloth for the flat sections, and a small fibre polishing drum in a Dremmel style mini drill to get into all the curvy bits.
Hanging the shelf
These are very easy to hang. Simply remove the infill panel, and drill holes through the back panel ready for the mounting screws. Offer the shelf to the wall in the final position and level, then mark through the back panel holes. Drill and plug the wall as required before fixing the shelf using screws. Finally replace the infill panel to hide the fixings.
Finished results
