Difference between revisions of "Building a log cabin"
m (→Lighting) |
|||
| Line 118: | Line 118: | ||
==Lighting== | ==Lighting== | ||
| − | There was a chance to fix a few lighting problems here... On the outside of the cabin, I added some weatherproof LED tape lights under the eves, to create a "wall washing" effect that also gently illuminates | + | There was a chance to fix a few lighting problems here... On the outside of the cabin, I added some weatherproof LED tape lights under the eves, to create a "wall washing" effect that also gently illuminates the area surrounding the cabin. A small spotlight on one corner highlights the BBQ, which makes cooking on dark evenings much easier, and the other corner has a colour cycling LED spotlight to highlight some steps and adjacent vegetation - just to look pretty, and because I could! |
[[image:CabinWithExternalLights.jpg|512px]] | [[image:CabinWithExternalLights.jpg|512px]] | ||
Revision as of 19:52, 20 October 2016
Introduction
This is a quick description of the assembly of a log cabin kit. Various online suppliers will do models similar to the one shown here, and they are a relatively easy job for a competent DIYer to get built in a few days.
Click images for larger versions
Delivery
This particular one was supplied from stock, and could be sent out next day. The only downside of this speed was that a normal pallet based courier is used, and the delivery vehicles don't have mechanical unloading capabilities. Hence you need two people ready to unload - preferably within 20 mins to half and hour.
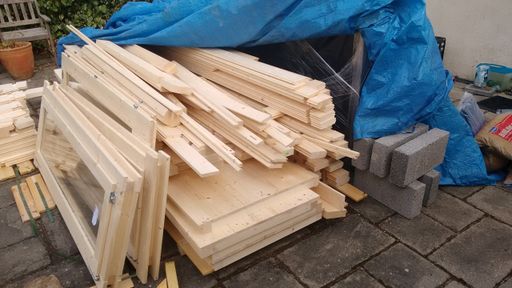
Once unloaded from the pallet (which came nicely shrink wrapped, and everything very carefully stacked inside with spacer and and splints between all the major components), we had a pile of stuff :
Foundations
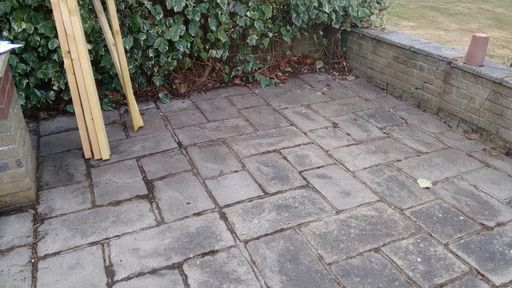
This one was to be built on an existing patio, so that made the base construction relatively easy. First we selected and cleared a corner:
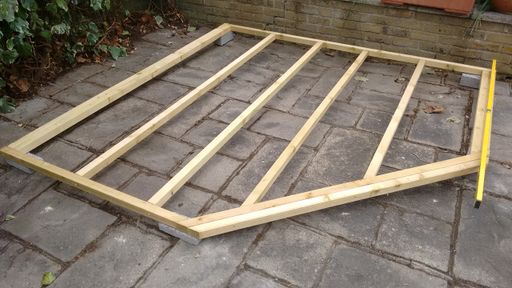
Then assembled the foundation frame. This will supplied in tanalised timber, with all parts pre cut - you just need to follow the directions a screw it together (all fixing supplied - although note that all the screws are torx head screws).
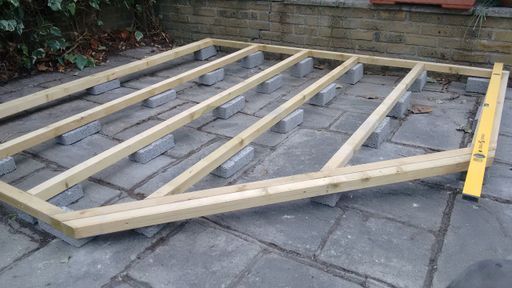
Since the patio in this area is not flat (due partly to some subsidence toward the rear of it (now fixed) I decided to use blocks to lift the foundation a little and take out any surface irregularities (this also proved to be a blessing in disguise since the overhang above the door would otherwise only be about 6'1" above ground level - the extra few inches of height making it head safe!
The first test fit was done to work out the location and what kind of block sizes would be required:
Having levelled up the frame on the corner supports, I then measured the size of block required for other places:
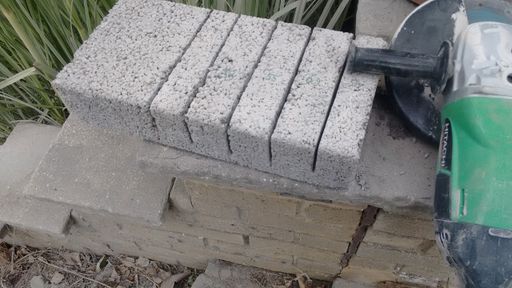
The blocks were made to custom thickness by chopping slices of the end of a few dense concrete blocks. I used 4 blocks in tota to make around 25 pads:
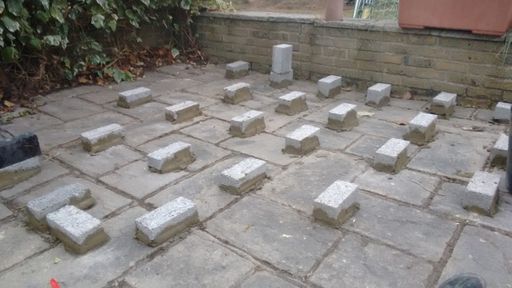
These could then be bedded onto a strong mortar mix:
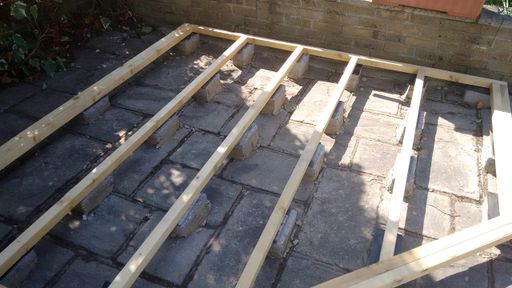
Finally the frame could be set onto the blocks once the mortar was set. Some strips of DPC were cut and stuck to the tops of the blocks. Any where there were slight errors in the height leaving the frame feeling a little "bouncy", some sections of slate (fake!) ripped off the side of a large slate) were used to pack any gaps:
For good measure, I then gave the whole perimeter of the foundation timbers a layer of DPC.
Starting assembly
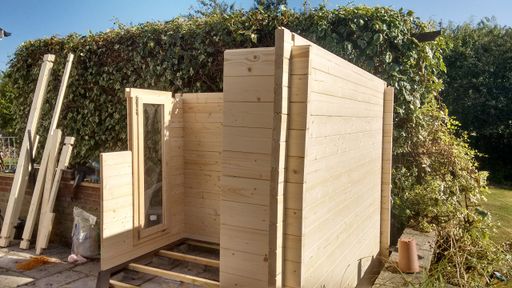
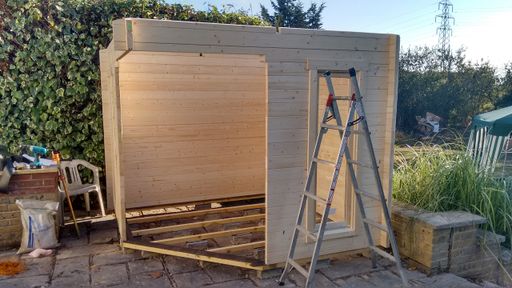
This bit is actually quite good fun, and not unlike playing with man size lego! Each of the "logs" (in reality 44 thick planks about 5" tall, with a double tongue and grove profile machined onto the tops and bottoms, and interlocking rebates machined near each end). The main challenge at this stage is finding all the right starter pieces from the huge pile of available timber. The logs interlock, so adjacent walls are offset by half a plank height, hence there are some half height logs for two of the walls that need to be used to start.
Most of the logs drop into place by hand or with a bit of a push. Some need a little persuasion with a mallet, and the supplied striking block (with profiled edge so you don't damage the interlocking profile on the timber). Once the walls are near to full height, you need to look for the half heigh finishing rows that bring the walls all out level at the same height:
Getting the roof on
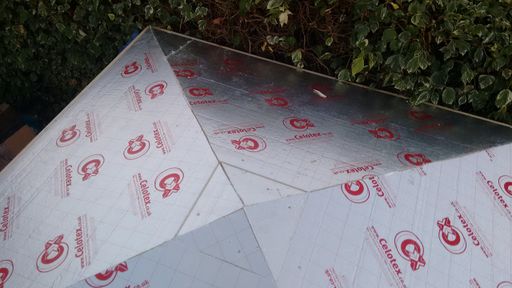
The roof comes partly pre-assembled in 16 sections. You start by screwing pairs of these together to make 8 large triangles. Next to find are the four main roof rafters (about 6 x 2") and fix these in place. Then the triangles can be fixed one by one. Once they are all up, they are firmly screwed to each other and the rafters. This creates a "hipped" square base pyramid style roof. My kit came with the optional insulation kit. That was next to go on. First some 2x2" timbers were screwed to the periphery of the roof (these needed to be cut to size). This forms a retaining edge for the PIR foam insulation boards. The supplied boards (50mm Celotex) then need to be cut in to fit the roof:
(this was one of those times where having the pre-printed grid on the Celotex was actually quite useful!)
A normal panel saw tends to be the easiest way to cut PIR foam boards, although it does make a bit of dust.
The next stage was to apply the roof finish. My kit came with glass fibre reinforced bitumen roof shingles. These need to be nailed on (vast quantity of long clout nails supplied - just the right length to reach the 19mm roof boarding through the felt and thick insulation).
The roof insulation is rigid enough that you don't need any additional boarding over the insulation - you just fix it straight on top and through it into the boarding below. (creating a "warm deck" roof, where all the timbers are on the internal "warm" side of the roof).
The process of applying shingles was reasonably straight forward. First a shingle strip (they come in approx 1m lengths with three "tiles" on each) was fixed at the bottom edge, but with the continuous non tile edge toward the edge of the roof. This formed the overhang at the bottom of the roof. Subsequent shingles were then nailed on in the right orientation (the first directly on top of the starter row), such that the next row covers the top of the previous shingle and hides its nails.
Some shingle strips are then cut down to make individual tile width capping pieces to do the roof hips. These are also nailed on right up to the top. The last one needs gluing in place so as to not leave any exposed nails.
Since the good weather lasting was possibly doubtful, a bit late late night moon lit roofing ensured that the shingles were well enough in place to make it water proof. (made easier when I remembered the large tripod mounted work lights in the workshop!)
Getting the doors on
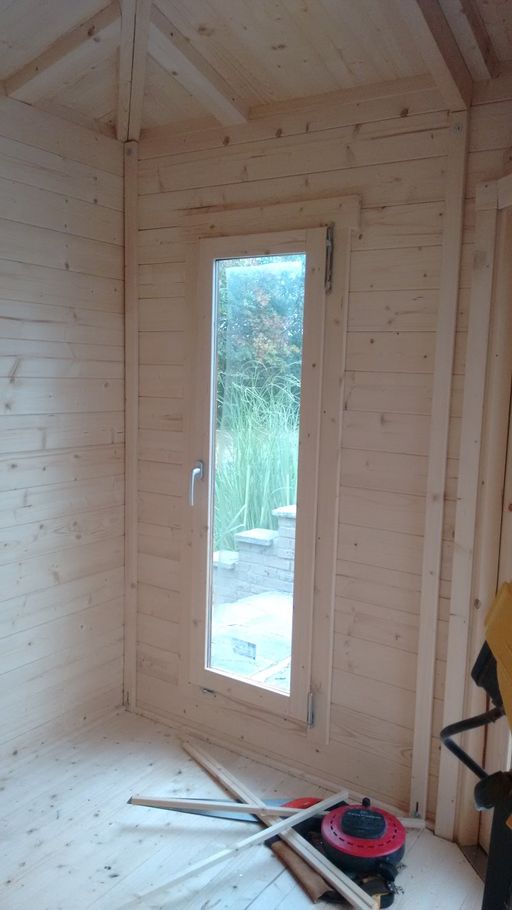
The last job to make the whole building water tight was to fit the doors. The frame is first assembled from several quite elaborately machined sections of timber. This is then fitted, and the frame section of the hinges fitted. The doors are then just hung onto the hinge pegs. The hinges allow a fair amount of adjustment to get them even and level etc. This was where I met the first problem - I seemed to have a slight skew in the frame that was putting the doors out of square by more than the hinge adjustment could tune out. Tapping the walls about with a sledge hammer helped a bit (the left was was still free to move a bit, although the right hand one was screwed to the foundation). That helped but was still not quite enough. Then I remembered that the log that crossed the top of the left window was about a quarter inch longer than the remaining short sections that went below (these are normally well hidden by the generous retaining edges round the windows), so by taking a couple of the trim parts that retain the windows off, there was space to get in there with a multimaster and plunge cut away a small bit of wood. This allowed the top of the frame to be shifted over a 1/4", which was just about enough to get it square.
Insulating the floor
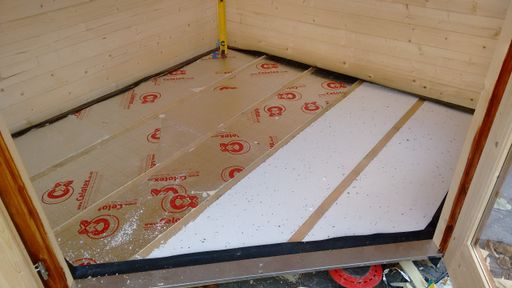
The insulation kit included some 25mm expanded polystyrene boards for the floor as well. The instructions suggested hammering in a row of nails into the sides of the floor joists to stop these "dropping through". Since I already had the foundation blocks which were wider than the joists and would do a good job of retaining the insulation, I skipped this. Also I had a fair amount of Celotex left over form the roof, and so decided to use as much of this as I could to the floor. The polystyrene could then be doubled up in two layers for the rest.
Once the floor was insulated, the T&G floor could go in next.
Inside
There was not much to do inside beyond fit some trim strips round the skirting to hide the floor edges. Also there are some "storm" strips - long wooden battens that tie the top to the bottom log (with a bit of expansion room). These prevent the roof being pulled off in high winds (since the roof is primarily held on by weight - the logs are not glued or screwed to each other)
The door lock could also now be fitted (euro cylinder style lock)
Finshing off
The cabin needs a couple of coats of wood preserver. So I opted for a part "soak in", part film style of product (like Sadolin, or Ronseal, but in this case a Wickes own brand "professional" wood stain. The first coat was hand brushed, and to be fair was not a particularly nice stuff to brush on (quite "sticky" and difficult work into the nooks and crannies). So for the second coat I thinned it down about 10% with white spirit and sprayed it with a HVLP sprayer.
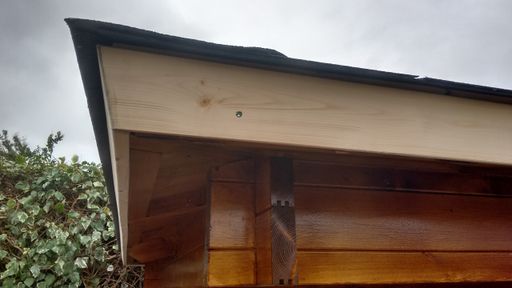
So far none of the joinery required was at all complicated - pretty much everything was pre cut and very accurately machined. The last job was to fit the facia round the top. This needed a compound mitre cut on the ends, and since the planks were too long to get into my mitre saw, I had to do these by hand!
To hide the edges of the foundation blocks, I chopped up some sacrificial planks from the pallet that the cabin came on, to make a skirt for it. These are fixed to the concrete blocks (Gripfill), and only enclose two sides of the building, so it should still allow airflow under it and not track moisture up to the building.
Result
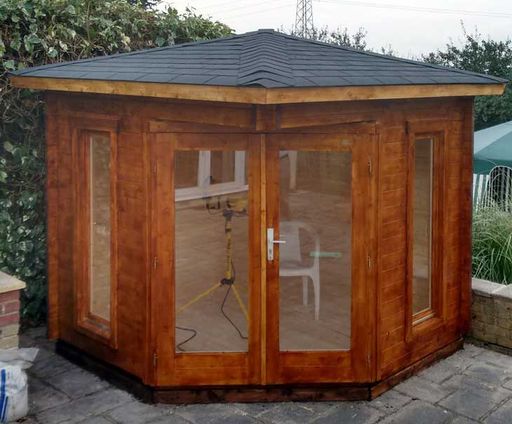
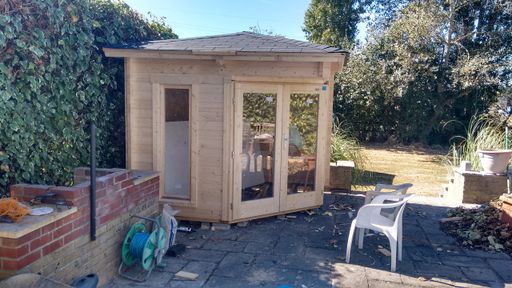
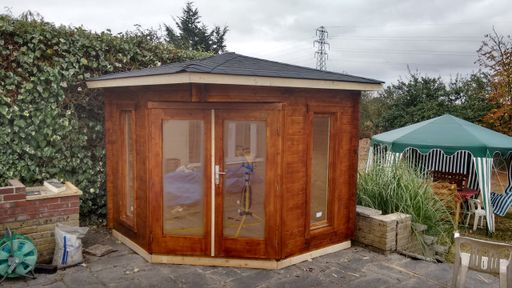
The end result (nearly, couple of bits still to stain)):
Wiring up
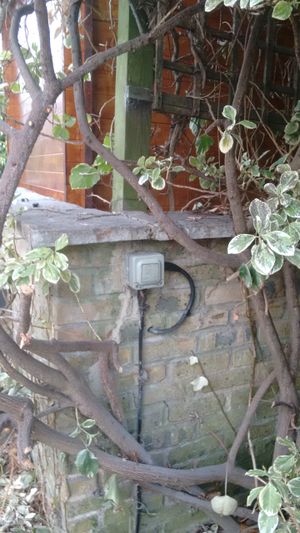
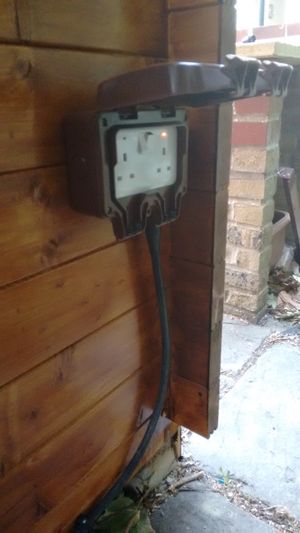
Since there was already a (RCD protected) garden socket not far from the back of the cabin (but in a useless place in the middle of a bush!), I decided (after laying waste to large swathes of bush) to run a length of SWA cable from this into a surface mounted double socket on the back of the cabin. (this makes terminating the SWA easy without needing to get it into the building). Then that socket could feed straight through the wall for an internal double socket, and a Fused Connection Unit to feed the lighting.
A connection from the back of this goes through the wall into the internal socket. (the outside socket is branded BG - not my usual brand of choice, but that comes from wanting something in a hurry at a weekend! To be fair, its not bad with plenty of wiring space, and a polycarbonate body. Not to sure of the logic of having neon indicators that you can't see when its closed).
Lighting
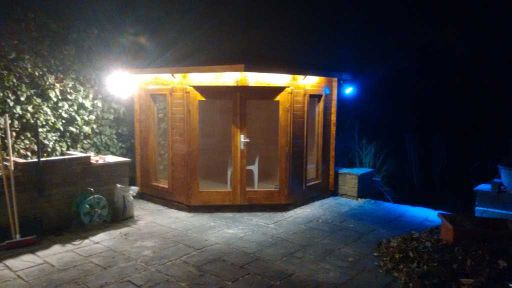
There was a chance to fix a few lighting problems here... On the outside of the cabin, I added some weatherproof LED tape lights under the eves, to create a "wall washing" effect that also gently illuminates the area surrounding the cabin. A small spotlight on one corner highlights the BBQ, which makes cooking on dark evenings much easier, and the other corner has a colour cycling LED spotlight to highlight some steps and adjacent vegetation - just to look pretty, and because I could!
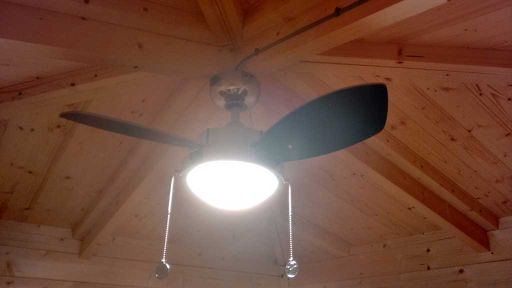
Internally I managed to find a small ceiling fan / light that had a very short drop (under 30cm) and a relatively small fan radius. This gives light, and some airflow.
