Difference between revisions of "Cable burial"
(in progress) |
|||
| Line 3: | Line 3: | ||
==Cable Choice== | ==Cable Choice== | ||
| − | Only certain types of cable are suitable for direct burial without additional protection. Commonly used types are Steel Wire Armoured (SWA) cable, and other PVC clad cables that have a | + | Only certain types of cable are suitable for direct burial without additional protection. Commonly used types are [[Cables#Armoured_Cable_.2F_Steel_Wire_Armoured|Steel Wire Armoured (SWA)]] cable, and other PVC clad cables like "split concentric" that have a conductor layout where an earthed metallic sheath encloses the live conductions. |
Other cable types would need to be protected in suitable underground ducting or trunking. | Other cable types would need to be protected in suitable underground ducting or trunking. | ||
| Line 10: | Line 10: | ||
An underground cable will normally be laid in a trench, and then the trench back filled to cover it. | An underground cable will normally be laid in a trench, and then the trench back filled to cover it. | ||
| − | The cable needs to be buried deep enough that it is unlikely to be disturbed accidentally in future. There are no hard and fast rules here since circumstances will dictate | + | The cable needs to be buried deep enough that it is unlikely to be disturbed accidentally in future. There are no hard and fast rules here since circumstances will dictate an appropriate depth. In areas unlikely to be dug over or disturbed such as under a path or a lawn, then shallower burial is acceptable - possibly a spade's blade depth or around 12". For a cable passing under a flower bed, where one could expect the area to be dug over, A typical minimum depth would increase to at least two spade's depth. |
| + | |||
| + | ==Digging a trench== | ||
| + | Long cable runs may be better done with a trenching machine of some form - local hire shops will normally have something that takes much of the hard work out of this! | ||
| + | |||
| + | Shorter runs can be done relatively easily by hand. If digging in a lawn as shown here, cutting a pair of parallel straight lines through the turf with a sharp spade or lawn edger is a good first step - sections of turf can then be lifted out for replacement later. | ||
| + | |||
| + | The trench does not need to be particularly wide - although the it needs to be wide enough to get easy access with what tools you have. | ||
| + | |||
| + | [[image:TrenchDiggingMattock.jpg|512px]] | ||
| + | |||
| + | One of the easiest tools for digging a narrow trench like this is the grubbing mattock. It not only digs in hard ground far more easily than a spade, it also makes getting the spoil out of the trench easier. Its narrow width also means less earth to move. | ||
| + | |||
| + | ==Laying the cable== | ||
| + | |||
| + | Once the trench is deep enough you are ready to lay your cable. It needs to be free of stones and other sharp objects that may damage the cable. Depending on your local conditions, it may be necessary to "blind" the trench with some sand or pea shingle first. | ||
| + | |||
| + | [[image:TrenhCableBlinding.jpg|512px]] | ||
| + | |||
| + | The cable can then be placed, and if necessary covered with a thin layer of blinding material. | ||
| + | |||
| + | Now start back filling the trench - aim to get an even cover of say 5 to 6" of soil over the cable. At this point its good practice to lay a cable warning tape (rolls of the stuff can be bought in any electrical wholesalers) in the trench. This will ensure that anyone digging in the area later will find the tape before they get deep enough to damage the cable: | ||
| + | |||
| + | [[image:CableBelowWarningTape.jpg|512px]] | ||
| + | |||
| + | No fill the remainder of the trench. Note that once dug, the soil will "bulk up", and getting it all back in the trench will take some work! Tamp the material down as you go. With a lawn trench, finish the filling by replacing the turf. | ||
| + | |||
| + | [[image:TrenchStartRamming.jpg|512px|The turf came out attached to great lumps of solid Essex clay here!]] | ||
| + | |||
| + | Use a ramming tool (sometimes known as an "elephants foot") or a section of 4x2" and a sledge hammer, to work along the trench letting the top level again. | ||
| + | |||
| + | [[image:TrenchRammingHome.jpg|512px]] | ||
| + | |||
| + | If you manage to get all the spoil back into the trench there is less chance that the trench will drop or sag later leaving a visible line where it was dug. | ||
| + | |||
| + | [[image:TrenchFilledandLevelled.jpg|512px]] | ||
| + | |||
| + | Now all that remains is to wire up the cable. The cable will need to be terminated with [[Terminating SWA|suitable glands]]. In this case it was an extension to an existing SWA cable feed. A garden socket was removed and replaced with a waterproof junction box: | ||
| + | |||
| + | [[image:CableSourceConnection.jpg|512px]] | ||
| + | |||
| + | And the destination at a garden building was taken to a surface mounted double socket. This makes an easy termination for the SWA. One can then drill through the back of the socket and the wall its on to get power into the building itself. | ||
| + | |||
| + | [[image:CableTerminationConnection.jpg|512px]] | ||
| + | |||
| + | ==Obstructions== | ||
| + | Sometimes there is a path or other obstruction in your way. Rather than lifting the path, it may be worth seeing if you can dig under from a access holes either side. Sometimes you can just hammer through a section of timber of a blanked off pipe of some form (the pipe can be removed or left in place and just used as a duct once the end cap is removed). | ||
| + | |||
| + | |||
| + | =See Also= | ||
| + | * [[Special:Allpages|Wiki Contents]] | ||
| + | * [[Special:Categories|Wiki Subject Categories]] | ||
| + | * [[Cables]] | ||
| + | * [[Taking electricity outside]] | ||
| + | * [[Wiring colour codes]] | ||
| + | |||
| + | =External Links= | ||
| + | * [http://www.basec.org.uk British Approvals Service for Cables (BASEC)] | ||
| + | * [http://www.etscc.co.uk/blog-home/earthing-requirements-cable-glands-swa-cables Earthing Requirements of Cable Glands Used on SWA Cables] | ||
| + | |||
| + | [[Category:Electrical]] | ||
Revision as of 11:43, 12 November 2016
Introduction
There are a number of ways in which underground wiring can be performed. This article addresses the direct burial of a cable.
Cable Choice
Only certain types of cable are suitable for direct burial without additional protection. Commonly used types are Steel Wire Armoured (SWA) cable, and other PVC clad cables like "split concentric" that have a conductor layout where an earthed metallic sheath encloses the live conductions.
Other cable types would need to be protected in suitable underground ducting or trunking.
How deep?
An underground cable will normally be laid in a trench, and then the trench back filled to cover it.
The cable needs to be buried deep enough that it is unlikely to be disturbed accidentally in future. There are no hard and fast rules here since circumstances will dictate an appropriate depth. In areas unlikely to be dug over or disturbed such as under a path or a lawn, then shallower burial is acceptable - possibly a spade's blade depth or around 12". For a cable passing under a flower bed, where one could expect the area to be dug over, A typical minimum depth would increase to at least two spade's depth.
Digging a trench
Long cable runs may be better done with a trenching machine of some form - local hire shops will normally have something that takes much of the hard work out of this!
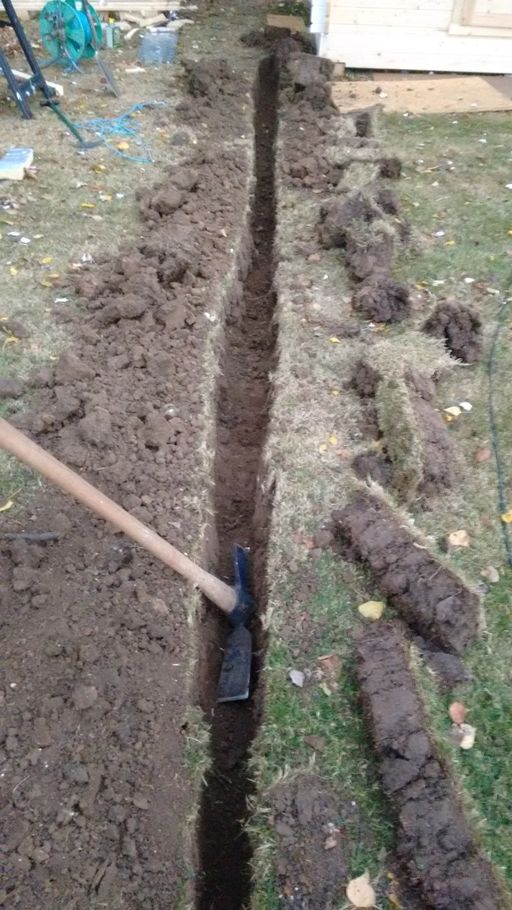
Shorter runs can be done relatively easily by hand. If digging in a lawn as shown here, cutting a pair of parallel straight lines through the turf with a sharp spade or lawn edger is a good first step - sections of turf can then be lifted out for replacement later.
The trench does not need to be particularly wide - although the it needs to be wide enough to get easy access with what tools you have.
One of the easiest tools for digging a narrow trench like this is the grubbing mattock. It not only digs in hard ground far more easily than a spade, it also makes getting the spoil out of the trench easier. Its narrow width also means less earth to move.
Laying the cable
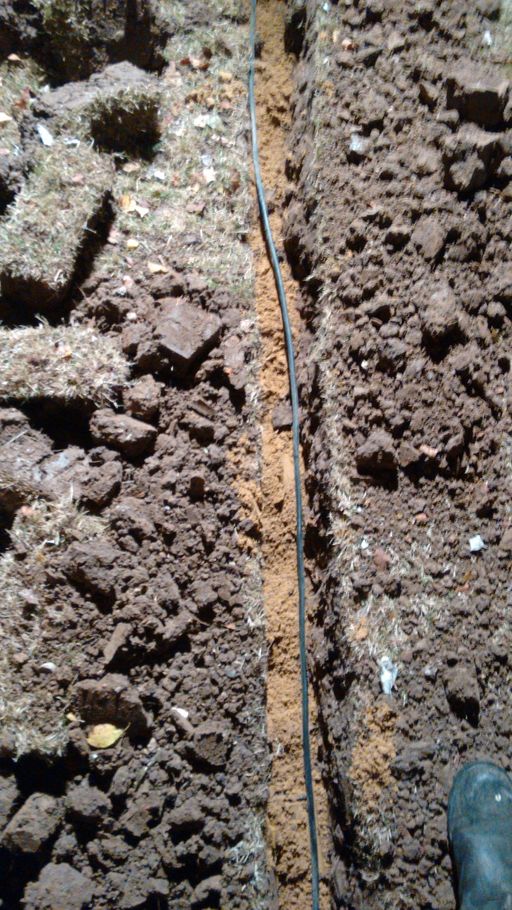
Once the trench is deep enough you are ready to lay your cable. It needs to be free of stones and other sharp objects that may damage the cable. Depending on your local conditions, it may be necessary to "blind" the trench with some sand or pea shingle first.
The cable can then be placed, and if necessary covered with a thin layer of blinding material.
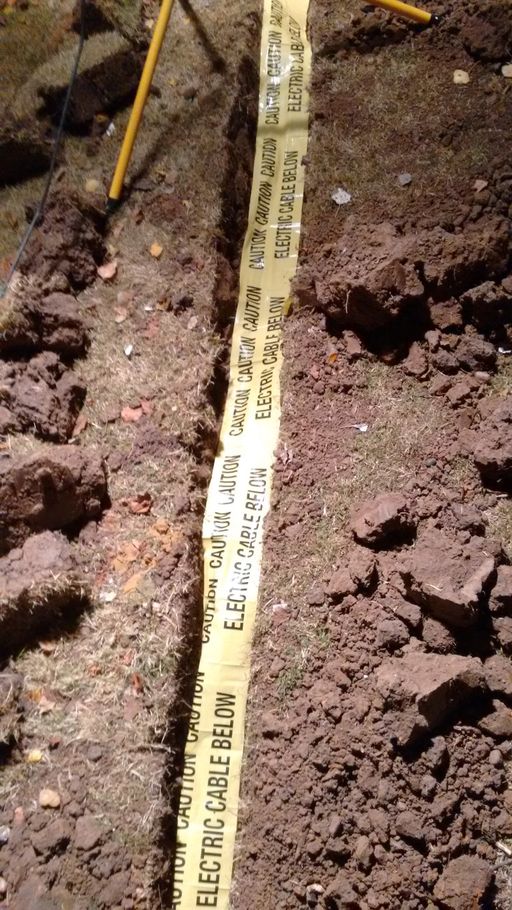
Now start back filling the trench - aim to get an even cover of say 5 to 6" of soil over the cable. At this point its good practice to lay a cable warning tape (rolls of the stuff can be bought in any electrical wholesalers) in the trench. This will ensure that anyone digging in the area later will find the tape before they get deep enough to damage the cable:
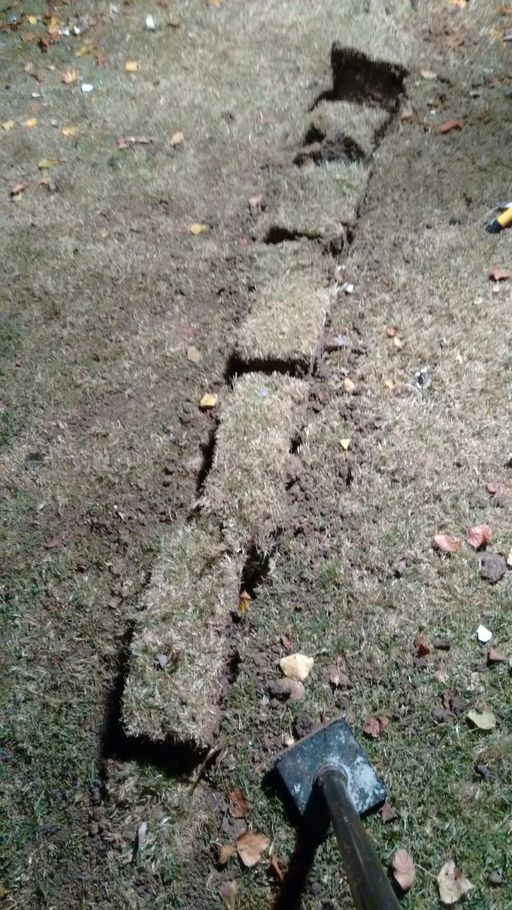
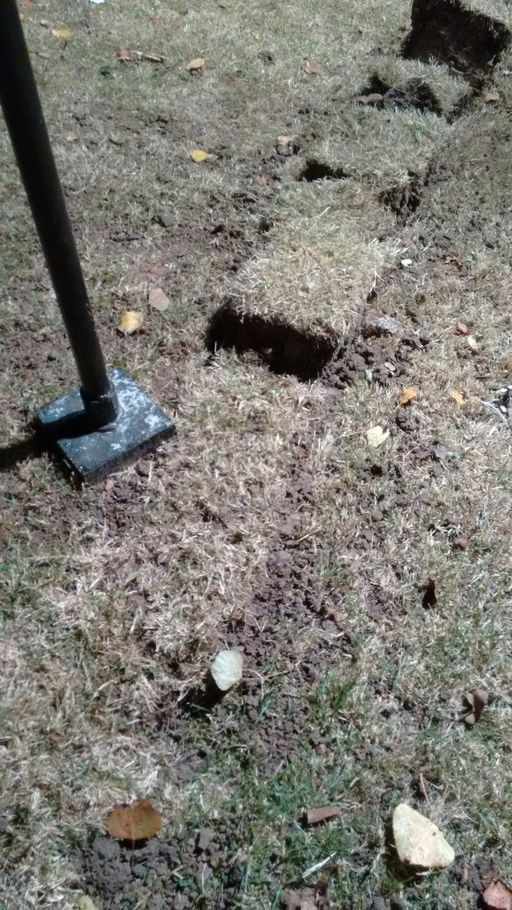
No fill the remainder of the trench. Note that once dug, the soil will "bulk up", and getting it all back in the trench will take some work! Tamp the material down as you go. With a lawn trench, finish the filling by replacing the turf.
Use a ramming tool (sometimes known as an "elephants foot") or a section of 4x2" and a sledge hammer, to work along the trench letting the top level again.
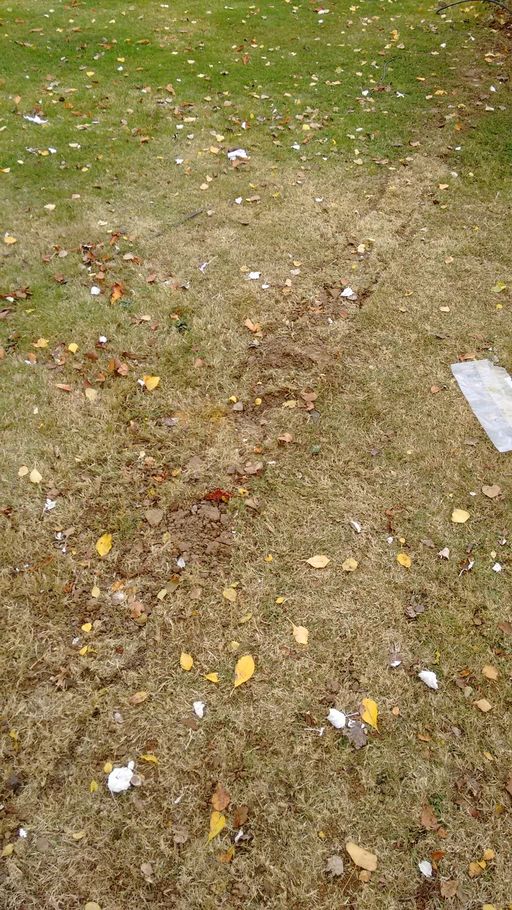
If you manage to get all the spoil back into the trench there is less chance that the trench will drop or sag later leaving a visible line where it was dug.
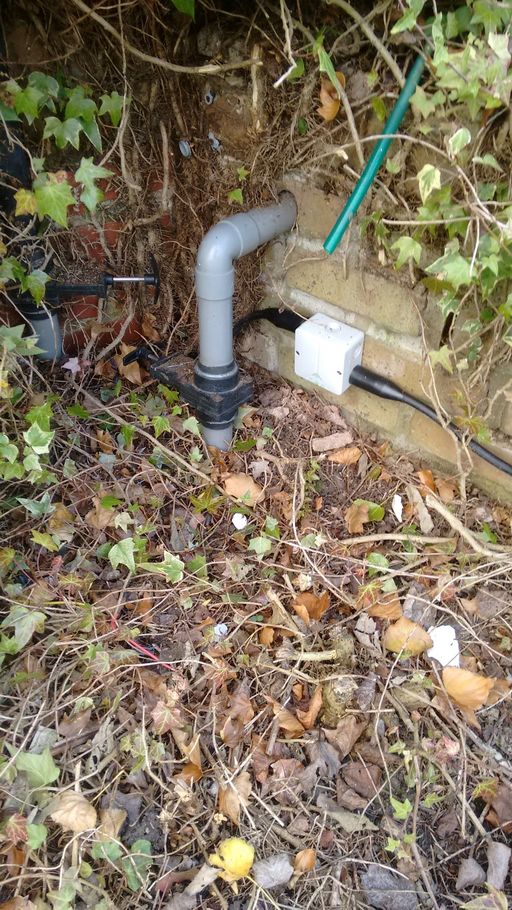
Now all that remains is to wire up the cable. The cable will need to be terminated with suitable glands. In this case it was an extension to an existing SWA cable feed. A garden socket was removed and replaced with a waterproof junction box:
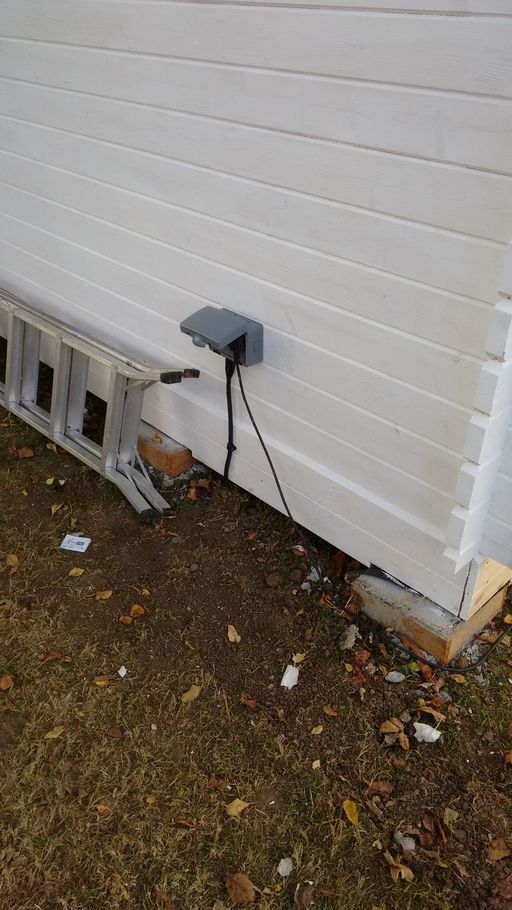
And the destination at a garden building was taken to a surface mounted double socket. This makes an easy termination for the SWA. One can then drill through the back of the socket and the wall its on to get power into the building itself.
Obstructions
Sometimes there is a path or other obstruction in your way. Rather than lifting the path, it may be worth seeing if you can dig under from a access holes either side. Sometimes you can just hammer through a section of timber of a blanked off pipe of some form (the pipe can be removed or left in place and just used as a duct once the end cap is removed).
