Difference between revisions of "Foam toolbox moulding"
(written by Thomas Prufer, posted with permission) |
Shed owner (talk | contribs) m |
||
| (5 intermediate revisions by 2 users not shown) | |||
| Line 1: | Line 1: | ||
| + | I made a form-fitted toolbox insert using polyurethane foam, see below. | ||
| + | |||
| + | It wasn't really a toolbox, but a sample suitcase for a travelling salesman in vampire killing weapons: oak stake, silver [[knife]], gun, holy [[water]], garlic extract, tables of sunset & sunrise... | ||
| + | |||
| + | It worked well. | ||
| + | |||
| + | First, I placed the [[tools]] in pleasing arrangement on a piece of cardboard, sized to fit an existing box. I turned the tools so that the less undercut side is up, and then photographed the arrangement of the tools. | ||
| + | |||
| + | [[image:Toolbox-1.jpg|512px]] | ||
| + | |||
| + | [[image:Toolbox-2.jpg|512px]] | ||
| + | |||
| + | I wrapped the tools in clingfilm in case the foam gets through to them. This also reduces the detail somewhat -- I didn't want foam to mold close to every loop and crevice, just to the general outline. I placed tools on cardboard face down, mirroring arrangement, referring to photograph. [[Tape]]d tools in place on the cardboard, using masking tape to reduce undercuts. (I decided to leave out some small boxy bits, and just cut rectangular holes in the cured foam later.) | ||
| + | |||
| + | [[image:Toolbox-3.jpg|512px]] | ||
| + | |||
| + | I then covered tools with a thin bit of jersey fabric, to provide protection from foam, and give a little overall clearance between foam and tools -- there will be decorative fabric over the foam in the final inset. This also softens any sharp edges that may cut the [[plastic]] bin liner. | ||
| + | |||
| + | Placed a bin liner over the lot: tools, cardboard, fabric. I used a polyethylene bin liner so that the foam will not stick to the liner -- PE is one of the things listed on the can that PU foam won't adhere to. | ||
| + | |||
| + | [[image:Toolbox-4.jpg|512px]] | ||
| + | |||
| + | Now, I sucked the air from bin liner. I used an injector pump and a bit of [[garden]] hosepipe attached with a [[cable]] tie. Fiddled with the plastic to get it to conform well to the [[tools]], and get the folds and wrinkles to lie flat. (This was the part that had me really worried: I wanted a vacuum to get the plastic foil good and close, but any tiny hole would result in foam being sucked all over the tools.) | ||
| − | + | [[image:Toolbox-5.jpg|512px]] | |
| − | + | [[image:Toolbox-6.jpg|512px]] | |
| + | [[image:Toolbox-7.jpg|512px]] | ||
| − | + | Built four cardboard sides, a bit smaller than the box it will fit in. Fold out bottom edge, and attach over the cardboard/tools/bin liner using binder clips. [[Tape]]d gaps on the inside to keep foam inside. | |
| − | |||
| − | |||
| − | + | [[Damp]]ened the foil and cardboard -- the foam wants a bit of moisture to cure. | |
Put on old clothes, rubber gloves, shook can and foamed away, squirting the stuff in the undercuts first. As the final foam block was to be about 30 liters, I ignored the "maximum thickness of 30 mm per layer" and emptied the can. (I have had half-used cans sitting in the corner harmlessly at first to find that they had oozed their guts out the moment I turned my back. So out with it.) This thick layer may have contributed to the large pores near some of the tools. | Put on old clothes, rubber gloves, shook can and foamed away, squirting the stuff in the undercuts first. As the final foam block was to be about 30 liters, I ignored the "maximum thickness of 30 mm per layer" and emptied the can. (I have had half-used cans sitting in the corner harmlessly at first to find that they had oozed their guts out the moment I turned my back. So out with it.) This thick layer may have contributed to the large pores near some of the tools. | ||
| − | It looked as if it were far too little for a while, but then expanded slowly and continuously. From previous experience with the stuff, it always does, and still I put in too much. | + | [[image:Toolbox-8.jpg|512px]] |
| + | |||
| + | It looked as if it were far too little for a while, but then expanded slowly and continuously. From my previous experience with the stuff, I knew it always does, and still I put in too much. I'd anticipated and left the cardboard sides very high, so no worries there. (No canoes here!) | ||
I let the injector pump run for about two hours, and then turned it off. The lightly moistened top layer had started to cure and was no longer tacky or soft by then, so I assumed the bottom with the tools would also have started to cure. This foam block cured overnight. | I let the injector pump run for about two hours, and then turned it off. The lightly moistened top layer had started to cure and was no longer tacky or soft by then, so I assumed the bottom with the tools would also have started to cure. This foam block cured overnight. | ||
| − | The [[tools]] came out easily this morning: I cut open the bin liner from underneath, pulled the tools out, pulled the fabric off, and peeling off the plastic sheet from the foam without any trouble. No leaks. There are large pores, gaps, and holes under the tools, but overall, details molded well. The pores tend to be at flat surfaces. Some narrow | + | The [[tools]] came out easily this morning: I cut open the bin liner from underneath, pulled the tools out, pulled the fabric off, and peeling off the plastic sheet from the foam without any trouble. No leaks. There are large pores, gaps, and holes under the tools, but overall, details molded well. The pores tend to be at flat surfaces. Some narrow gaps of 1.5 cm wide and 2 deep have filled in well, with a fine-grained foam. Perhaps the moisture keeps the pore size down? The bin liner rounded out the edges nicely. |
| + | |||
| + | [[image:Toolbox-9.jpg|512px]] | ||
| + | |||
| + | [[image:Toolbox-10.jpg|512px]] | ||
| + | |||
| + | The next step was to cut the remaining holes with a cutter [[knife]] and a scalpel, reduce some of the undercutting, and maybe provide some clearance holes to make it easier to grip and remove tools. | ||
| + | |||
| + | [[image:Toolbox-11.jpg|512px]] | ||
| − | + | [[image:Toolbox-12.jpg|512px]] | |
| − | Yellow foam with large pores is not pretty - this would do for packing, but not for use or display. I | + | Yellow foam with large pores is not pretty - this would do for packing, but not for use or display. I used some stretchy crushed velvet to cover the foam. This is a synthetic fabric and very elastic, so placing it over the foam and inserting the tools one by one, from the middle out, pulls it into the cutouts nicely. The crushed look makes the inevitable folds and wrinkles much less noticeable and unobjectionable. [[Glue|Hot-melt]] and double-sided carpet [[tape]] holds the fabric down nicely. |
| + | |||
| + | [[image:Toolbox-13.jpg|512px]] | ||
Should you think crushed red velvet a bit too much -- it was cheaper than felt by about half, and felt would have required a lot of cutting, joining and gluing! | Should you think crushed red velvet a bit too much -- it was cheaper than felt by about half, and felt would have required a lot of cutting, joining and gluing! | ||
| + | I trimmed the uneven underside ( the side that was freely foamed) using a long knife. The block of foam fit in an old wooden box. This was lined with more red velvet. A padded rectangle of fabric separates the top and bottom when the box is closed. | ||
| + | |||
| + | [[image:Toolbox-14.jpg|512px]] | ||
| + | |||
| + | [[image:Toolbox-15.jpg|512px]] | ||
| − | + | While the utility of this particular toolbox is limited to a salesman travelling in vampire hunting weapons, this procedure will adapt to other tools. | |
| + | |||
| + | [[Category:Furniture]] | ||
| + | [[Category:Projects]] | ||
| + | [[Category:Storage]] | ||
| + | [[Category:Tools]] | ||
Latest revision as of 15:35, 24 October 2017
I made a form-fitted toolbox insert using polyurethane foam, see below.
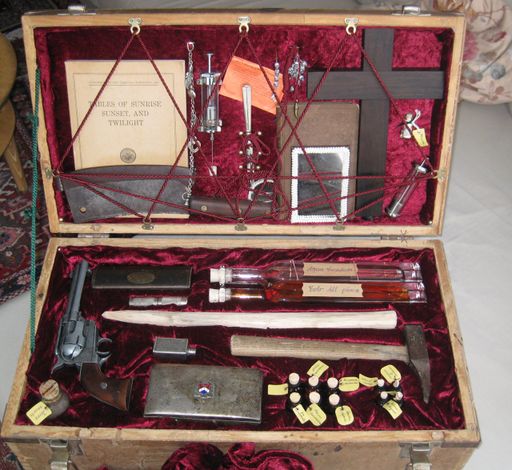
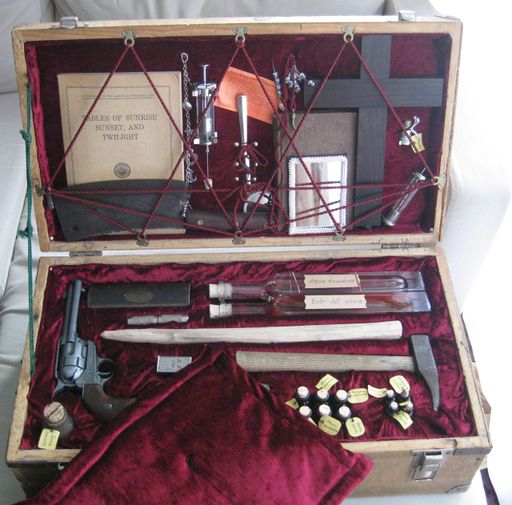
It wasn't really a toolbox, but a sample suitcase for a travelling salesman in vampire killing weapons: oak stake, silver knife, gun, holy water, garlic extract, tables of sunset & sunrise...
It worked well.
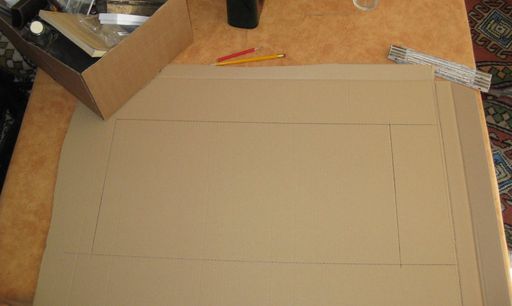
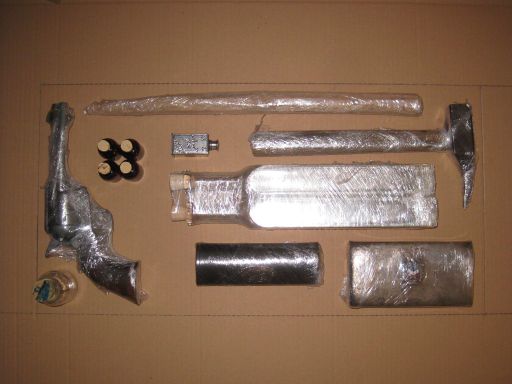
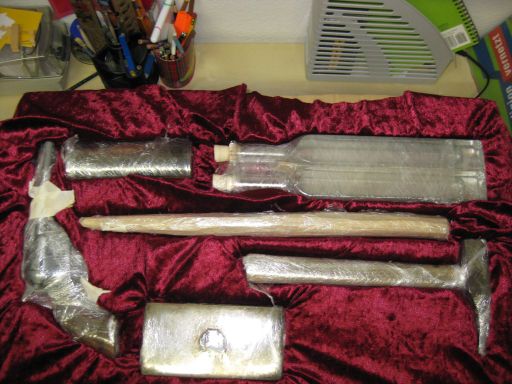
First, I placed the tools in pleasing arrangement on a piece of cardboard, sized to fit an existing box. I turned the tools so that the less undercut side is up, and then photographed the arrangement of the tools.
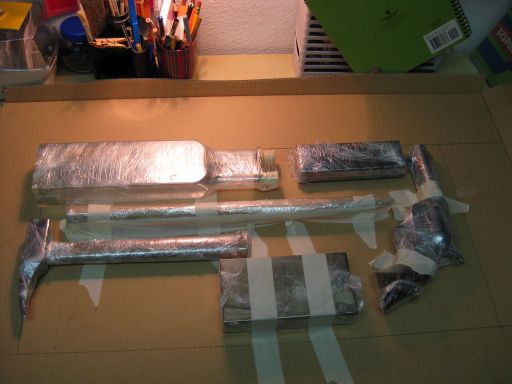
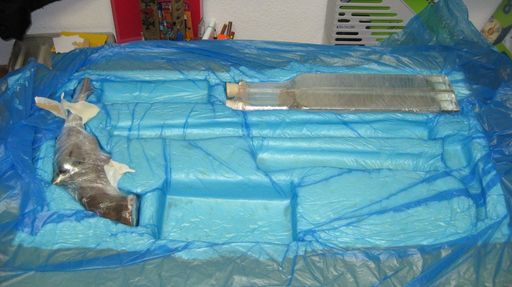
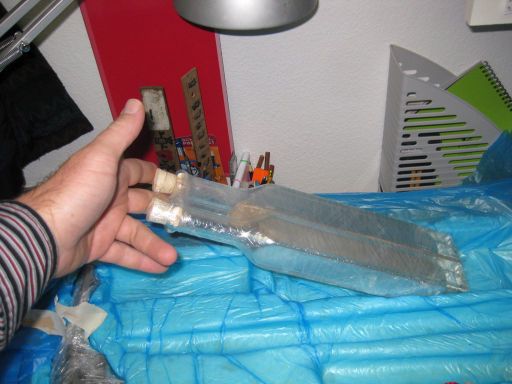
I wrapped the tools in clingfilm in case the foam gets through to them. This also reduces the detail somewhat -- I didn't want foam to mold close to every loop and crevice, just to the general outline. I placed tools on cardboard face down, mirroring arrangement, referring to photograph. Taped tools in place on the cardboard, using masking tape to reduce undercuts. (I decided to leave out some small boxy bits, and just cut rectangular holes in the cured foam later.)
I then covered tools with a thin bit of jersey fabric, to provide protection from foam, and give a little overall clearance between foam and tools -- there will be decorative fabric over the foam in the final inset. This also softens any sharp edges that may cut the plastic bin liner.
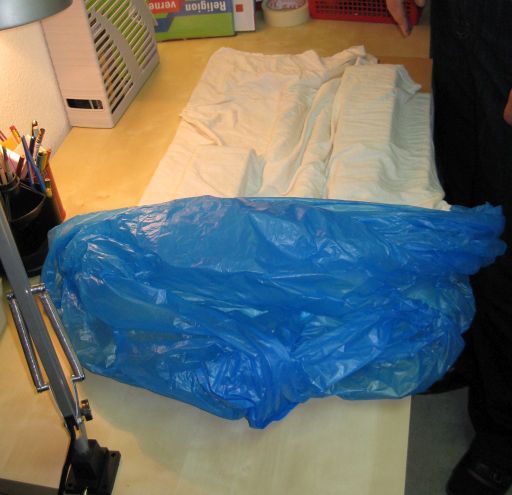
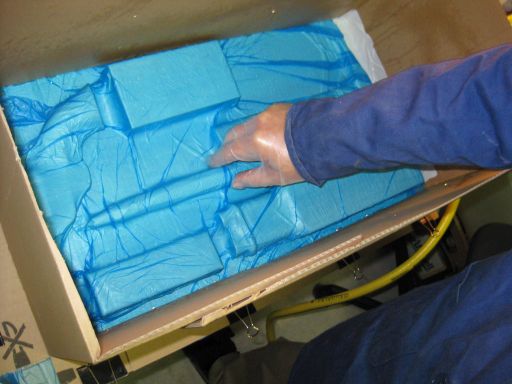
Placed a bin liner over the lot: tools, cardboard, fabric. I used a polyethylene bin liner so that the foam will not stick to the liner -- PE is one of the things listed on the can that PU foam won't adhere to.
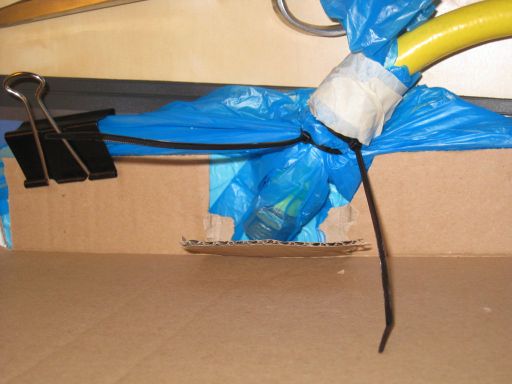
Now, I sucked the air from bin liner. I used an injector pump and a bit of garden hosepipe attached with a cable tie. Fiddled with the plastic to get it to conform well to the tools, and get the folds and wrinkles to lie flat. (This was the part that had me really worried: I wanted a vacuum to get the plastic foil good and close, but any tiny hole would result in foam being sucked all over the tools.)
Built four cardboard sides, a bit smaller than the box it will fit in. Fold out bottom edge, and attach over the cardboard/tools/bin liner using binder clips. Taped gaps on the inside to keep foam inside.
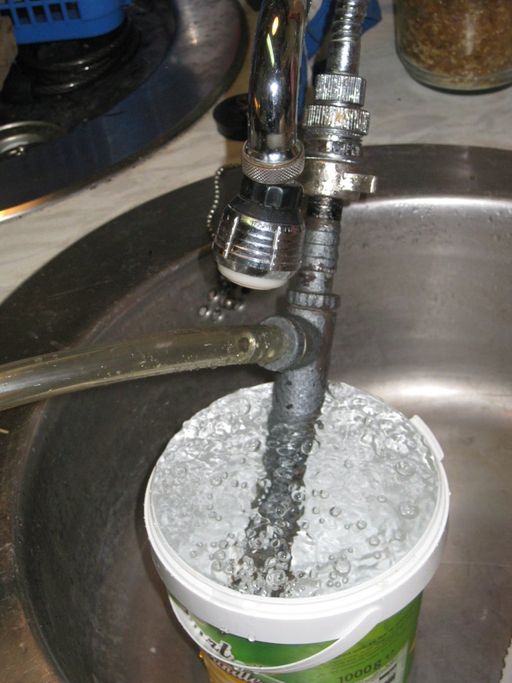
Dampened the foil and cardboard -- the foam wants a bit of moisture to cure.
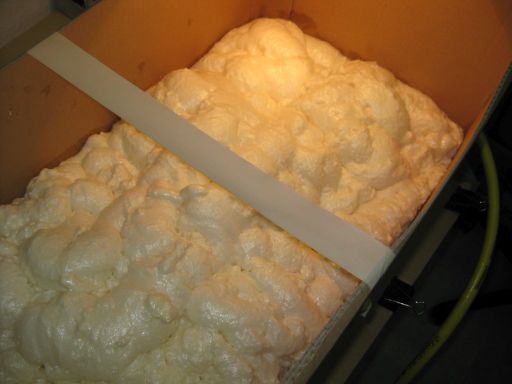
Put on old clothes, rubber gloves, shook can and foamed away, squirting the stuff in the undercuts first. As the final foam block was to be about 30 liters, I ignored the "maximum thickness of 30 mm per layer" and emptied the can. (I have had half-used cans sitting in the corner harmlessly at first to find that they had oozed their guts out the moment I turned my back. So out with it.) This thick layer may have contributed to the large pores near some of the tools.
It looked as if it were far too little for a while, but then expanded slowly and continuously. From my previous experience with the stuff, I knew it always does, and still I put in too much. I'd anticipated and left the cardboard sides very high, so no worries there. (No canoes here!)
I let the injector pump run for about two hours, and then turned it off. The lightly moistened top layer had started to cure and was no longer tacky or soft by then, so I assumed the bottom with the tools would also have started to cure. This foam block cured overnight.
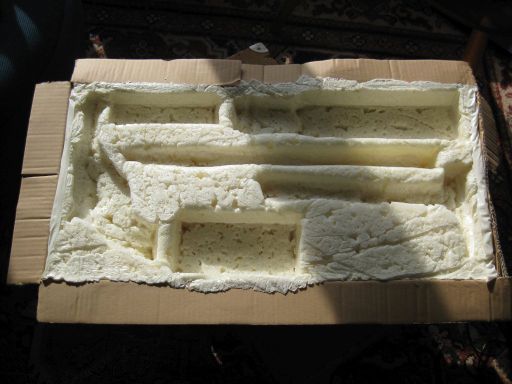
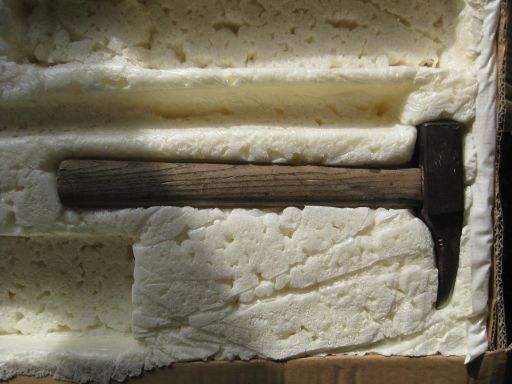
The tools came out easily this morning: I cut open the bin liner from underneath, pulled the tools out, pulled the fabric off, and peeling off the plastic sheet from the foam without any trouble. No leaks. There are large pores, gaps, and holes under the tools, but overall, details molded well. The pores tend to be at flat surfaces. Some narrow gaps of 1.5 cm wide and 2 deep have filled in well, with a fine-grained foam. Perhaps the moisture keeps the pore size down? The bin liner rounded out the edges nicely.
The next step was to cut the remaining holes with a cutter knife and a scalpel, reduce some of the undercutting, and maybe provide some clearance holes to make it easier to grip and remove tools.
Yellow foam with large pores is not pretty - this would do for packing, but not for use or display. I used some stretchy crushed velvet to cover the foam. This is a synthetic fabric and very elastic, so placing it over the foam and inserting the tools one by one, from the middle out, pulls it into the cutouts nicely. The crushed look makes the inevitable folds and wrinkles much less noticeable and unobjectionable. Hot-melt and double-sided carpet tape holds the fabric down nicely.
Should you think crushed red velvet a bit too much -- it was cheaper than felt by about half, and felt would have required a lot of cutting, joining and gluing!
I trimmed the uneven underside ( the side that was freely foamed) using a long knife. The block of foam fit in an old wooden box. This was lined with more red velvet. A padded rectangle of fabric separates the top and bottom when the box is closed.
While the utility of this particular toolbox is limited to a salesman travelling in vampire hunting weapons, this procedure will adapt to other tools.
