Difference between revisions of "Hanging a door"
(→Chamfer the edges: rewording to improve clarity) |
(→Mark and cut hinge rebates on door: Added info on rebate techniques) |
||
| Line 77: | Line 77: | ||
Fitting a middle hinge is strongly advised since it better supports a heavy door, stops a light weight door from warping so much, and is a requirement on fire doors (fire door hinges also need to be made to BS EN 1935, so don't use any old hinge). | Fitting a middle hinge is strongly advised since it better supports a heavy door, stops a light weight door from warping so much, and is a requirement on fire doors (fire door hinges also need to be made to BS EN 1935, so don't use any old hinge). | ||
| − | Use a sharp chisel to first cut round the outline of the hinge, and then to pare away wood within the outline | + | Use a sharp chisel to first cut round the outline of the hinge, and then to pare away wood within the outline. Don't take too much out at a time, and use the hinge to keep test fitting the rebate. An alternative way of cutting the rebates for the hinge would be with a router and a hinge rebate jig. |
| + | |||
| + | However you cut the rebate, the hinge should be a snug fit in it and the top surface should end up level with the edge of the door or fractionally below it: | ||
[[image:RebatesInDoor.jpg|Door with rebates for hinges cut]] | [[image:RebatesInDoor.jpg|Door with rebates for hinges cut]] | ||
Revision as of 17:35, 11 May 2007
Hanging a door
This is a short tutorial on door hanging. There are already plenty of tutorials on this subject dotted about on the web, so rather than just duplicate information available elsewhere, we will also concentrate on describing some of the little "tricks of the trade" that can make the task easier, quicker, and give a better looking result. (I did not make these up, but they were passed on to me by a skilled joiner, who can hang 20 doors in a day!)
Introduction
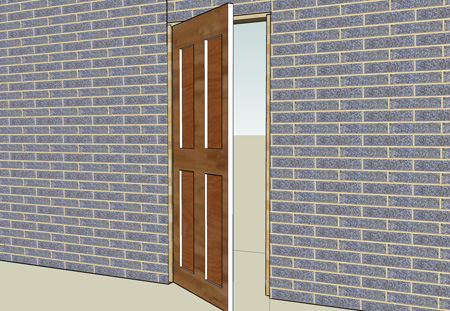
For the purposes of this discussion we are going to cover all the aspects of hanging a door assuming we are starting with just a hole in a wall, i.e. no door frame (or "lining") either.
Preparing the door lining
The quickest way to prepare a door lining is to buy one ready made. These are available from timber & builders merchants wrapped up in a plastic bag with all the basic bits you need, often for less than the cost of the timber to make one. However if you do want to make one (or have a timber thicknesser and can knock out nicely finished planed timber from any old bit of scrap) then there is nothing to it.
The door lining wants to be about and inch (25mm) thick (although for big heavy doors, a thicker lining may look better), and the width will be dictated by the thickness of the wall. For a four inch block or brick wall that will be plastered, a 5" wide board is about right. Ideally the lining wants to come out flush with the finished surface. The same size would suit a 4"x2" studwork wall that is to have 1/2" plasterboard and skim each side.
Joints
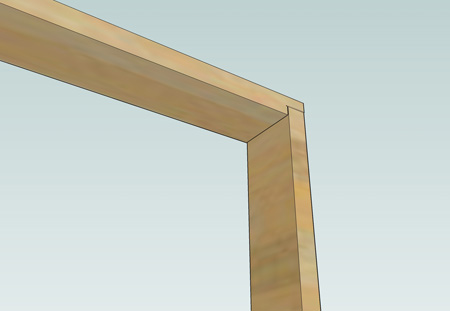
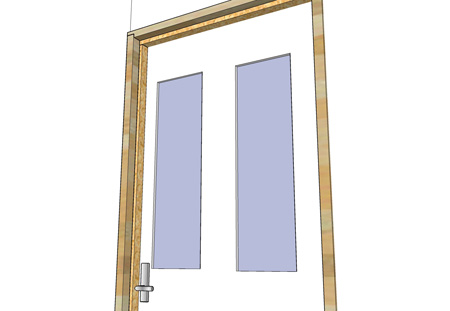
The top joints on the lining want to be set into a rebate like this:
The rebate will add strength to the lining and prevent any slight movement in the frame or wall from opening up a gap at the top of the frame. You can cut this rebate with a saw, a router, or even a plane if you wish.
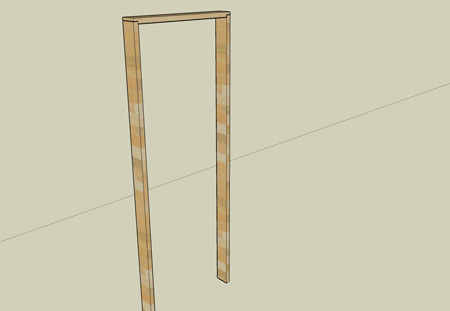
Some nails or screws through the outside edge of the lining into the top rail will hold the thing together long enough to get it installed. Once the lining is assembled it is ready to fit:
Fixing the lining
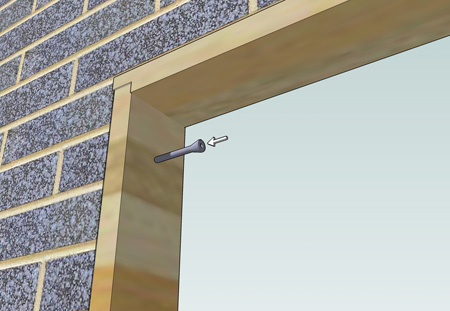
Fix the lining into the sides and top of the door opening. You need two or three fixings into the top rail, and about four or five into the side rails. You can use whatever fixing are suitable for the wall construction (nails, screws and plugs, multimonti masonry fixings etc). Use packing pieces behind the lining if necessary to get the sides parallel and upright. Keep the top rail horizontal, and don't worry if it does not meet the top of the opening all the way along. If need be, pack out the gap where you are fixing to save distorting the lining. Any gap can be filled later and ultimately will be covered by the architraves anyway.
Handy Tip: fix the lining in roughly the centre of the width of the board only. The reason will become clear later!
Preparing the Door
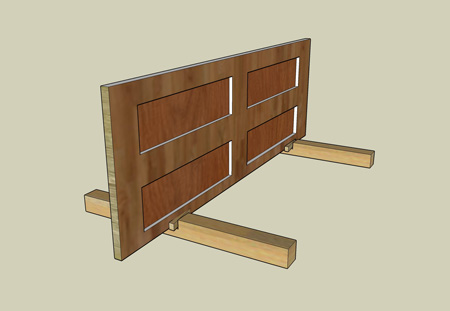
Handy Tip: One of the tricky things about working on a door before it is hung is finding a good way to support it so that you can work on it and not risk it falling and damaging something (or you!). One very simple solution for this is to make a couple of support feet. These will hold a door firmly and easily and are quick and easy to make, ideal if you need to do several doors.
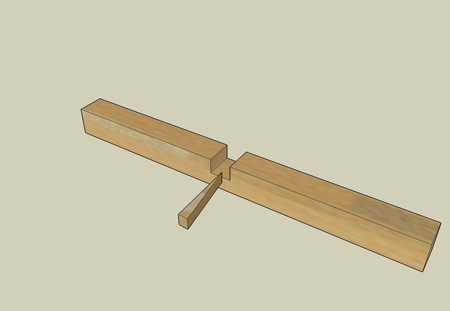
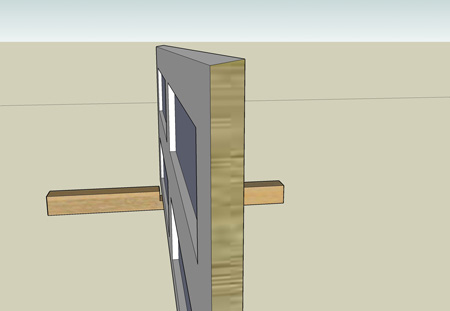
Start with a couple of 4' lengths of 4x2" sawn timber, and cut a notch a bit wider than the thickness of your door into the middle of both of them. The notch wants to extend about half way through the longer axis of the timber:
You can chop out the notch with a couple of saw cuts and a big chisel. Now cut yourself a wedge for or five inches long, and about 3/4" thick at the thick end.
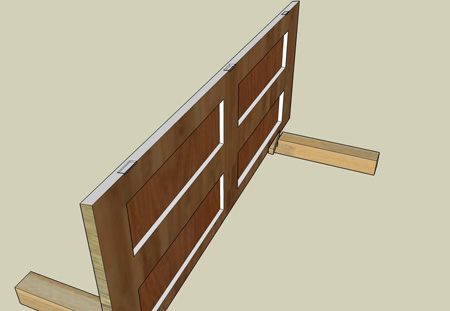
With a pair of these feet, you can drop the door into the notches, and tap the wedges in place with a hammer to give you a solid free-standing door to work on:
Tap the wedges out to free the door.
Sizing the door
First we need to make any major changes to the door size that may be required. The width will need to be about 4mm less that the width between either side of the door linings, and the height will want to be about 2mm less than the height of the door lining minus an amount to allow for the thickness of the floor covering. If there is no flooring down at all when the door is fitted, you should allow at least 6mm for this. If there is going to be a thick carpet and underlay installed then this may need to be more - perhaps as much as 15mm.
The quickest way to reduce the size of the door is with a circular saw guided by a straight edge. If the amount that needs to come off the door is less than a couple of mm then this can be done with a plane instead. If planing the base of the door you will need to plane in from both sides to prevent risk of splintering out the wood at the edges of the door. If using a manual plane a sharp low angle one is best for the end grain sections at the edges of the door. A powered plane is often easier, but take shallow passes.
Chamfer the edges
This is a step often omitted, but if done can make for a neater finish overall, and also can save spending too much time fiddling with the fit of the door later.
Plane a slight chamfer along both long edges of the door. The chamfer wants to slope from the front of the door (as viewed from the opening side) down to the back. So if you were looking down on the top of the door it will have a slightly trapezoidal profile. The narrowest bit of the trapezoid goes at the back against the door stops. The purpose of the chamfer on the hinge side is that it allows a little more space round the hinge fittings. That will stop the hinge binding should any of the screw heads not seat perfectly, and also allows a little more tolerance on the hinge rebates. On the latch side of the door it allows the gap to the lining to be adjusted to look nice an neat without any risk of the back of the door catching on the lining as it opens or closes:
Once the door is chamfered, you may want to lightly plane off any sharp corners at the sides of the door. This will not only make it easier to paint (paint does not stick well to sharp corners) but also makes it a little safer for anyone unfortunate enough to trap their fingers in the door.
Mark and cut hinge rebates on door
Mark out the hinge positions on the door edge, by hooking the barrel part of the hinge over the edge of the door on the opening side, and drawing round the plate. The traditional position for the hinges is 8" up from the bottom, 6" down from the top (although some prefer 6" both ends now), and the middle hinge (if fitted) equidistant between the other two.
Fitting a middle hinge is strongly advised since it better supports a heavy door, stops a light weight door from warping so much, and is a requirement on fire doors (fire door hinges also need to be made to BS EN 1935, so don't use any old hinge).
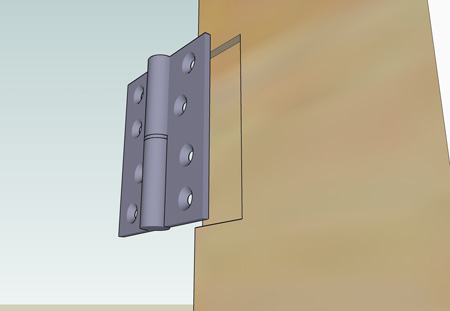
Use a sharp chisel to first cut round the outline of the hinge, and then to pare away wood within the outline. Don't take too much out at a time, and use the hinge to keep test fitting the rebate. An alternative way of cutting the rebates for the hinge would be with a router and a hinge rebate jig.
However you cut the rebate, the hinge should be a snug fit in it and the top surface should end up level with the edge of the door or fractionally below it:
To fix the hinges to the door, set the hinge plate in the rebate and find a nail that just fits through the hinge holes (a 3" wire nail is usually about right) to punch a starter hole into the wood through each hole. This will aid centring the screws and make driving them easier. If the door is a solid hardwood you may want to pre-drill the hole after punching the positions. Use a drill bit about the same size as the centre of the threaded part of the screw.
Hanging the door
Now the door is ready to be hung, we need to mark the position of the hinge rebates on the frame. You can either do this by carefull measurement (taking into account the clearance gap at the bottom) or by offering the door up to the frame. The latter is probably the more reliable way. When you offer the door to the frame you will need a spacer under it to hold it at the right distance from the floor. A pair of wedges will do, as will a couple of big screwdrivers, or even a dedicated door lift tool that you can control with your foot.
Draw round the hinge positions as you did for the door, and chop out the rebate for the hinges. Use a spare hinge (or take one off the door) to test fit as you go.
The hinge rebate on the frame is worth getting right, since not only will it carry some of the weight of the door, it also makes hanging the door much simpler if you are working alone.
Punch starter holes for the screws with the nail again.
Offer door up and fix
Using a spacer to support the door, you can now engage the top hinge in its rebate and secure with a screw. Then place a screw in the bottom hinge. If you make sure you have some way of pulling the door towards you (nail tapped into the face where the handle will go), you can test close it. If the door catches on the lining at any place you can remove it and adjust the fit (either by planing the side, or altering the depth of the hinge rebates).
The door should swing into the closed position without any binding, catching or resistance. Once you are happy with the fit of the door the remaining screws can be driven home.
Latch fitting
The next stage is fitting the latch. Doing this before fitting the door stops makes it much simpler to get a nice snug closure.
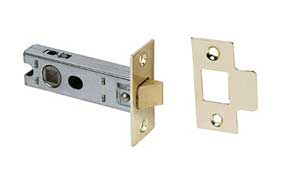
We will assume that you are using a basic tube latch:
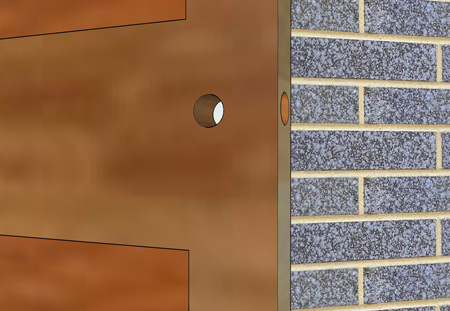
These are easy to fit and suitable for when no locking mechanism is required. The first stage is to drill the hole in the door edge for the latch. To make this easier wedge the door in an open position so that it does not move about. Select a spade bit or auger bit that is a couple of mm wider than the widest dimension of the latch. Mark the depth of the latch on the bit with some sticky tape (or set the depth stop on your drill if it has one). Choose a position for the latch. This will usually want to match the other doors in the house. If starting from scratch then about 1m up from the finished floor level is about right. Mark the centre line and height of the latch on the edge of the door, and drill the main hole into the door. Take care to keep the drill level and parallel to the door. Clear the hole of sawdust and test fit the latch.
Remove the latch from the door and use it to mark the hole positions for the handle. Do this on both sides of the door. Select a auger or spade bit that is large enough to clear not only the spindle of the latch, but also any mechanism fixed to the back of the chosen handles. 22mm is often about right for this (the hole will be covered by the handles anyway, so it is easier to err on the larger side since it offers less chance for something binding on the back of the handle and making it stiff to operate). Drill into the door from both sides so as not to risk splintering the door surface.
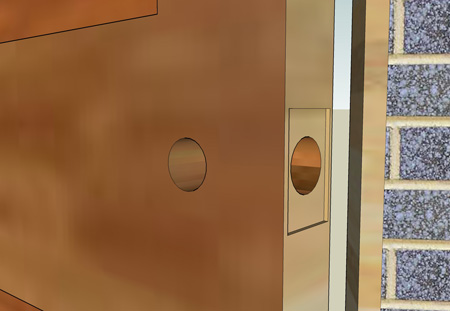
Once the latch holes are drilled, you can place the latch in its hole and draw round its plate. Remove the latch and chisel out the rebate for it. Remember that since the edge of the door is slightly chamfered the plate will sit very slightly deeper in the door on the front side.
You should now have something like:
You can now fit the latch, nail punch the screw holes and screw it home. Fit the spindle and the handles. Depending on the door thickness you may need to shorten the spindle with a hacksaw.
Once that is fitted, close the door such that you can mark the latch height on the lining. Now carefully measure the distance from the front of the door to the back of the latch bolt. Mark this position on the frame, and offer up the striking plate in the correct position and draw round it. Chisel out a rebate for the striking plate.
Handy Tip: When creating the rebate that the bolt will actually close into, don't chisel quite to the front of the striking plate hole. That way you can pare a little more wood away later to adjust the closing position of the door should you need to. Once the striking plate is fitted you can check the closing position of the door and get it matching the position on the hinge side.
Finally you can tap the leading edge of the striking plate with a hammer to bend it back a little at the front of the door lining. This will make the door close more smoothly.
(if you want to fit a bigger latch that requires a long mortice rather than the simple hole required for the tube latch, the basic principle is the same, except you will need to drill a number of holes into the side of the door. Position these so that they partially overlap (but not so much as to make drilling the holes difficult). You can now straighten the edges of the mortice with a wide chisel).
Finishing up
That is the bulk of the job done now.
Fitting door stops
Cut door stops to fit the lining. One to span the top, and the others to reach from the floor to the bottom of the top stop. Close the door and use it as a guide for fitting the stops. This way you will ensure a snug fit of the door against the stops and prevent any rattling in the wind later.
The size of the stops is partly personal preference. Usually door lining kits come with stops ready to use, however these are often quite small. On deep frames a wider stop can look better. The depth of the stop is usually 1/2" (12mm) unless they are for a fire door, in which case they need to be at least 25mm (1") deep. Fix the stops with some countersunk screws (or nails punched in) and fill the surface. The stops will fit in roughly the centre of the frame and should cover the fixings that are holding the lining to the opening.
If you find that the depth of the stops required for a fire door looks objectionable, you can greatly improve the appearance by fitting some quadrant moulding into the corner between the stop and lining (mitring it at the corners) .
Getting even penny joints
The penny in this case is in old money! With inflation that corresponds to a gap between door and lining of about the thickness of a 2p, or 2mm. Close the door and check all the margins. If there are any places where they are a bit wider than you would like you can fix this with some wedges.
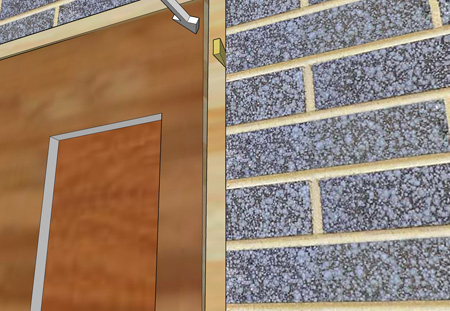
Cut small wedges about 30mm long and say 5mm thick at the wide end. Where the frame to door gap is too big, hammer the wedge into the gap between the lining and the opening in the wall. Don't worry if there is no obvious gap, the wedge will make its own:
Hammer each wedge just far enough to adjust the gap to the required position. Since we only fixed the lining at the centre of the boards, the lining will adjust its position at the edge quite nicely.
Once you are happy with the gaps all round, you can cut off any protruding ends of the wedges with a saw or chisel.
Fitting the architraves
Last stage is fitting the architraves. These need to be neatly mitred at the corner, and want ot be set back from the edge of the lining by 5 to 10mm depending on preference. These can be nailed in place. Usually fixing to the lining alone is enough to secure them, although additional fixings through the thick end of the architrave and be used (or a "no more nails" type adhesive). Oval wire nails will usually fix the architrave such that the fixing points can be easily filled and hidden.
Job Done!
