Roof construction
Roof Construction
Traditional Joinery
Traditionally roofs were constructed on site using sawn timber, typically with all joints simply nailed together.
Pros
- Creates a strong roof structure with mostly open loft space
- Floor joists typically strong enough for light storage applications
- Complex and bespoke roof designs can be implemented
Cons
- Usually requires a central spine load bearing wall to span any great depth of building.
- Uses more timber than trussed designs
- Takes longer to assemble on site
- requires more skilled labour to build.
Prefabricated Roof Trusses
Modern roofs are frequently erected using prefabricated roof trusses. These are built off-site in a controlled environment and delivered ready to be positioned on the roof.
Pros
- Very fast erection of roof structure
- Uniform and accurate sizing of all components
- Less weight of timber required
- Very wide unsupported roof spans can be covered (80' or 25m not being uncommon)
There are a wide variety of truss designs available to cope with a range of roof design requirements. Most truss manufacturers will have extensive catalogues with styles available like: this, or this. Some also have detailed technical manuals available like here
Cons
- Unless attic trusses are specified at the outset, they create a loft space that is difficult to use for storage, and requires a lot of extra work to convert to a living space. Space has value in houses, and trusses tend to make the loft space unusable due to the 'forest of matchsticks.'
- Requires a crane or other mechanical lifting facilities on site during construction.
- Joist sections may be too flimsy for storage of goods in the attic.
Building a Roof - Traditional Joinery Method
With Gable walls
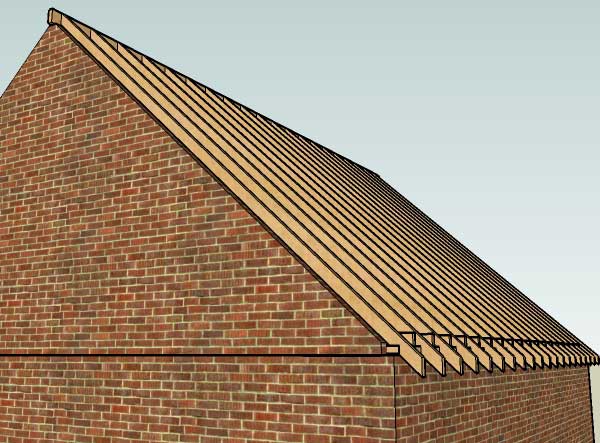
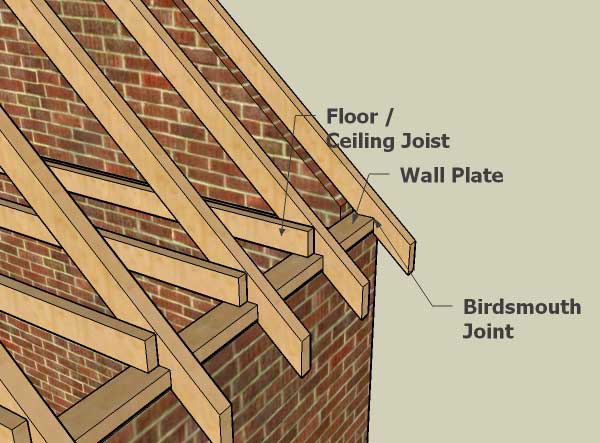
One of the first stages of construction is fixing the wall plate. This is simply a timber beam that is fixed to the top of all the walls (typically by nailing through it directly into the brickwork below). Its purpose is to allow easy fixing of all further timber at the wall interface.
A more modern enhancement to this technique is to include metal straps that help tie the wall plate to the walls. Typically these nail over the wall plate and are then fixed to the inner surface of the wall.
Once the wall plates are in place, the loft floor / ceiling joists can be placed. These are skew nailed into the wall plates at each end, and may also be nailed together where there meet on the central spine wall. In addition to making a working platform for the remainder of the roof assembly, they also help resist the forces applied by the rafters when loaded that would otherwise attempt to spread the supporting walls.
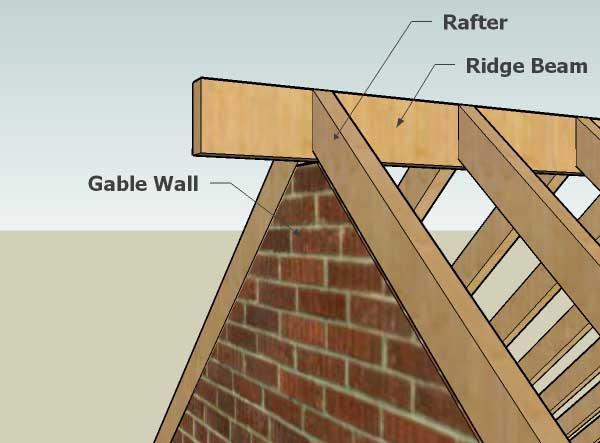
The next timber to prepare is the ridge beam. This servers as a joining place for all the rafters at the top of the roof. With a symmetrical roof the forces applied to either side of it from the rafters and the weight of the tiles etc should balance, hence there is no need for this to be a particularly substantial timber. For roofs that will include large dormer windows on one side it may be necessary to make this stronger, or in some cases even substituting a steel joist.
Once the ridge is ready, the first "pattern" rafter can be cut. This will need to be accurately measured and marked out with the correct angles at both ends and the position of the birdsmouth joint before cutting. Once the pattern has been produced all further rafters can be cut from that template. This helps ensure that all the rafters are the same, and so long as the final brickwork level of the house is plumb, the roof should be also. Typically an end pair of rafters can be fixed in place at the base first, and then one end of the ridge inserted between them and tacked in place.
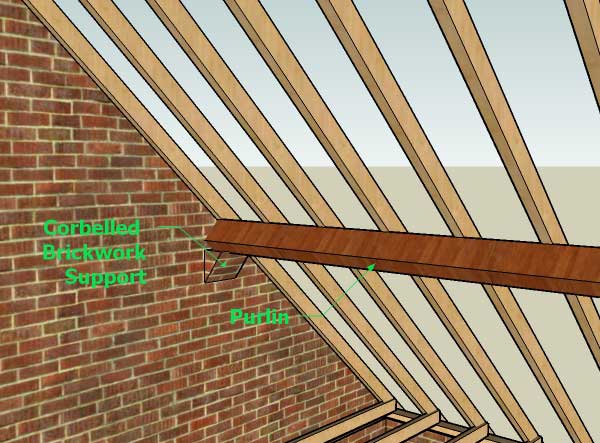
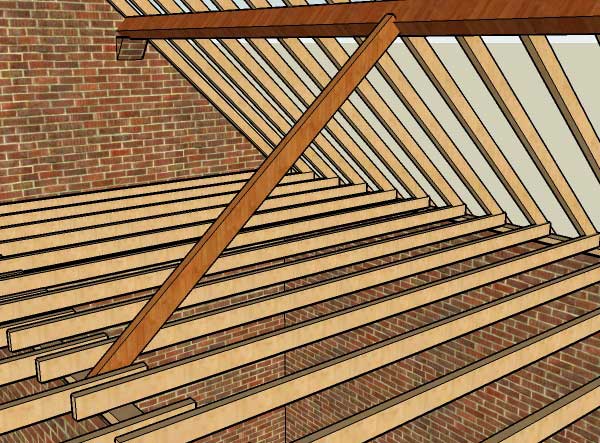
Finally purlins are usually installed before any significant loading is applied to the rafters. These support the rafters typically either at mid span, or possibly at 1/3rd and 2/3r span if used in a pair. The purlins themselves are often fixed to gable end walls when available - often resting on a small projection of corbelled brickwork. In the absence of gable ends (or when additional support is required) struts may be used to prop the purlin and transfer some of the load either to the spine wall of the building or possibly to the loft floor.
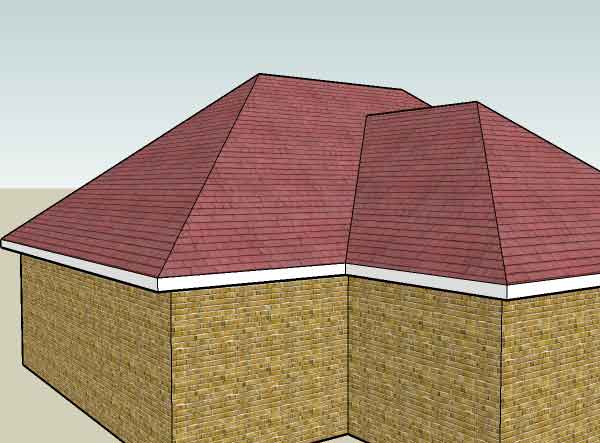
Hipped roof
A hipped roof is any that has sloping roof surfaces instead of upright gable sections:
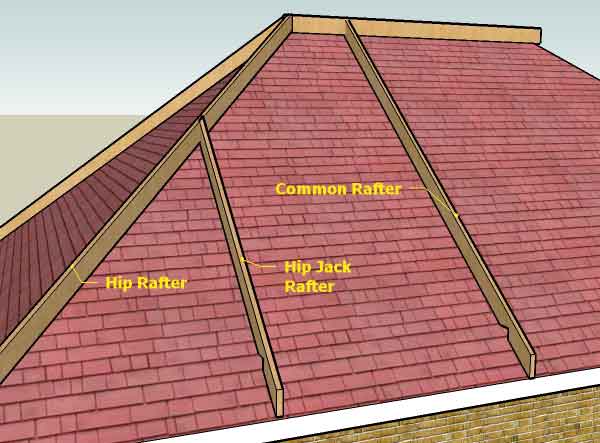
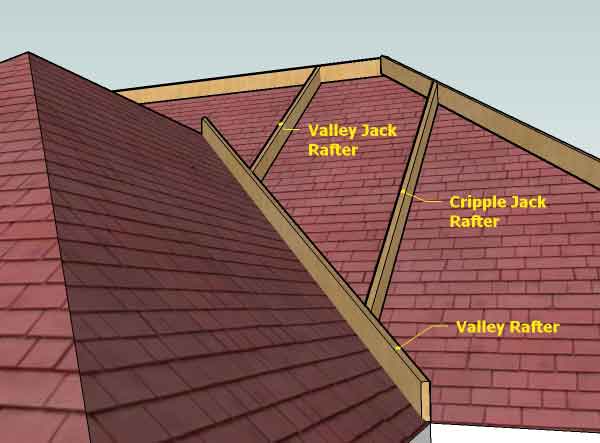
There are a few new terms introduced, especially with the rafters. Until now all rafters shown have been "common" rafters that run from the wall plate to the ridge board. With hipped roof designs there are also "Hip" and "Valley" rafters that form the external and internal "corners" of the roof, plus a number of "Jack" rafters. Jack rafters are ones that have one end (or both) that does not meet a wall plate or ridge beam.
(The pictures here overlay the new rafters onto the surface of the roof just to illustrate their position)
A hip jack rafter, has a birdsmouth joint at the bottom, but is cut at a compound mitre at the top so at to intersect with a hip rafter.
Valley jack rafters meet the ridge in the normal way, with a simple mitre, but have a compound mitre on the base and no birdsmouth joint.
Cripple jack rafters, have compound mitres at both ends, intersect with both a hip and a valley rafter, and do not make contact with either wall plate or ridge beam.
Building a Roof - Prefabricated Trusses
The latter stages of construction (felt, battening, tiling) remain the same regardless of the framing method used. A trussed roof will often rest on a timber wall plate as with a conventional one. Each truss is lifted into position and fixed to the plate. Timber straps are usually added to span a number of trussed (often diagonally behind the roof face) to add to the rigidity prior to the tile battens going on.
Tiling a Roof
Once the mechanical structure is in place and fixed, one can prepare the roof for tiling.
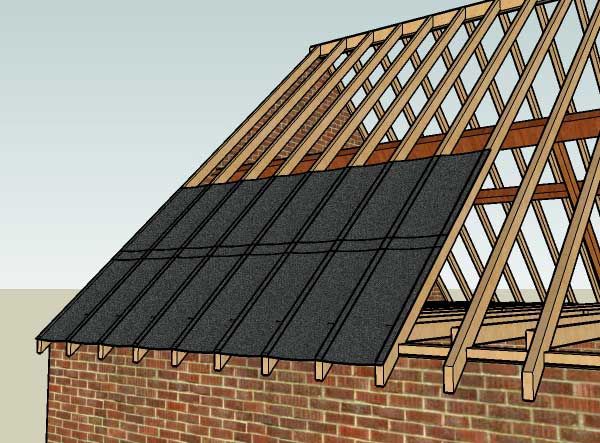
The first step is to fix the sarking. This is either a tiler's felt (like normal roofing felt, but with a hessian re-enforcement), or a breathable membrane like Tyvek sheeting. This is fixed in strips starting at the bottom. Each strip (typically a rolls width at 1.2m) should overlap the previous one by a few inches to ensure that any water that runs down the sarking will not penetrate the roof space. Sarking is traditionally fixed either with large head clout nails, or more commonly, ordinary wire nails hammered partially in, and then bent over.
The sarking is usually left a little long at the facia end, so that it can overhang the facia, and deposit any water on it directly into the gutter.
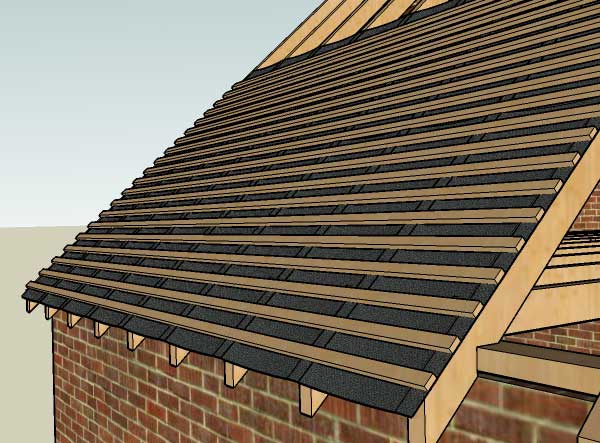
After the sarking, the tile batten can be nailed on. Typically spaced evenly at 100mm intervals, these not only provide a fixing and hanging location for the tiles, they also greatly strengthen the roof and consolidate its structure.
A roof that it felted and battened is also basically waterproof - even without tiles.
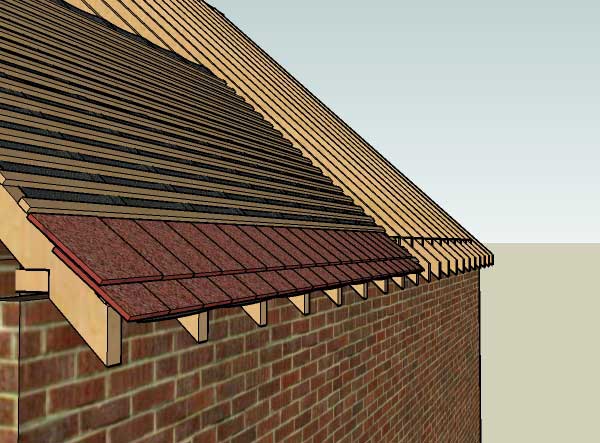
The next job is tiling. Typically each tile has lugs that enable it to hang onto the tile batten. It will also have nail holes to allow it to be nailed to the batten. Every other row ought to be nailed on. However the actual level of fixing will depend on the location and the likelihood of extreme weather. It is not uncommon to find roofs with very few if any tiles nailed in place.
It is often easier to fix the facias before the first row of tiles are installed. That way the facia can hold up the bottom row of tiles at the same angle as subsequent rows (that partially rest on the rows below).
The tiles are laid at the base of the roof first. The first row may need to be shortened a little to prevent them protruding beyond the facia board too far - ideally they want to drain into the middle of the gutter. Subsequent rows are placed so as to overlay 2/3rds of the height of the tile, and half its width (you need a 1.5x width tiles at the start of each alternate row to allow this). Tiles are placed side by side, but (with plain flat tiles) small gaps can be left to maintain the aesthetic spacing of the tiles. Modern interlocking tiles set their own gap spacings.
Once all the tiles are in place, the ridge tiles can be bedded onto a mortar mix, and the gaps between them pointed. The exposed tile edges at the gable ends can also be pointed in.
