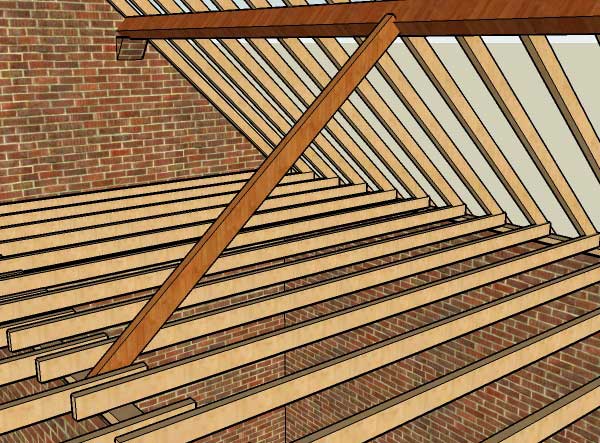
Roof construction
| ||
| If you are thinking of editing this page please be aware that the original author(s) of this page may be actively working on it at this moment, so changes you make may clash with theirs. (The Wiki software will warn you of conflicts if this happens.) Checking the page's history tab for frequent recent edits can warn you if changes by others are likely. |
Roof Construction - Traditional Joinery
Traditionally roofs were constructed on site using sawn timber, typically with all joints simply nailed together.
Pros
- Creates a strong roof structure with mostly open loft space
- Floor joists typically strong enough for light storage applications
- Complex and bespoke roof designs can be implemented
Cons
- Usually requires a central spine load bearing wall to span any great depth of building.
- Uses more timber than trussed designs
- Takes longer to assemble on site
- requires more skilled labour to build.
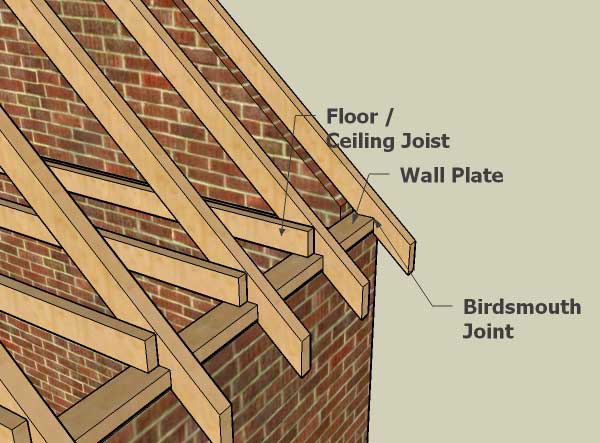
The first stage of construction is the fixing of a wall plate. This is simply a timber beam that is fixed to the top of all the walls (typically by nailing through it directly into the brickwork below). Its purpose is to allow easy fixing of all further timber at the wall interface. Later enhancements to this technique may include straps that help tie the wall plate to the walls.
Once the wall plates are in place, the loft floor ceiling joists can be placed. These are skew nailed into the wall plates at each end, and may also be nailed together where there meet on the central spine wall.
