Difference between revisions of "Shed"
(Sheet bracing) |
(Damp control) |
||
| Line 91: | Line 91: | ||
* [[Sheet Materials#Plywood|WBP plywood]] recommended | * [[Sheet Materials#Plywood|WBP plywood]] recommended | ||
* Chipboard is totally unsuitable | * Chipboard is totally unsuitable | ||
| + | |||
| + | |||
| + | ==Damp control== | ||
| + | Some sheds have no form of damp control. The result is rotting wood, mouldy fabrics if stored, rusting steel etc. | ||
| + | |||
| + | ===Void=== | ||
| + | A simple means to control [[damp]] is to create an open void under the shed. Damp evaporating from the earth is blown away. | ||
| + | |||
| + | ===Waterproofers=== | ||
| + | Waterproofers such as [[bitumen]] can be [[paint]]ed on top of a concrete slab. Bitumen can get sticky on extremely hot days. | ||
| + | |||
| + | ===DPMs=== | ||
| + | Damp prooof membranes, whether housebuilding types or [[roofing felt]], can go under a shed to stop damp from the ground, or under a concrete base. | ||
Revision as of 18:13, 6 March 2012
DIY or kit?
Sheds can be bought in kit form or built from scratch.
Kits are:
- quick to assemble
- usually weak
- benefit from reinforcement
- poor ability to support shelving
Self designed sheds:
- no cheaper to DIY
- you get a much more robust result
- you can have whatever size & shape you want
- whatever style you want
- whatever design features you want.
Timber sources
- Diy Sheds (Wickes, B&Q etc)
- Timber merchants
- Pallets
- spend the money on a suitable saw and using a garden felled tree. Lot more work
- Sawmill offcuts
For the last 2, sufficiently thorough wood preservation isn't really workable at home, and durable timber species should be used.
Construction
While there are many ways to build sheds, the great majority are wooden and contain the following elements:
- Base
- Floor
- Frame
- Cladding
- Window
- Door
- Roof sheeting
- Felt
(Base and floor functions are sometimes separate, and sometimes both performed by the same item.)
Base
In each case where a timber frame rests on masonry, its best to put a damp barrier between base and timber. A roofing felt offcut can be used for this. These barriers are often omitted, but can reduce the tendency to rot.
Poured concrete base
- a very durable permanent structure
Construction:
- 4" concrete recommended
- 3" is a lot weaker, but sometimes used
- Concrete usually laid on compacted ground & hardcore
- final concrete level should be above ground level
- See Mortar Mixes
Damp:
- Concrete conducts damp
- A DPC within the slab is not necessary, but can keep the shed interior drier
- a waterproofing admix might also work
Recommended base construction:
- hardcore or MOT 1
- sand blinding layer to prevent DPC damage
- DPC
- 4" of concrete, same size as shed not larger, and no reinforcement
Brick or block piers
- used for suspended timber floors
- the risk of a pier or 2 sinking is always present
- pouring a small concrete pad for each pier reduces this risk
Concrete fence posts, horizontal
- A quick easy option for use with a suspended timber floor
- cost higher than blocks
- Ideally use weed control fabric due to low clearance
Paving slabs
- quicker than a poured base
- some risk of unevenness occuring over time
- the joints let in some damp
- Joints may be tarred to reduce damp ingress
- slabs are usually laid on compacted sand
No base
- Not recommended, lets in significant damp, and encourages wood rot
- damp spoils stored goods.
Floor
Concrete base
A concrete base also acts as a floor.
Suspended timber floor
- WBP plywood recommended
- Chipboard is totally unsuitable
Damp control
Some sheds have no form of damp control. The result is rotting wood, mouldy fabrics if stored, rusting steel etc.
Void
A simple means to control damp is to create an open void under the shed. Damp evaporating from the earth is blown away.
Waterproofers
Waterproofers such as bitumen can be painted on top of a concrete slab. Bitumen can get sticky on extremely hot days.
DPMs
Damp prooof membranes, whether housebuilding types or roofing felt, can go under a shed to stop damp from the ground, or under a concrete base.
Frame
There is no one answer to the question of what size framework to use. Any of the following can be used, and which is best is a matter of opinion and circumstance.
- 1"x1" is the lightest I've ever seen used for smaller sheds. The walls would bend when leant on
- Would not support shelving
- Would not last too well
- Not recommended!
- 2"x2" is light but adequate for a small shed in a fairly sheltered location.
- 2"x4" is a robust option
- 3"x3" or 4"x4" may be used for medium to large sheds, sheds in exposed locations, or for extra durability.
Restraint
Rectangular timber frames can twist and fall over if not restrained. Movement pulls the fixings apart, permitting further movement until the structure falls down or leans. Some form of restraint is necessary.
Timber bracing is the usual method, either with small or large bracing.
Sheds built onto 2 masonry walls will be restrained by those walls, and need little bracing. Sheds built onto one masonry wall still need some bracing.
Effective bracing needs to be done on at least 3 sides. 2 side bracing does not rigidify a frame structure. Maximum strength is achieved by bracing all sides.
Masonry sheds don't need bracing, but often need piers to ensure wall stability.
Methods:
Large timber bracing
- Each square frame is braced with a strip of wood running from one corner to the opposite corner.
- Simple
- Gets in the way of insulation, some shelving and hanging tools
Small Wooden bracing
- Each 90 degree timber joint is reinforced with a short piece of extra timber at 45 degrees
- no extra material cost, offcuts are used
- less intrusive
Sheet bracing
Large sheet material fixed to the framework has a bracing effect, and further bracing isn't then needed. Sheet may be used to aid fixing to walls, or to conserve heat along with insulation.
Steel brackets
- London brackets are a quick ready made option
- These stiffen the structure, but generally aren't as tough as timber bracing.
Cladding
The frame may be clad with various options to give a closed structure.
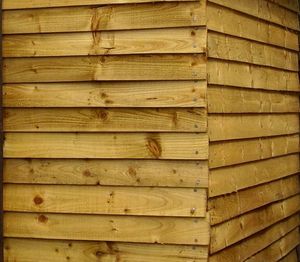
Featheredge boards
- the most common option
- medium durability
- gaps at corners allow airflow, draught & insect access
Tongue & groove
- neater higher cost option
- no gaps, not draughty
- pic
Shiplap
Another style of tongue & groove
Fence panels
- a quick low cost option
- the shed must be sized to fit the panels used
- less durable than featheredge
- not very strong, a security issue
Planks
- 1" plank gives a very tough durable building.
Window
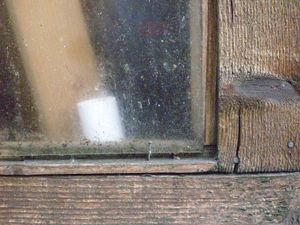
A shed window is usually a simple rectangular wood frame with a small section wood strip around the inner side to prevent the glass moving inward. A few panel pins around the edge hold the glazing in place.
Wood beading can be used instead of pins, but by trapping water this encourages rot in the frame.
Reusing a house window works, but tends to look rather out of place, and creates extra work if the glass gets broken.
Materials
Windows can be made from:
- Sheet glass
- breakable
- Sheet plastic (acrylic)
- less easy to break once fitted
- easy to break during cutting
- can deteriorate in time
- Twinwall polycarbonate
- Insulates
- Reclaimed house window
Window position
Visibility
Windows at conventional eye level mean the contents can be visible from the outside, which can sometimes be a security issue. White curtains can be added, either on tracks or just stapled in place.
Sun
Windows that receive afternoon sun will give more light in the shed, but this will cause heating in summer, elevating summer temps further. Windows that don't get direct sun avoid adding further summer heating.
Gable windows
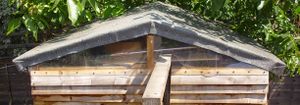
Triangular windows under the roof slope require no more work than rectangular ones, and eliminate the cutting of several featheredge strips. These can be frameless, with acrylic sheet simply screwed in place. The small roof overhang prevents water penetration along the top, and the bottom of the plastic is over the outside of the timber cladding.
The plastic is drilled and screwed in place. Go gently when drilling acrylic, or it can crack. Don't make the screws too tight, or the plastic can crack. Fixing holes should be a little larger than screw shanks so that shed movement doesn't break the window.
When roofing felt is used with minimal roof overhang, the felt overlaps the top of the plastic window. In these cases, the layers of felt and the clear plastic can be holed in one by using a die grinder with a small grind stone, which quickly melts through all the layers in one go. One row of screws then fixes both felt layers and window.
Strip windows
Window strips, which are long thin strips of plastic used in place of a strip of featheredge, can limit view of contents if placed high up near the roof. The advantage is that no window frame is required. The plastic should be at least 4mm thick. However viewable contents is only one of several security issues with sheds. If such windows are fitted at the right level on a shed with roof overhang, the overhang can block direct summer sun while allowing some winter sun in.
Custom
Its also possible to fit decoratively shaped windows, and these can add wanted character to a shed close to the house.
Door
Ledged & braced is by far the most common shed door construction
Timber:
- T&G is usually used, but any thin planks are usable.
- T&G avoids gaps opening up due to warping
- When not using T&G, additional light bracing is recommended to address warping
- the horizontal ledges may be 2x1.5 or bigger
- bracing may be 2x0.5 or bigger
Construction:
- The thin planks are laid side by side.
- They are screwed or nailed to 3 wood strips (ledges) running across, one at the top, one at the bottom, and one halfway up the door
- 1 or 2 bracing strips are added at an angle on the inner side of the door to prevent it drooping on one side
Roof sheet(s)
The options are:
- timber roof sheets plus felt
- corrugated sheet, available in various materials
Pitched roofs should overhang the shed. This way they shed rain water away from the walls, helping prevent rot.
Timber roof sheets
- WBP ply - maximum durability
- OSB - nearly as good as ply. Most common choice.
- Chipboard
- cheap
- works but will give slightly shorter life, as it disintegrates fairly quickly when a leak occurs
- prone to sag
- more care is required with roof detailing, as any water ingreess at all will quickly cause chipboard disintegration
- don't put any nails or screws in the felt above the chipboard
Felt
2 layers of roofing felt are used for durability.
Low cost shed felts tend not to last well, and are generally a false economy.
Felt deteriorates quickest where it goes over edges, so taking care over sheet wood joints can prolong felt life.
Felt is held in place by folding it over the edge of the roof and using clout nails. Self adhesive felts are also available. Some people find waferhead screws easier to install than the clout nails.
Better alternatives to felt are available, but carry a much higher price tag, not usually justifiable for shed construction.
For a temporary roof cover, a single layer of felt on chipboard can last years.
Fixing felt
There are 3 ways to fix felt:
- Self adhesive felts
- nails - fold felt over roof edges and nail there
- bitumen emulsion - paraffin thins it and cleans it off
Corrugated roofs
Corrugated sheet is available in various materials, including:
- clear plastic
- opaque plastic
- composition (eg onduline)
- Steel
- fibre cement
Clear plastic eliminates the need for other windows, but makes for a very hot shed in summer. A white shower curtain may be fixed underneath to reduce this effect to some extent, and prevent people seeing into the shed.
Plastics and composition sheets are low strength and need good support from battens.
Metal roofs can be noisy in rain, which is a consideration for sheds that will be used as workshops. Some people aren't concerned by a little noise, some are quite bothered by it (it does get noisy in hail).
Construction
All corrugated materials are fixed by screwing through the sheets and into the timber (or sometimes metal) frame. Screws with pre-attached soft caps are used, the cap material squashes and makes the join watertight.
Sharp pointed screws are used for timber and lightweight steel frame, self drilling screws are used for most metal frames.
The edges of corrugated panels are overlapped to maintain watertightness. For larger roofs, panels are fitted at the lowest part of the roof first, with the next layer up overlapping these.
Corrugated panels create large gaps at the ridge line, and the ridge is usually capped with purpose made matching capping sheets - eg onduline. Lead flashing can be used instead.
Timber Species
Spruce (whitewood)
- popular
- low cost
- requires periodic preservative
- rots eventually
Pine (redwood)
- absorbs preservative better than spruce
- lasts longer
Red cedar
- much more durable than softwoods
Oak
- rarely used but highly durable. Can last centuries
Optional Extras
Frame Reinforcement
- Increases robustness against high winds by reinforcing framing joints
- Resists nail pullout at joints
Steel strapping
- Perforated galvanised metal band is wrapped around joints and nailed in place
- Useful in high wind exposed locations.
Bracing
Any type of bracing will toughen the frame considerably. This is usually the best way to go, as it rigidifes and strengthens in one go.
Insulation
If the shed will be used for working in, polystyrene sheet may be fitted between the frame members. When using featheredge boards, which leave gaps, a permeable membrane should be used between frame and exterior boarding to prevent draughts.
Shelving Racks
See Shelving Units
Lighting
Lighting may be achieved with:
- Gas lamp
- minimal install cost
- ventilation is wise (the usual featheredge sheds provide ventilation)
- Mains Electricity
- Solar panel, battery, 12v striplight
- easier than mains installation
- panel can be vulnerable to vandalism
- can recharge cordless tools of upto 12v (using either a charger intended to run off a car electrics, or a self built 12v charger)
Waterproof Base
A waterproof concrete mix for the base can reduce damp levels in the shed when these bases are used. Coating the base is also an option.
Fixings
- Galvanised nails are the usual option
- Screws hold better and are more robust in areas prone to high winds or vandalism.
- Glued structures are not recommended
Other Construction Methods
Most sheds are timber, but various other options also exist.
Common options:
- Concrete block
- permanent structure
- Metal
- fireproof
- dents & rusts
- expect condensation
- Plastic
- weak
- rust & rot proof
- Fibre cement sheet
- long lived but not cheap
- pre-1986 fibre cement usually contains asbestos
Unusual options:
- Papercrete - tough, durable & cheap, but requires a big paddle mixer, wooden form & plenty of labour
- Cordwood - pretty, uses a lot of wood
- Adobe - thick walls & plenty of labour
- Earthcrete - minimal cost, but lot of labour
- Concrete domes - odd shape, requires a suitable form


