Compression fitting
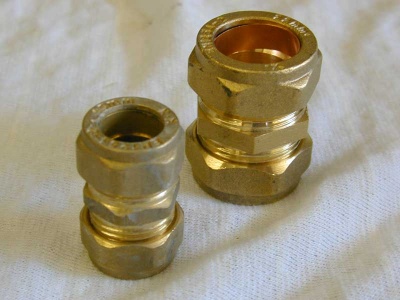
Compression plumbing fittings are fairly easy to fit, and make a secure joint. They're also fairly straightforward to remove later and require no soldering skills. Hence they're popular.
Pros:
- No heat or soldering required
- Mechanically strong joint
- Can be used on wet and dripping pipes
- Safe on gas and water
- Work at high temperatures where soft solder would fail
Cons:
- Expensive
- Ugly
- Physically large and lumpy
Components
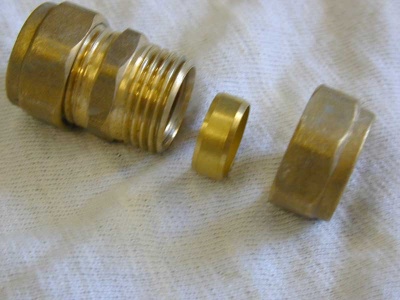
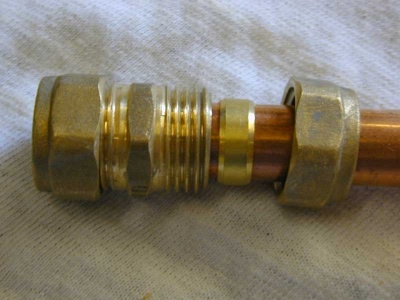
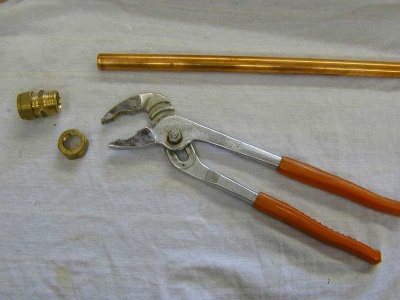
Compression fittings are usually made with brass main body, backnuts, and a copper or brass olive (also known as a "ferrule" in some countries). The main body has a recess into which the pipe is slid, and the compression backnut then drives the compression olive into the gap between the pipe surface and the joint's body casting.
The components can be assembled onto the pipe separately, or in many cases the whole fitting with the olive and loosened backnut simply slid onto the pipe complete.
Use
Compression joints are designed to be used without any sealant. The nut compresses the olive driving it into the cone shaped profile at the end of the fitting body, causing deformation of both the metal surfaces of the olive and the pipe, zeroing the gap and creating a watertight seal.
Once the nuts are done up hand tight on the joint, an additional half to three quarter turn with a pair of spanners (one on the body of the fitting to hold it still, the other on the nut) is usually adequate to make a seal. If the joint leaks, an additional tightening tweak will normally fix it. Note that over-tightening a joint may actually make it leak.
Copper and brass olives both work fine. Olives can't be removed from a pipe and reused. Even hand tightening a fitting with an olive inside before the pipe is inserted, is enough to make the olive unusable.
You can usually dismantle and remake a sound compression joints without ill effect. However if you attempt to reuse an already fitted olive in a new fitting body (say changing a radiator valve but keeping the existing olive and back nut on the pipe tail), results can be variable since the depth of penetration of the pipe into the fitting is not standardised. If the protruding length of pipe beyond the olive is too long for the new fitting, no amount of tightening will make a sound joint.
When remaking a joint where the old olive is stuck firmly to the pipe, you may be able to trim the end of the pipe down if that is what is preventing the olive from sealing. However if the problem is just incompatibility of the mating surfaces, you will either have to cut the end of the pipe off and start afresh, or try one of the sealing techniques shown below.
Metal
Copper pipe works well with compression fittings. Chrome plated copper pipe also works well. Some advocate stripping the chrome from the area of the pipe in the fitting as this allows the olive to get a better grip on the pipe. There is no actual need to do this, but if not doing so, it is advisable to torque the nuts a little higher than with normal copper pipe since its harder for the olive to "bite" the chromed pipe.
Preparation
The pipe needs to be cut square and cleanly, with any burrs removed. Pipes cut with a pipe cutter are much easier to use than those cut with a saw. The pipe needs to be clean and free from contaminants like paint or plaster etc. It does not need to be quite as clean and shiny as required for soldered connections.
Plastic
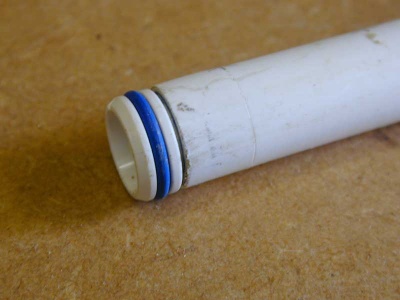
Plastic pipe can be joined with compression fittings, however it is important to use the correct brand of pipe insert to support the end of the pipe, or else the joint may start to leak over time.
Speedfit insert used on speedfit 15mm pipe
Preparation
Again, a clean square cut is important, and any burrs removed. Take great care to protect pipe ends when pulling them under floors etc, since its very easy to scratch plastic pipe and this makes it hard to get a good compression (or pushfit for that matter) seal.
Tools
One of the difficulties with compression fittings is that while the nuts are usually a nominal size, there is not agreed standard tolerance between manufacturers. This can make selecting a single universal spanner difficult. Also not all spanner types can be used in all situations. Hence most plumbing kits will have a number of spanners, including at least one adjustable one.
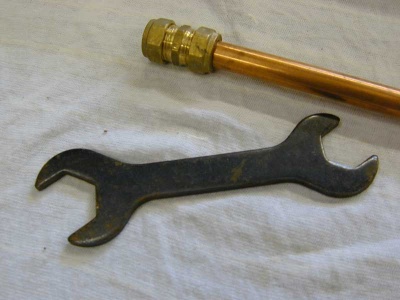
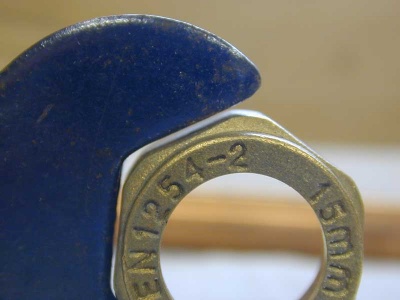
Stamped steel spanner
These are cheap and light, and readily available. However they are usually a poor choice since they are often too short to get adequate leverage, they are also usually a somewhat sloppy fit which risks damaging the nut and also injuring yourself should the spanner slip:
They are very skinny which makes them uncomfortable to use as well, but sometimes this slimness is an advantage where there is not much space.
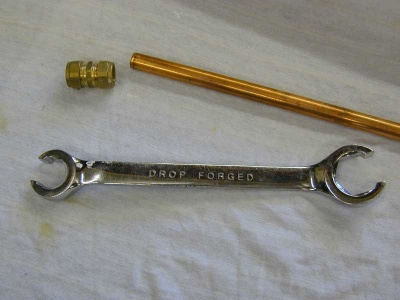
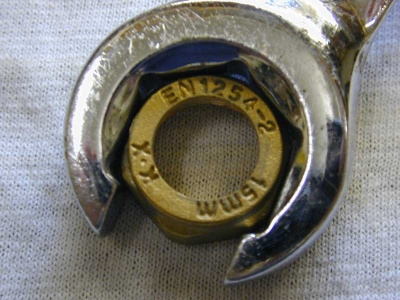
Forged compression spanner
These are far better suited, are long enough to get good leverage and are comfortable to use. The design of the end wraps around more of the nut giving better support and greatly reducing the risk of damaging a nut: The partially "open" end allows the spanner to slip over a pipe, and then slid onto the nut.
On the downside, the extra leverage can make it too easy for a untrained gorilla to overdo it! Sometimes the length can also be a problem in confined spaces.
Waterpump pliers
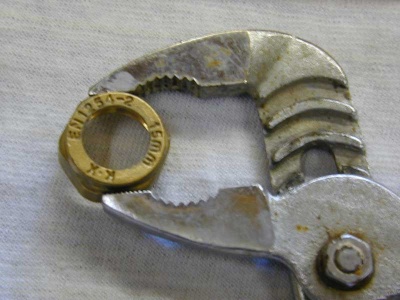
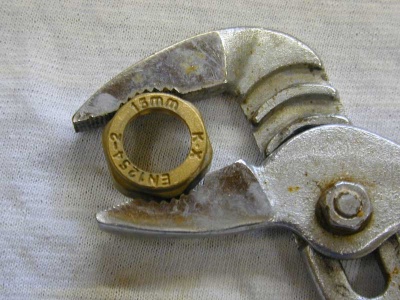
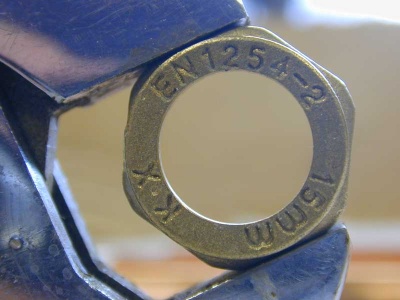
Most tool kits will include a set of these. While not the perfect tool, they can be very useful since they will adapt to make a good fit on any nut. If you use them with the correct orientation (you should be pushing on the handle attached to the moveable jaw) they also grip harder the more force you apply to them:
The ability to grip the nut on the flats:
And on the corners:
Also means that you have twice the number of positions that the spanner can engage with the nut. This is very handy when there is very limited turning space for the spanner.
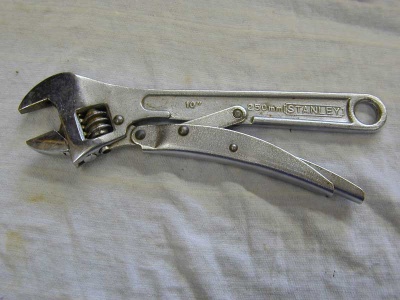
Vice grip spanner
The vice grip spanner is a combination of an adjustable spanner and a set of vice grip pliers (aka "mole grips"). Very handy for working at arms length in awkward spaces, and also for not marking polished chrome fittings like nuts on taps or service valves.
These have the advantage of being adjustable for a perfect fit onto any nut, with the added ability to lock tightly onto a nut.
When locked on they become self holding, and also won't slip and scratch the nut.
Failure causes and remedies
Compression fittings are very reliable and have been proven over many decades, however sometimes things can go wrong and you end up with a joint that leaks. The common causes are:
Insufficient Tightening
Compression joints only work when the olive is squashed onto the pipe and into the fittings by tightening the back nut. That way it properly mates with the pipe and the fitting. If a joint is not tightened enough, you will get a leak. If you are having difficulty getting adequate tightness then consider using a lubricant on the fitting to make turning it easier, and also check to see that the tools you are using are up to the job.
Over Tightening
From one extreme to the other. A joint that is tightened using all your strength or great long spanners may well leak due to over tightening. To correct this you will need to remake the joint with a new olive. You may also need to cut back to a clean bit of pipe if that has also been deformed too far.
Nut distortion
Using a poorly fitting spanner on a joint can also result in he distortion of the backnut due to excess pressure being applied to just two corners of the nut. This can result in the nut becoming oval, and in turn this will create uneven pressure on the olive resulting in a leak. The only fix here is to remake the joint and also replace the damaged backnut.
Joint not seated
A joint that does not have the pipe fully seated into the cup on the end of the fitting may leak due to the olive being compressed onto the very end of the pipe rather than a little way back from it. This can result in the diameter of the pipe collapsing a little making a loose joint. To fix this the joint will need to be remade with a new olive and the pipe cut back to a undamaged section.
Contamination
Any debris in the joint can prevent the proper metal to metal seal being formed by the olive. Paint, verdigris, hard water scale, and metal burrs from the cut edge are all possible culprits. To fix this, remake the joint after cleaning the pipe well with wire wool or a purpose made pipe brush. Pipes that are difficult to access can sometimes be more easily cleaned with a length of machinists emery cloth held by the ends and stropped back and forth while partly wrapped round the pipe.
Surface Damage
Any damage to the mating surfaces such as deep scratches, or dents, and nicks in the metal surfaces can also make a bad joint. Using new parts, or cleaning may be the solution. Also see the sealing techniques section.
Sealing techniques
New fittings used on fresh pipe should seal with a close to 100% success rate if made properly. However sometimes you will get a joint that will not seal perfectly. This can be for any number of reasons including scratches and nicks to any of the metal mating surfaces.
Lubricating joints
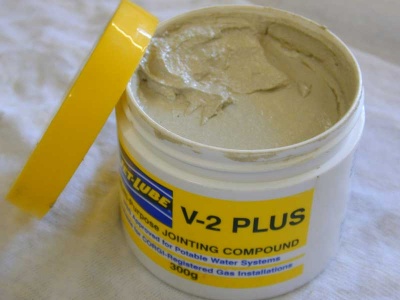
Sometimes tightening fittings in confined spaces can be difficult - and inadequate tightening will result in a leaking joint. Lubricating the threads of the fitting can help by making it easier to tighten the backnut{s}. There are two common ways to do this. One is to add a jointing compound to the threads:
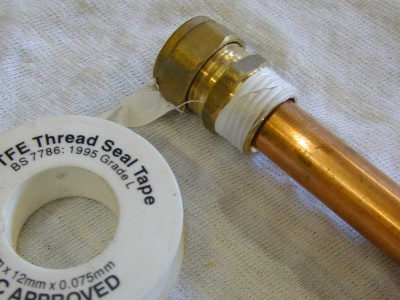
The other way is to use a few turns of PTFE tape to the threads. Note that used this way the PTFE will not aid the sealing of the joint, but it will just make the nuts easier to torque up.
Adding sealants to the mating surfaces
If the problem with the joint is not lack of torque, one will need to coat the mating surfaces with a sealant before assembling & tightening. Opinions tend to polarise over whether one should do this never, sometimes or always. When even this is liable to not seal, e.g. when the pipe is visibly deformed or damaged, packing the nut with sealant as well can make it work. This forces sealant over and into the joint as the nut is tightened - the sealant left behind in the nut does nothing to create a seal.
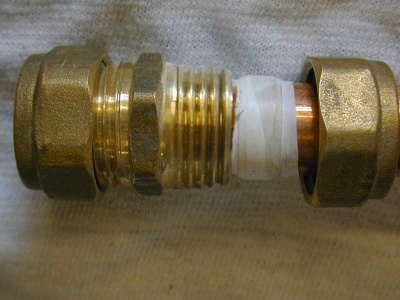
PTFE tape can also be used as a sealant - a few turns need to be wound over the olive such that they will end up sat between the mating surface between the olive and the fitting:
Use of PTFE tape on both olive and threads can be of course be combined to both lubricate and seal.
Note that this may not cure a leak that is caused by a scratch on the pipe under the olive. You may be able to wind a couple of turns under the olive - but this is less easy.
Non setting lubricants and jointing compounds like that shown above can also be applied under and over the olive. This can be more effective for fixing leaks due to pipe scratches.
The most effective "cure all" sealants are the silicone based "setting" sealants like Fernox LS-X. These will usually seal most problem joints so long as the olive is actually meeting the fitting body when the nut is tightened.
Note that any sealants used on drinking water must have WRAS (Water Regulations Advisory Scheme) approval for this use.
Removing an olive
When remaking a joint it is often necessary to remove an olive from a pipe - either because its damaged and a new one is required to make a working seal, or because it is holding a backnut captive.
Care must be taken to not damage a pipe when removing the olive.
With an Olive puller
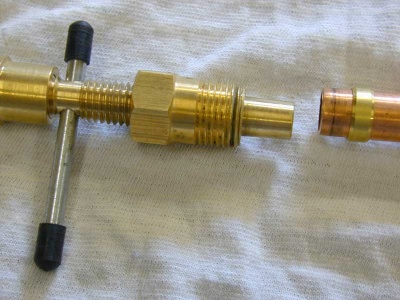
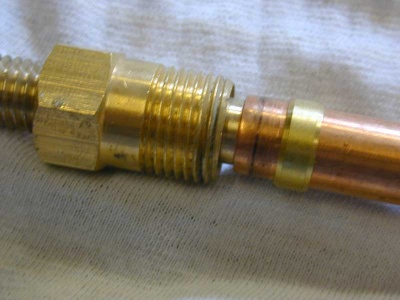
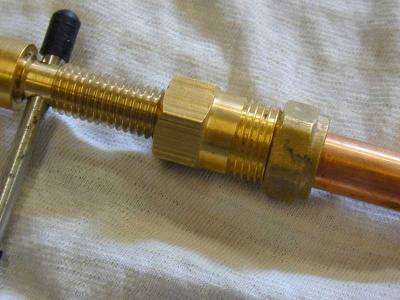
The best way to remove an olive is with a purpose made olive puller. These are normally simple threaded devices that use the captive backnut itself to pull the olive from the pipe:
First the nose of the puller is inserted into the open end of the pipe
Then the nut is engaged with the thread on the puller
Finally the tee bar on the puller is wound in to draw the outer sleeve of the puller (and hence the backnut threaded onto it) up the pipe pulling the olive free.
With an olive splitter
An olive splitter takes a different approach by tighenting a sharp edge onto the side of the olive while supporting the pipe from the inside. They cut through one side of the olive without damaging the pipe, allowing it to expand a bit in diameter and slide off the pipe.
With a Hacksaw
Another technique is to cut most of the way through the olive at a 45 degree angle to the pipe (doing it at an angle makes it far less likely that you will damage the pipe). Once you have a slot in the olive, insert a normal screwdriver into the slot and turn. This will split the olive at the partial cut, hopefully leaving the pipe undamaged.
With an Adjustable spanner
Sometimes an olive can be removed by tightening an adjustable spanner closely around the pipe, and then using it as a slide hammer to strike the nut or the olive itself and drive it toward the pipe end.
