Knife sharpening
Sharp kitchen knives make hard jobs easy, reduce fatigue, and reduce the risk of accident due to putting too much force on a knife and losing control.
Blade Materials
Stainless steel
Nearly all modern knives are stainless steel. SS was introduced in 1913, and there are different formulations in use. The percentage of chromium (for rust resistance) and nickel (for acid resistance) is writen like so:
- 18/10 - 18% chrome, 10% nickel (good quality formulation)
- 13/0 - 13% chrome (low cost formulation with a dull appearance)
The quality of steel used in knives varies widely. Some knives can take a very sharp edge, most can be made fairly sharp, and the worst are barely capable of becoming sharp at all. The difference is down to factors other than differing steel formulae, and seems to have little correlation with price.
Ceramic knives
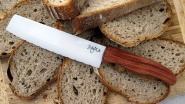
Ceramic knives are the hardest of all, can take a very sharp edge, and can go long periods between sharpening. They snap easily, making them a poor choice for general kitchen use. ceramic blade review. Diamond grit or silicon carbide is required to sharpen them.
Ceramic blades are visible on airport security scans.
EPNS
ElectroPlated Nickel Silver Knives are less popular for domestic use, being mainly used in the hotel trade. The finish is a bright shiny silver if polished, and a badly tarnished mess if not polished. A lot of domestic EPNS cutlery is very old, it was a more attractive option before stainless steel was common.
This cutlery has a nickel silver finish, but also contains other elements including copper. Compositions vary, and leaving some old EPNS cutlery sitting in some types of food can risk copper poisoning.
The mixed metal finish is much softer than stainless steel, and is only a thin plating. Any attempt at sharpening would expose the base metal, ruining the knife. Sharpening such knives isn't really an option.
Titanium
Titanium kitchen knives are steel with a coloured titanium coating. The hard non-stick titanium layer increases sharpening interval to around 3-10x as long. They are generally coated on just one side, and the greater rate of wear on the steel than the titanium helps keep the knife sharp. They should only ever be ground on the uncoated side.
Knives & other cutting tools are produced a range of titanium coatings in colours ranging from grey to blue to purple to black:
- TiN - gold
- TiCN - a grey coating
- TiAlN
- TiAlCN
- Titanium oxynitride - purpley finish
Chrome plate
Chrome plate is sometimes seen, usually on old pre-stainless knives. Like any all-over plating, sharpening would ruin the finish and expose the knife to corrosion.
Others
Various other metals and coatings have been used on knives at times. Discussion of less common plated knives
Angles
Specific angles are best for specific metals and jobs, but with kitchen knives one is usually working with unknown budget stainless steel, and not looking for a razor edge. The thinner the angle of the blade edge, the more sharp the blade is initially, but the quicker it blunts. And with popular low cost cutlery, blunting at narrow angles can happen very quickly.
The poorest quality metal, found on some table knives, is sometimes only able to take a very wide angled edge without the cutting edge pitting during grinding. Bear in mind there's no need for a thin cutting angle on a table knife, even an 80 degree blade is ok at the table.
Its possible to place a printed angle under the grinder to act as a guide if wanted. Personally I don't lose sleep over precision here, the average kitchen knife is far from a critical high performance tool. If you buy high quality knives though, you should follow the original grinding angles to ensure you get the best possible performance. Most people however are working with unknown material, and its not possible to specify what angle will give the best performance for each knife. If it blunts too fast, or breaks up at the cutting edge, use a wider angle next time.
If you're determined to tweak your grinding angles to get peak performance out of each knife, in my experience the worst quality metal is found on pretty table knives from a popular major manufacturer that most buyers regard as quality.
If you're having difficulty maintaining the right angles, there are angle guides that will hold the blade correctly aligned. Its also possible to cut a piece of wood to rest the knife on when grinding.
A lot of table knives have no ground edge at all, making them a pain to use. I like to grind a very wide angled edge onto them, of around 80 degrees. While not especially sharp, it makes them perform comfortably at the table, and the mild level of sharpness is safe for children.
80 degree sharpening means grinding an angle of 40 degrees to the blade on each side, not 80 degrees each side.
Beginners should note that the angle between grinder and blade needs to be consistently controlled, and must match the existing ground angle on the knife, otherwise:
- if the angle is too narrow, the grinder won't touch the sharp edge at all
- if the angle is too wide, the blade will be made blunter
Some people prefer to use glass chopping boards, often on hygiene grounds. Glass blunts sharp blades very quickly, so if you do this its best to use the widest angle that gives sufficient sharpness, in order to improve the blade's life on such a hard surface. This may be as wide as 60 degrees for a chopping knife.
Order of grinding
When a knife is ground, the stone applies sideways force to the blade, and this causes the very thinnest tip of the edge to bend over. This bent over edge is called a burr. A burr is easy to feel: if you run a finger across the blade (NOT along it), the blade grabs in one direction, but slides easily the other way. A burr prevents sharpness, and part of the grinding process is to either bend the burr back straight or grind it away. To achieve this, grinding is normally alternated between sides.
- With powered grinders the knife is best run over the stone once before changing sides, so the order of sharpening would be A,B,A,B, etc
- With hand held grinders, 2 or 3 strokes each side is easier and thus quicker, so the order of sharpening would be A,A,B,B,A,A,B,B, etc
Some types of blade are best sharpened on only one side. However this forms a burr, and for a good result this should be removed at times with a stroke on the other side. Where its strongly desirable not to grind one other side, such as with titanium blades, the coated side can have the burr straightened with a steel instead of a grindstone.
Sharpening and reforming
The majority of grinding will consist of just resharpening an existing ground edge. This needs relatively little grinding to achieve.
If a knife doesn't have a ground edge on it, as is often the way with table knives, or the edge is very damaged, it will be necessary to grind it down much more to form a new well shaped edge. This of course takes a lot more grinding than just a sharpen, and a motorised grinder is a big time saver here.
Blade thinning
Its usual to thin the blade near the cutting edge for best cutting performance. On the average knife, there are 2 ground angles. First there is a large expanse of narrow angle grinding to thin the metal, then a far smaller grind along the edge to make it sharp.
- If a cutting knife wears so far that the edge becomes thick again, bulk grinding is needed to rethin the edge
- table knives may be ground without thinning, since only a low level of sharpeness is wanted.
Serrated blades
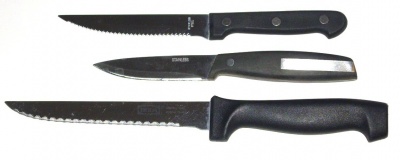
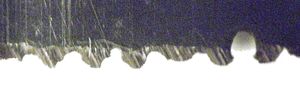
Serration is a way to get much of the effect of sharpness without real sharpness being present. Serration is widely disliked among knife sharpeners, but its an easy way to get cutting ability from cheap metal, its liked by many end users, and it has its uses, such as cutting frozen food. Consequently it may be wished to sharpen serrated knives without loss of serration.
There's no easy way to maintain the serrated shape indefinitely while sharpening using home equipment. There are however a few successful ways to sharpen serrated knives.
Sharpen all
Its possible to sharpen cresent shaped serrations and maintain their shape. Its time consuming though. A small manual serration sharpening stick is used. Narrow serrations can't practically be done this way.
Sharpen the back
Often knives have serrations ground on one side only. In this case the flat other side of the blade can be ground. Only a small amount of grinding is needed. Finally just a little very light grinding is done on the serrated side solely to remove the burr.
Sharpen the tips
Where the above method doesn't produce enough sharpening, the knife may be ground on the serrated side(s) too. The idea here is not to thoroughly grind all areas of the blade, but rather to make the usual fairly quick pass over the blade. This sharpens the tips only, giving a big improvement in performance. Its good enough for most uses.
Rough edge
This technique produces a rough edge with mini serrations, and works well with an angle grinder. I don't know if its possible to do this approach with other grinding tools. The blade is sharpened as normal, but its moved over the grinder disc as quickly as can be done safely, rather than gradually. The idea is to pass the whole length of the blade over the disc in about half a second. The result is fairly sharp, but rough and uneven. It effectively creates ungraceful serrations. A rough old grinding disc creates more serration than a new smooth one.
This method isn't often the best choice, but can be used where existing serrations are too uneven to sharpen usefully, and where conversion to a plain edge is unworkable for some reason, eg not enough metal left, or would require grinding an excessive amount of metal away. Its also a quick easy way to deal with serrated knifes that are barely worth the trouble of sharpening.
Plain blade conversion
The final option is to remove enough metal to convert the knife to a plain blade. It makes it practical to ensure the blade's sharp every millimetre of its length.
One sided blades
Many knives come ground Japanese style, on one side only. This causes them to wander off line when cutting; this has its uses, but for general purpose use its a pain in the kitchen. Grinding them only on the unground side reduces this tendency, at the cost of widening the cutting angle. Only the very minimum work on the originally ground side is done to remove the burr.
Sharpening tools
There are several tools for sharpening kitchen blades.
Manual
Manual sharpening is slower, but some people prefer this approach.
Stones
- Oilstones are abrasive stones that work well wetted with oil. They should not be used dry, or can wear down very quickly.
- Waterstones are abrasive stones that work best wetted with water.
- Both are called whetstones
Diamond
Diamond sharpening stones are flat steel plates coated with synthetic diamond dust. Diamond grinds even the hardest materials, such as ceramic knives & TC tips. Low quality diamond hones can be warped or shed abrasive.
Steel
A traditional steel restores a microscopically bent cutting edge by restraightening it. Some also act as a file. These were traditionally used between abrasive sharpenings as an intermediate way to prolong sharpness.
Most knives use metal soft enough to benefit from use of a steel. They're no use on harder non-steel finishes.
Abrasive Steel
The abrasive steel is a traditional steel but with some added abrasive. It primarily acts like a traditional steel, but also provides a little grinding as well, prolonging sharpening intervals further.
Sandpaper
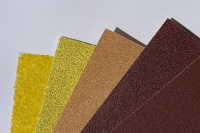
Abrasive paper may be used on a dead flat surface (eg glass) for sharpening. This has popularly become known as the 'scary sharp' method, as by progressing through increasingly fine grades its possible to achieve a very high level of sharpness.
Several different abrasives are found on abrasive paper, including alox, emery, tungsten carbide, zirconium, sharp sand and others. These are frequently loosely referred to as sandpaper. To sharpen steel blades, a sufficiently hard abrasive is required, sand is no use. Wet & dry paper is suitable for steel.
Chainsaw file
The small size makes it slow.
Steel wheels
The knife blade is drawn over a set of hard steel discs. These deburr and to some extent file the knife. Usually the angle is not adjustable. If you're happy with the fixed angle, these work like a steel, but are easier to use as the angles are controlled by the sharpener.
V shaped stone
A small V shaped stone in a handle makes control of angles easier. However they're not adjustable. Easy to use if you're happy with the same preset angle on everything. They can even sharpen some types of serration middlingly well - the blade is drawn slowly in both directions.
Motorised
Kitchen knife sharpener
Low cost motorised domestic knife sharpeners are available. One go with one of these caused me to abandon all hope.
There are also good quality machines that can produce a fine edge. Many users like them, but they tend to be pricey.
Bench grinder
Bench grinders are probaby the best option for all-purpose sharpening. They are the standard engineer's choice for sharpening a wide range of blades. But they don't look particularly graceful in the kitchen!
Angle grinder
The suggestion of using an angle grinder to sharpen knives often raises eyebrows. They are very fast and effective, able to sharpen a totally blunt knife in 20-30 seconds, and remove stock to create a new edge in under a minute. This speed makes it easy and practical to sharpen all one's knives quickly, table knives included.
However, as sharpeners they have some sizeable flaws, and some precautions are very necessary.
Flaws
The knife blade must be kept moving, don't ever grind one stationary spot. Doing so would overheat the metal 5-10 seconds, and if this happens the blade will never be able to keep an edge again.
The very high disc speed can throw a knife if held to the disc in the wrong direction. Always confirm the direction of rotation before use (eg with a match etc), and be sure to always hold the knife the right way. Position everything so that if a knife is ever thrown, it will fly left or right, away from you.
Always use indirect vent goggles, ear defenders, and ideally a full face mask too.
Never use a damp grit disc in an angle grinder, and don't dip cutlery in water to cool it when using such a disc. Damp grit discs can fail violently.
Keep your face out of the plane of rotation of the disc. Grit discs can break violently.
Angle grinder grit discs are somewhat coarse. This coarseness limits the level of sharpness available, but the result is plenty sharp enough for normal kitchen use. It would not satisfy most die hard knife sharpeners though. Use only the very lightest pressure to achieve the sharpest edge.
Don't use these tools if tired, drunk, drugged, or not really with it. They're not friendly.
Use
If you have an angle grinder stand that secures the grinder properly, it can make the job easier. If not, the tool may be held on its back to minimise fatigue. Sitting down with it on your knees (in your hand of course) makes it easy to pass knives both ways. However you position it, keep a good firm grip at all times.
To sharpen, move the blade as shown past the disc. Use the lightest of pressure only. 2 strokes on each side of the blade is enough for any blade that already has an edge formed, ie doesn't need stock removal. Finally make a burr removing pass along the other side of the blade (compared to the previous stroke). Use all the pressure of a feather, so the blade only just touches the disc.
Stock removal requires just a little pressure, and more passes. Never get the metal hot though, if in any doubt just put the knife down and come back to it a bit later. Dipping the knife in water is not recommended with grit discs, damp can cause violent disc failure.
To get the angle consistent I hold the grinder still and move the workpiece across it.
They're way too fast - but when doing piles of stuff its great.
To avoid overheating the metal, keep the workpiece moving fairly quickly and the pressure feather light. If removing bulk metal I give the workpiece a break to avoid overheating.
End result: For knives, drill bits etc its great. For planes or razors forget it. For chisels meh but it'll work. Axes aren't ideal due to their weight: quick blade movement, feather touch and a heavy axe don't mix so well, but it can still give a more than sharp enough edge.
Die grinder
Carbide stones (grey) are much quicker than alox (asstd light colours), especially for stock removal. Die Grinder
Belt sander
I sharpen most things with a B&D powerfile and it's very effective. If you've not come across this tool before it's like a belt sander but the belts are only 12mm (IIRC) wide. It allows me more control than my angle grinder and is a *lot* safer as the belt is significantly slower and the energy much less. It can be used one-handed quite safely so I usually just hold the knife against a stop with the blade protruding over the edge of the workbench and run the powerfile over it judging the angle by eye. Simple, safe and effective.
After grinding
Knives should be washed after grinding. Grind stones can harbour all sorts of detritus, oil residues, decayed food & so on.
Its best to warn the rest of the household if previously blunt knives are now psychopathically sharp.
Care of sharp knives & Chopping boards
Many knives benefit from use of a steel between sharpenings.
Use of sharp knives on glass chopping boards or ceramic plates blunts them quickly. Most knife sharpening people prefer wooden chopping boards.


