Makita HR2450 SDS Drill Armature Replacement
So the drill is running really rough and slow, loads of sparks can be seen at the brush end of the motor, and wisps of blue smoke are escaping.... A quick guide to replacing the armature in a Makita 2kg class SDS.
Introduction
The Makita HR2450 SDS is a long standing model that has proved very popular. Its a very effective drill for hard masonry drilling, and also a superb light weight chisel / breaker for wall chasing and all manner of small jobs that would otherwise need much effort with a cold chisel and lump hammer!
My 12 year old machine has done extensive work and never missed a beat... at least until a week ago. I had finished chopping out some brickwork to make space for the end of a door sill, and was just about to start drilling some 10mm holes for the frame fixings, when all of a sudden the drill did not sound or feel right. It appeared if its hard life in the masonry dust had finally got to it, and one of the windings in the armature had developed a short.
Service Procedure
Parts are easy to obtain, and Miles Machinery had replacement armatures for around £26. You just need to ensure you order the 240V or 110V version depending on which version of the drill you have. The service procedure is straight forward, and the machines are designed with ease of maintenance in mind.
Step 1
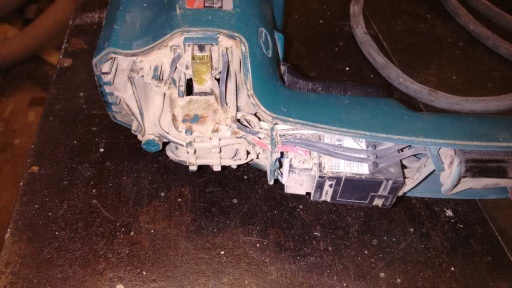
With the machine disconnected from the mains, Remove the rear terminal cover with the three screws in the back:
These drills have prodigious airflow generated by their cooling fans... that also means loads of dust gets sucked through them!
Now remove the carbon brushes from the rectangular brush tubes (the cap on the top of the brush spring simply grips the top of the tube - prise it free, and the whole brush can be withdrawn. (you need to remove the brushes to be able to slide the armature out later)
Step 2
Now undo the 4 long bolts that join the gearbox and the rear section of the drill together. Once these are out, the gearbox will separate from the rest of the drill, and the armature will pull out of the stator section, and remain attached to the gearbox:
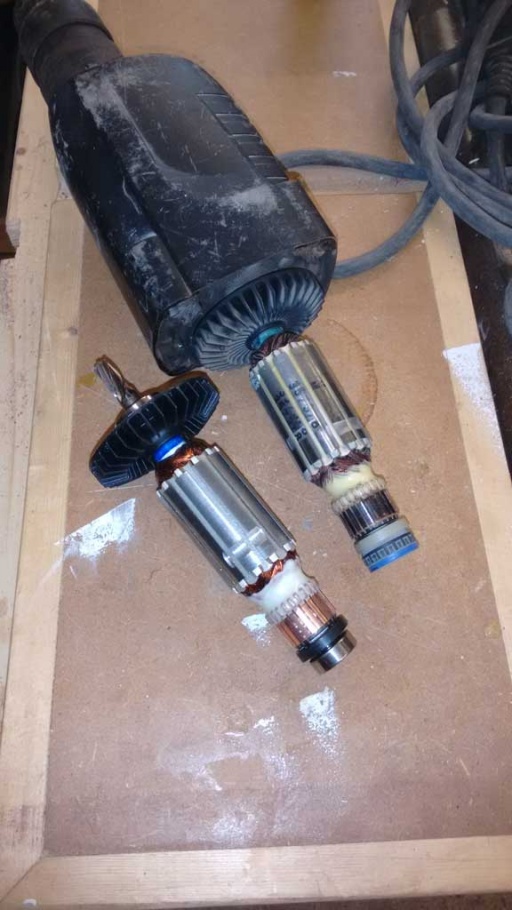
You can see the old armature in place and the new one beside it.
Note there is a rubberised cap that sits over the back bearing of the armature just behind the commutator. Pop this off the old one, and put it on the new one.
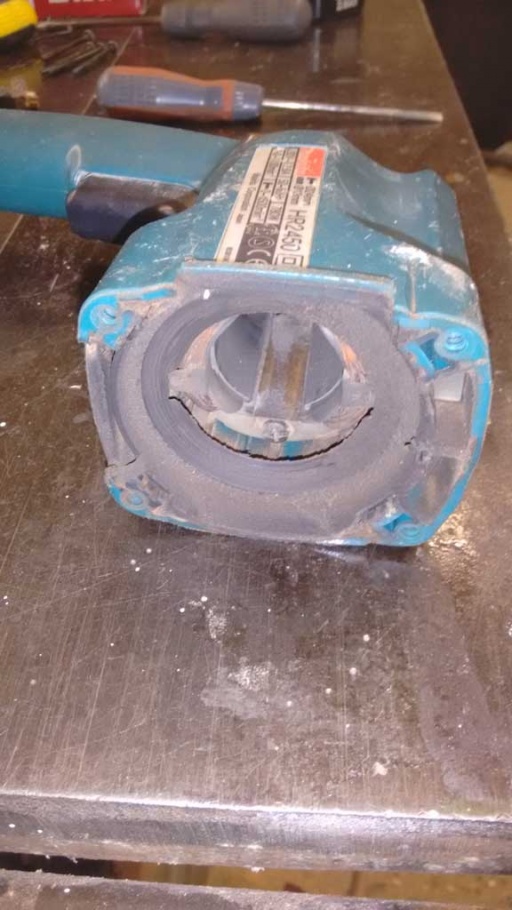
There is no need to do anything with the back end of the drill (the stator housing):
Just put it to one side, and focus on the gearbox assembly.
Now grasp the old armature firmly and pull it free of the gearbox. It will pull out and bring the front bearing with it. The connection to the gearbox is via helically splined shaft - and pulls free with no need to remove any fixings.
Now push the new armature back into place, such that its front bearing seats properly in the back of the gearbox.
Finally resemble the front and rear sections of the drill, and replace the bolts.
Although the brushes still had a fair amount of life left, I replaced these at the same time since it was cheap and easy (this also saves and risk of damaging the commutator on the new armature should there be any metal debris embedded in the old brushes picked up from the failed armature).
Replace the rear terminal cover and test the drill.
Normal operation restored.


