Dehydrator
Dehydrators dry a fair range of harvested foods, enabling easy storage for the year. Dehydrating also greatly reduces weight and bulk. Dehydrators can prepare dry snacks, herbs, dry soup mixes, fruit leathers, teas, dried pie filling mixes, vegetable mixes, fruits, fruit mixes, and so on.
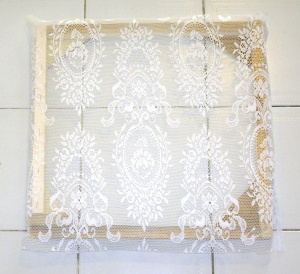
The basic idea is very simple, just a stack of wooden trays covered with old curtain netting.
Construction
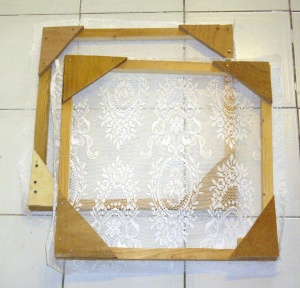
The tray size chosen for this one was 18" square. 6 such trays take the contents of a large well packed binbag of leaf vegetables or herbs. A dozen of these trays take up 16" in storage, 28" of height in use when used with 1" spacers, or 16" of height without spacers.
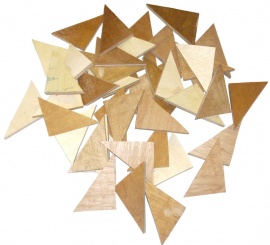
1"x1" is good to construct the trays. Reject timber & offcuts were used. The wood should be smoothed if rough sawn, and free of toxic rot treatments. The corner triangles are 4"x5", and were cut from scraps of 9mm ply. This unit was built in a hurry, so all the cutting was done freehand for max speed, accuracy wasn't a priority.
The use of wood and netting makes this unsuitable for meat products.
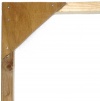
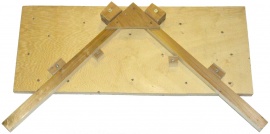
Each corner triangle is glued to the 1x1 frame with PVA and 4 small nails put in. The nails enable the trays to be moved and worked on immediately, but they're not robust until the glue's set. Doing this step freehand proved impractical, with bits moving at every hammer blow. The solution was to make a jig, it positions the sticks correctly, and partially holds the triangles in place. If I do this job again I'd definitely make a jig that holds all the parts of the entire tray rather than just one corner, it would really speed things up and avoid mistakes.
With the tray frames made, netting is draped over and pulled gently until taut, and fixed with a staplegun all round. Trim off the excess net, leaving an inch or so spare on all round. This makes it easy to restaple the net if it comes adrift. If you're making bigger trays, include some nylon twine stapled & glued under the netting.
If the dehydrator needs to live in the main house, it can be accurately made, planed wood used, the edges routed, and stained / oiled / varnished.
Stability
If you build a big stack, its best to ensure it won't fall over if pushed. There are various ways to arrange this, take your pick. The trays pictured don't have such provision, they're just stacked with offcuts acting as spacers between each layer.
Frame
If you're using the dehydrator a fair bit, but not enough to fill it all with the same foods at the same time, it saves time to make a frame to hold the trays so they can be slid out in any order. A simple 2"x2" timber frame with 1x1 horizontal strips to support the trays and some bracing does the job.
Drying methods
There are several ways to dry with such a unit. All the following methods work with non-fleshy leaves, bulkier items need heat for quick enough drying.
Ambient
Quick drying items need no heat or fan. The trays need to be spaced apart with bits of wood. Leaves dry this way in 3-4 days in a warm dry place.
Fan
A fan doubles drying speed, and enables items with more bulk to dry in an acceptable time. Deskfan or ceiling fan both work. If just sitting a deskfan next to it, use spacers to ensure plenty of airflow. A no energy option for a small dehydrator is to use the air output of a desktop pc.
Heat
Heat is the most popular way to dehydrate. All the usual dried foods can be hot dried. Vegetable foods can be processed over a range of temperatures, meats should be over 65C for safety. Meats require sufficient temperature and even heating.
There are many options for the heat source.
- Lightbulbs are very simple, they're easily replaced with different wattages to control the heat, but their uneven heating limits their uses to vegetable foods.
- An oil radiator is adjustable and provides more even heat, and is often already to hand.
- A grid of resistance wire powered by a PC PSU provides even heating, and can be controlled on the mains side by a bimetal oven thermostat; these should be covered by a netting layer to keep foods off the hot wire.
Dehumidifier
The last option is a dehumidifier. The dried air output is led to the dehydrator stack. Ensure airflow is unobstructed when the dehumidifier is off. This dries faster than a fan if the dehumidifier runs enough of the time.
Variations
Any open weave material will do. Haberdashers stock lightweight net.
A staplegun or hammer stapler is best. An office stapler isn't recommended, but can be used if you really have to. The trick is to hit it hard enough.
If I build another one, I'd make a pyramidal dehydrator from plywood. I'd cut all the tray frames from a single sheet of half inch ply, each one being 2" smaller than the one before. This would enable the thing to stored in a far smaller space, and make the whole thing quicker to build. To stack, put any spacing material to hand across each corner, or stack them skewed.
