Unisaw out feed table
The internet seems full of articles and videos on making an out feed table for your table saw... So why another one? Well try as I might, I could not find one that matched all the requirements in this particular case.
What's it for?
An out feed table is simply a table placed at the end of a table saw to support cut pieces as they come off the saw. With most table saws, a length of material more than a couple of feet long will tend to drop off the back of the saw once cut - potentially damaging the wood, and also distracting the operator as they try to control both the cut and waste pieces as they overbalance. So an out feed table makes the saw easier and safer to use - especially when working on longer sections of timber.
Requirements
The specific requirements were for a table appropriate for a small workshop. It needed to fit my 1948 vintage Delta (Tauco) Unisaw, which crucially features its original fence that rides both front and rear pipe guides rather than a more modern Biesemayer style fence. The saw lives on a mobile base, so ideally the tables needed to be fixed to the saw, and move with it. The floor is not perfectly level, so some way of accommodating the variable floor to table height is needed when supporting the table without using a fixed length "leg".
Types of table
One option is to simply build a regular table at the same height (or fractionally below) that of the saw. Placed at the end it will double as an out feed table, but can also serve any number of other purposes in the workshop. The disadvantage of this approach is that in a small workshop it will consume valuable space all the time.
Folding tables fixed to the saw solve the problem of permanent use of space - being deployed only when needed. But these can be difficult to hinge at the saw if you don't have a saw with a rear L shaped bracket already attached. Also they must also be deployed with each use.
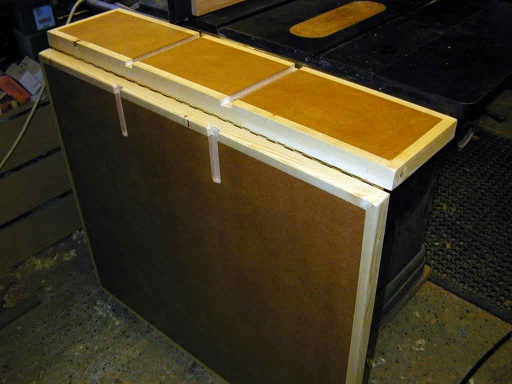
The table described here is a split table, with a small fixed section, and a larger hinged one that can be deployed when required.
Design and Construction
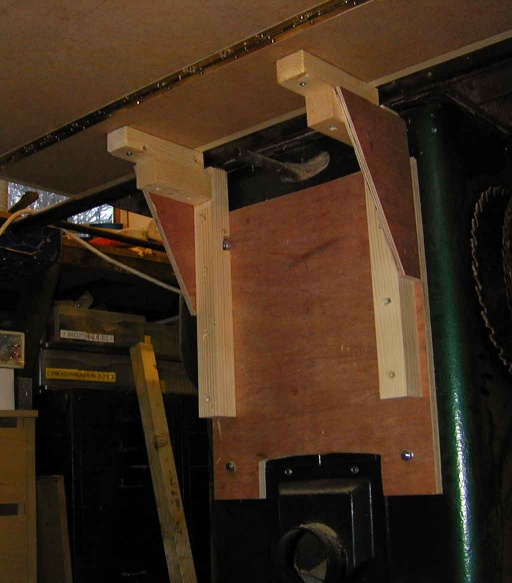
Since there is no L section "angle iron" on the back of an original Unisaw, there is no easy place to fix an extension table. Also clearance must be left to ensure the fence can still clamp to the back rail of the saw. Fortunately the casework of my saw is made from quite sturdy steelwork. So the first job was to make fixing things to this a little simpler. Four holes were drilled through the case, and a section of 3/4" ply bolted to the back of the saw. (on my saw it had also been previously modified to add a dust extraction port, so the ply needed to fit around this).
Next a couple of gallows brackets were made up with the short horizontal member tenoned into the upright, and an additional 1/2" ply gusset added to further strengthen them. These were then screwed to the ply on the back of the saw.
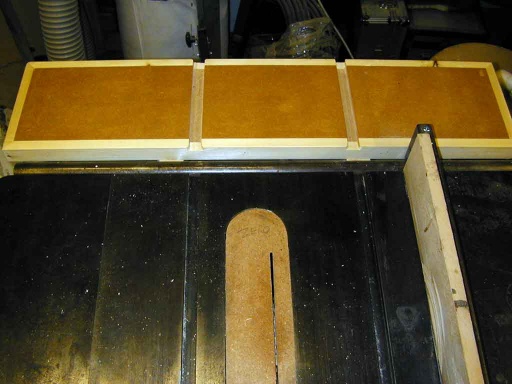
The first section of table (the full width of the saw table, but only approx 8" deep, was then made from two layers of 3/4" MDF laminated together. These were lipped with 3/4" thick softwood that was glued and brad nailed to the edges.
Additional spacers were then cut that would sit between the table bottom, and the top of the gallows brackets. These were sized such that the finished table surface was just fractionally below (1/16th inch) that of the main table. The spacers were then screwed to the bottom of the table, and finally the spacers fixed to the brackets from the underside.
When the spacing for the rear rail and lippings are included, this creates an additional surface extending to around 11" beyond the normal table. Although this is fairly small, it dramatically increases the size of timber that can be worked easily to around 4' in length.
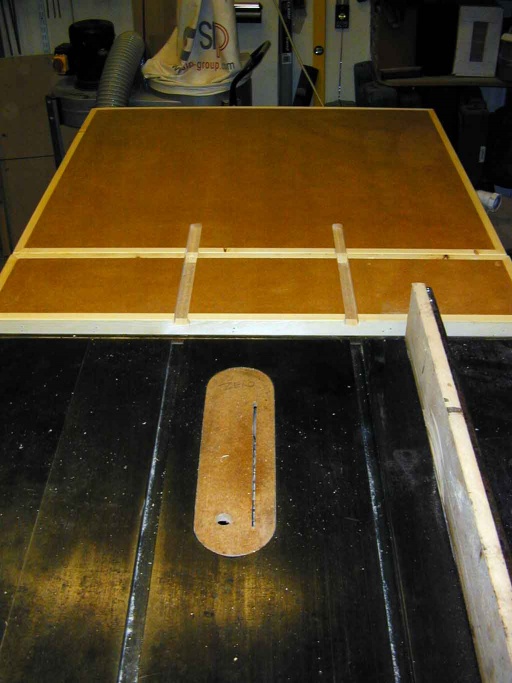
The next step was the create the main table section in the same way as the first. This was around 22" deep. Its suspended from the trailing edge of the small table using a piano style continuous hinge. (although heavy, it makes little impression on the bulk of the Unisaw since its cast iron table and fence alone probably weigh in excess of 70kg)
When this is deployed, it extends the working capacity to at least 8' without requiring much effort to control the work by the operator.
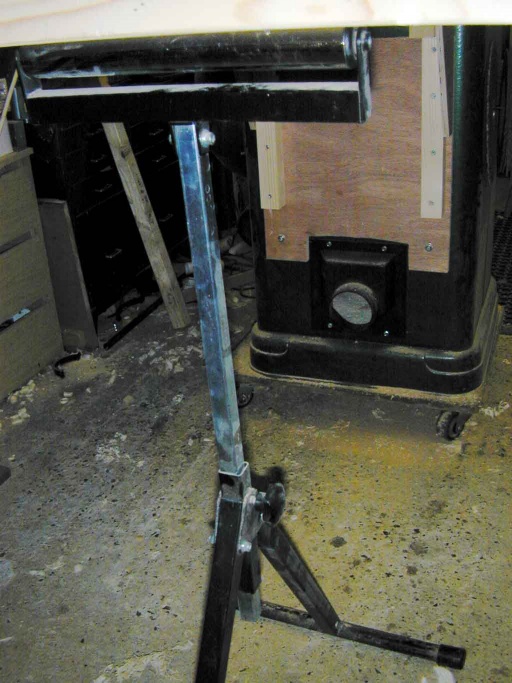
The final problem to solve was that of support for the table when deployed. The table is not deep or wide enough to hide fixed length legs that would reach the ground. So either some form of telescopic leg would be required, or a brace that props the table against the saw rather than the floor. So experimentation found that in fact a normal roller stand worked very well in this roll, and also allows the saw to be shifted a little on its mobile base without fear of stressing built in legs or supports.
The last job was to route some chases into the table to extend the saws guide channels, so that a mitre gauge or cross-cut sledge can still pass the end of the saw's own table without hitting the new table.
Finishing
After a quick sanding, to give some stain resistance to the table, a wipe over with Liberon finishing oil was used to seal the surface.
